KubeSphere-02-Service Mesh 的使用
Kubesphere Service Mesh 是基于 Istio 构建的微服务治理层,深度集成在 KubeSphere 容器平台中。它提供非侵入式的流量管理、服务观测、安全策略(如熔断、金丝雀发布)和可观测性(监控、链路追踪),简化了服务网格的部署与管理,帮助用户更轻松地实现微服务架构的治理与运维。
一、环境前提
正确部署 kubesphere 平台
启用服务网格功能插件(servicemesh: enable.true)
启用日志收集功能插件,因为 jaeger 需要将数据链路收集到日志存储中(opensearch.enable.true)
部署 nginx-ingress-controller
二、配置企业空间
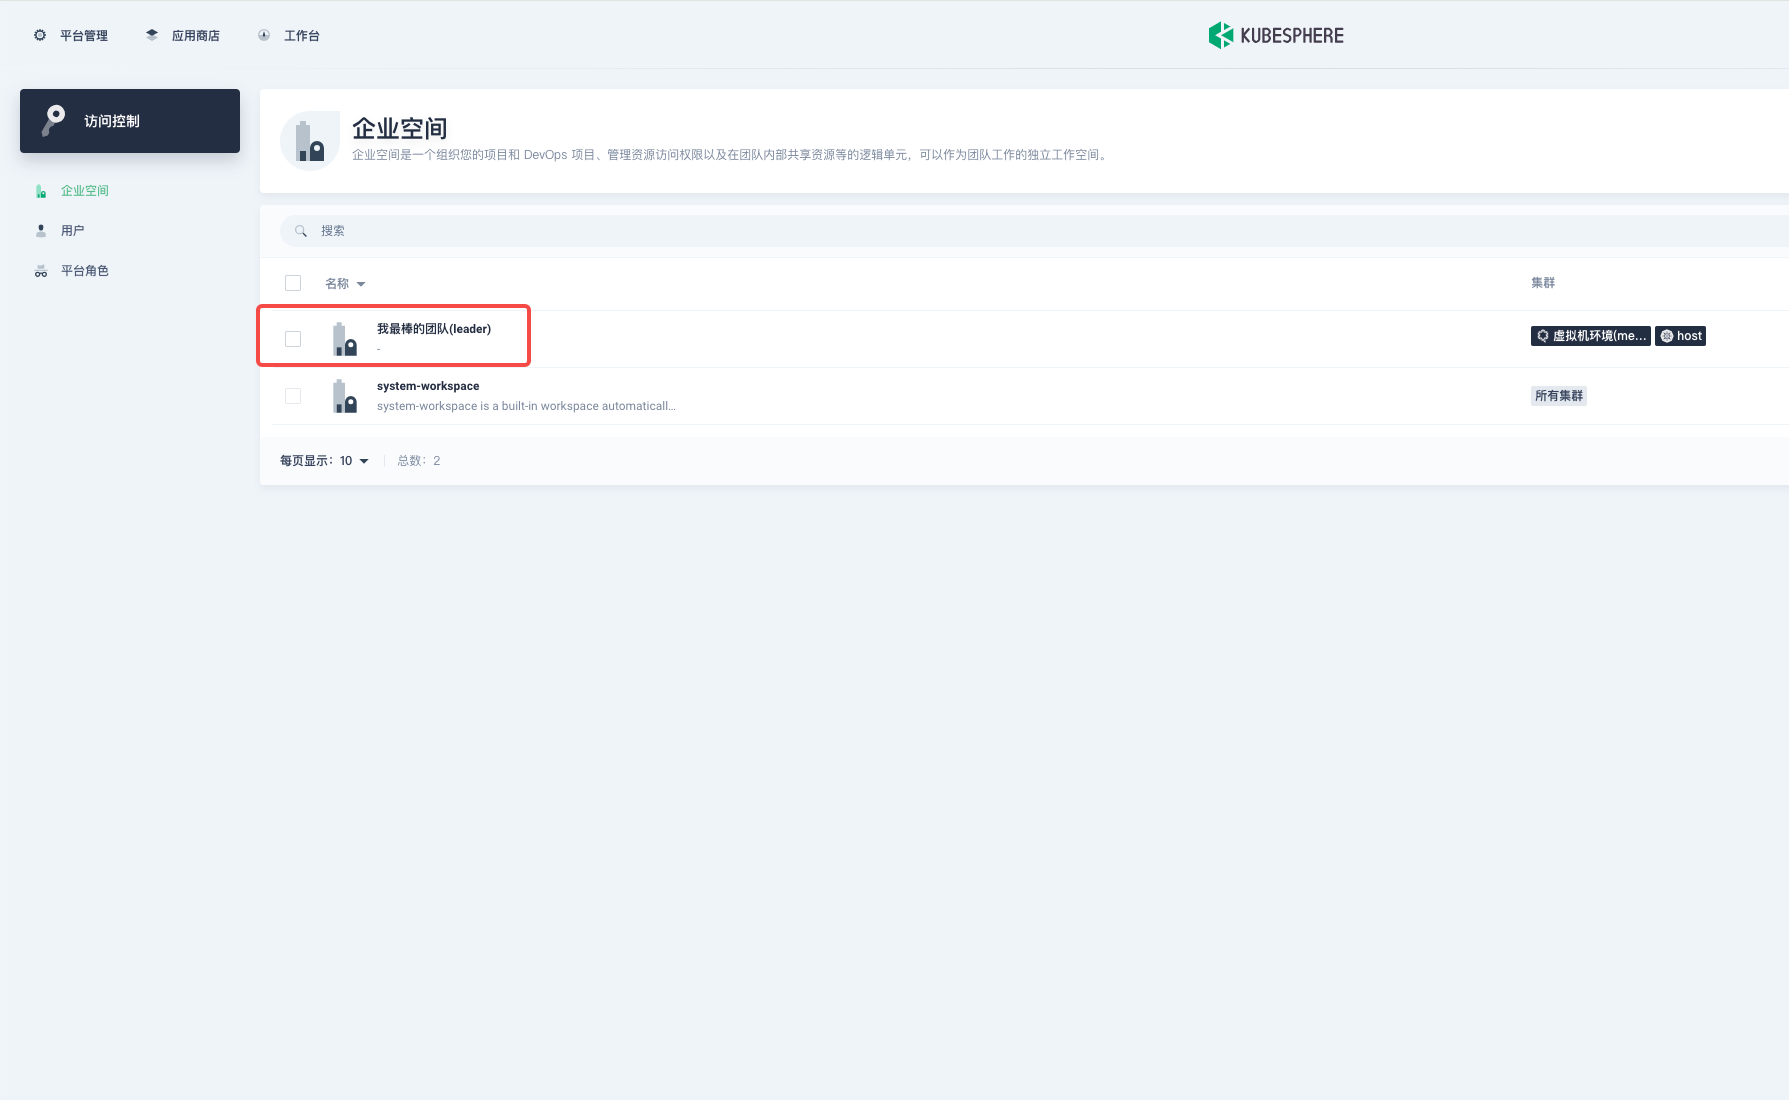
1. 我最棒的团队
使用服务网格管理应用,包括 devops 流水线工程,都要在企业空间中进行操作
2. 创建一个项目
创建一个项目,表示创建 namespace ,kubesphere 的服务网格应用的范围单位是以 namespace 为最小单位管理
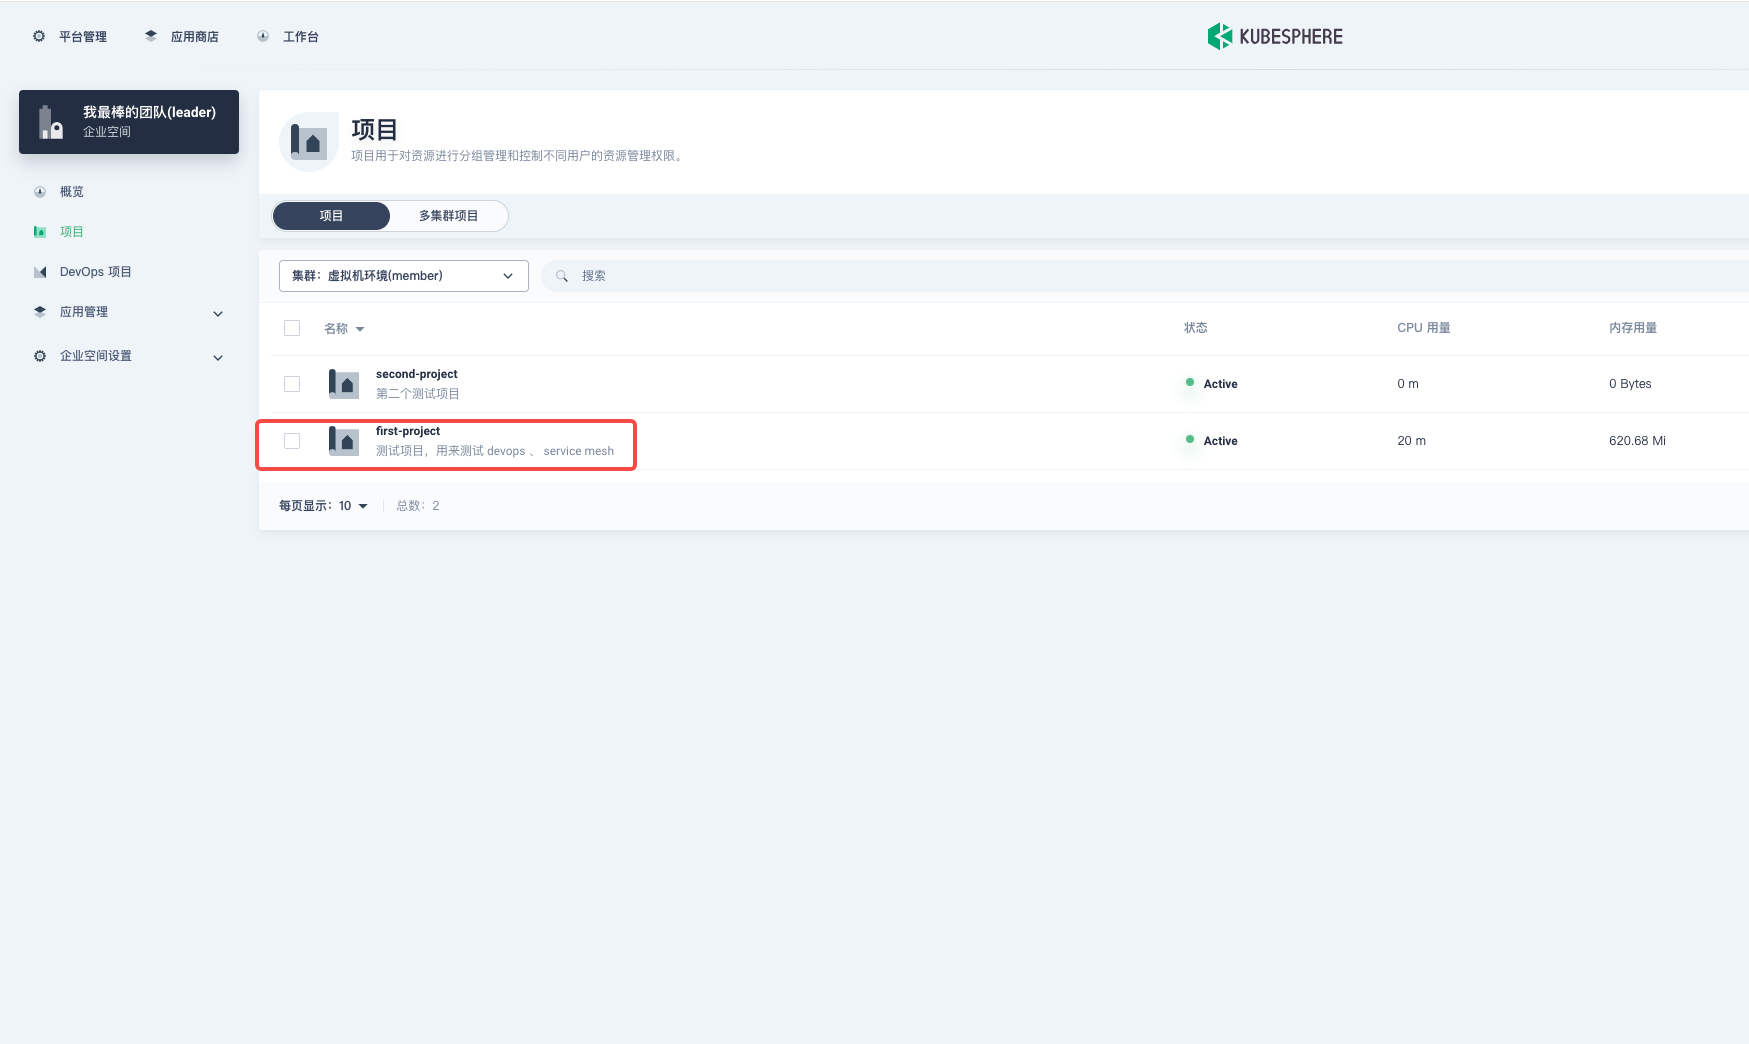
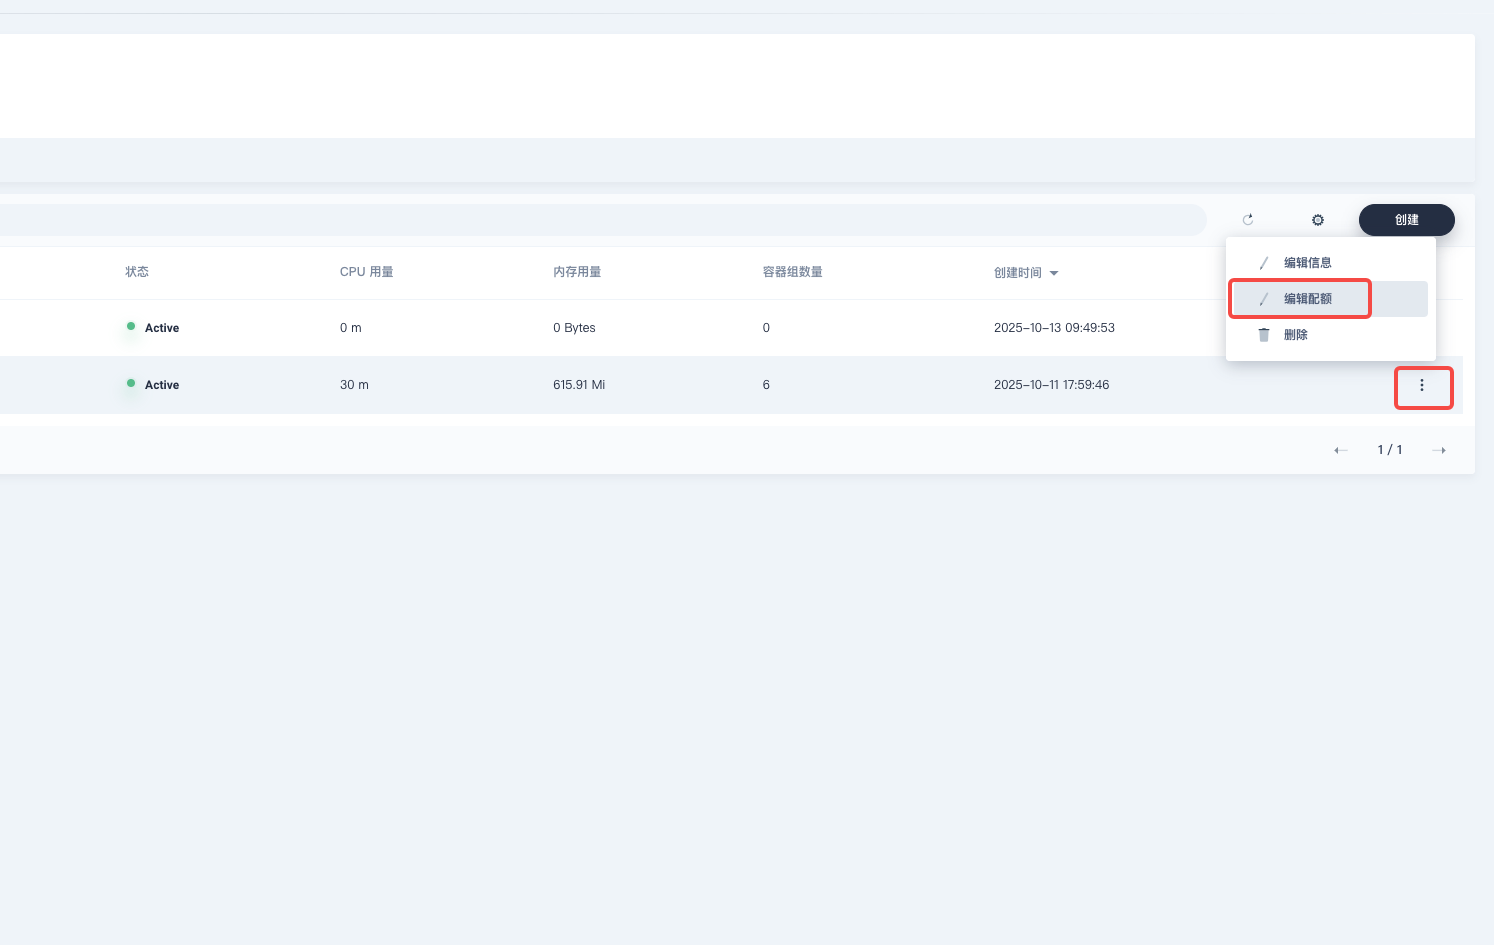
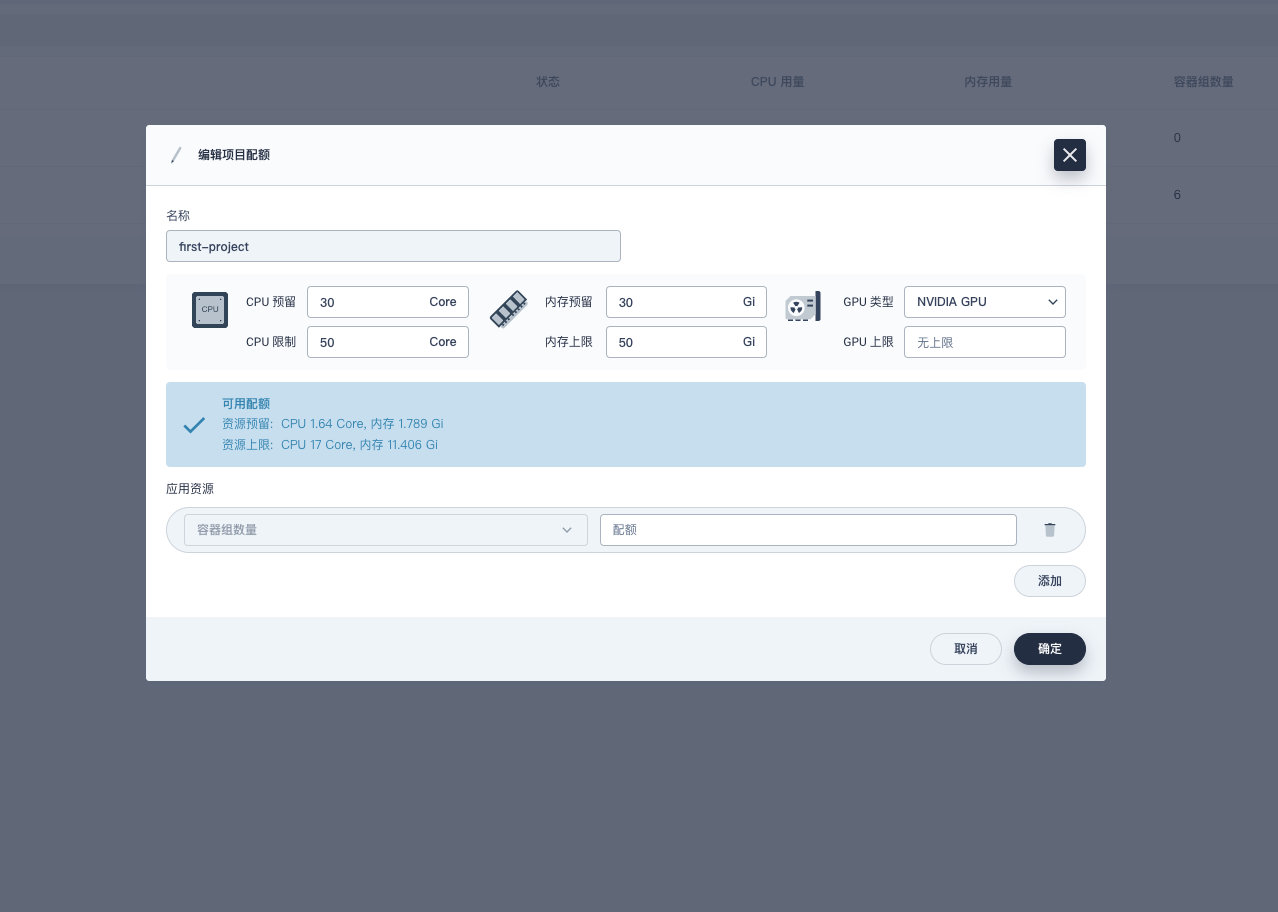
可以为项目限制一下 CPU 内存的使用配额
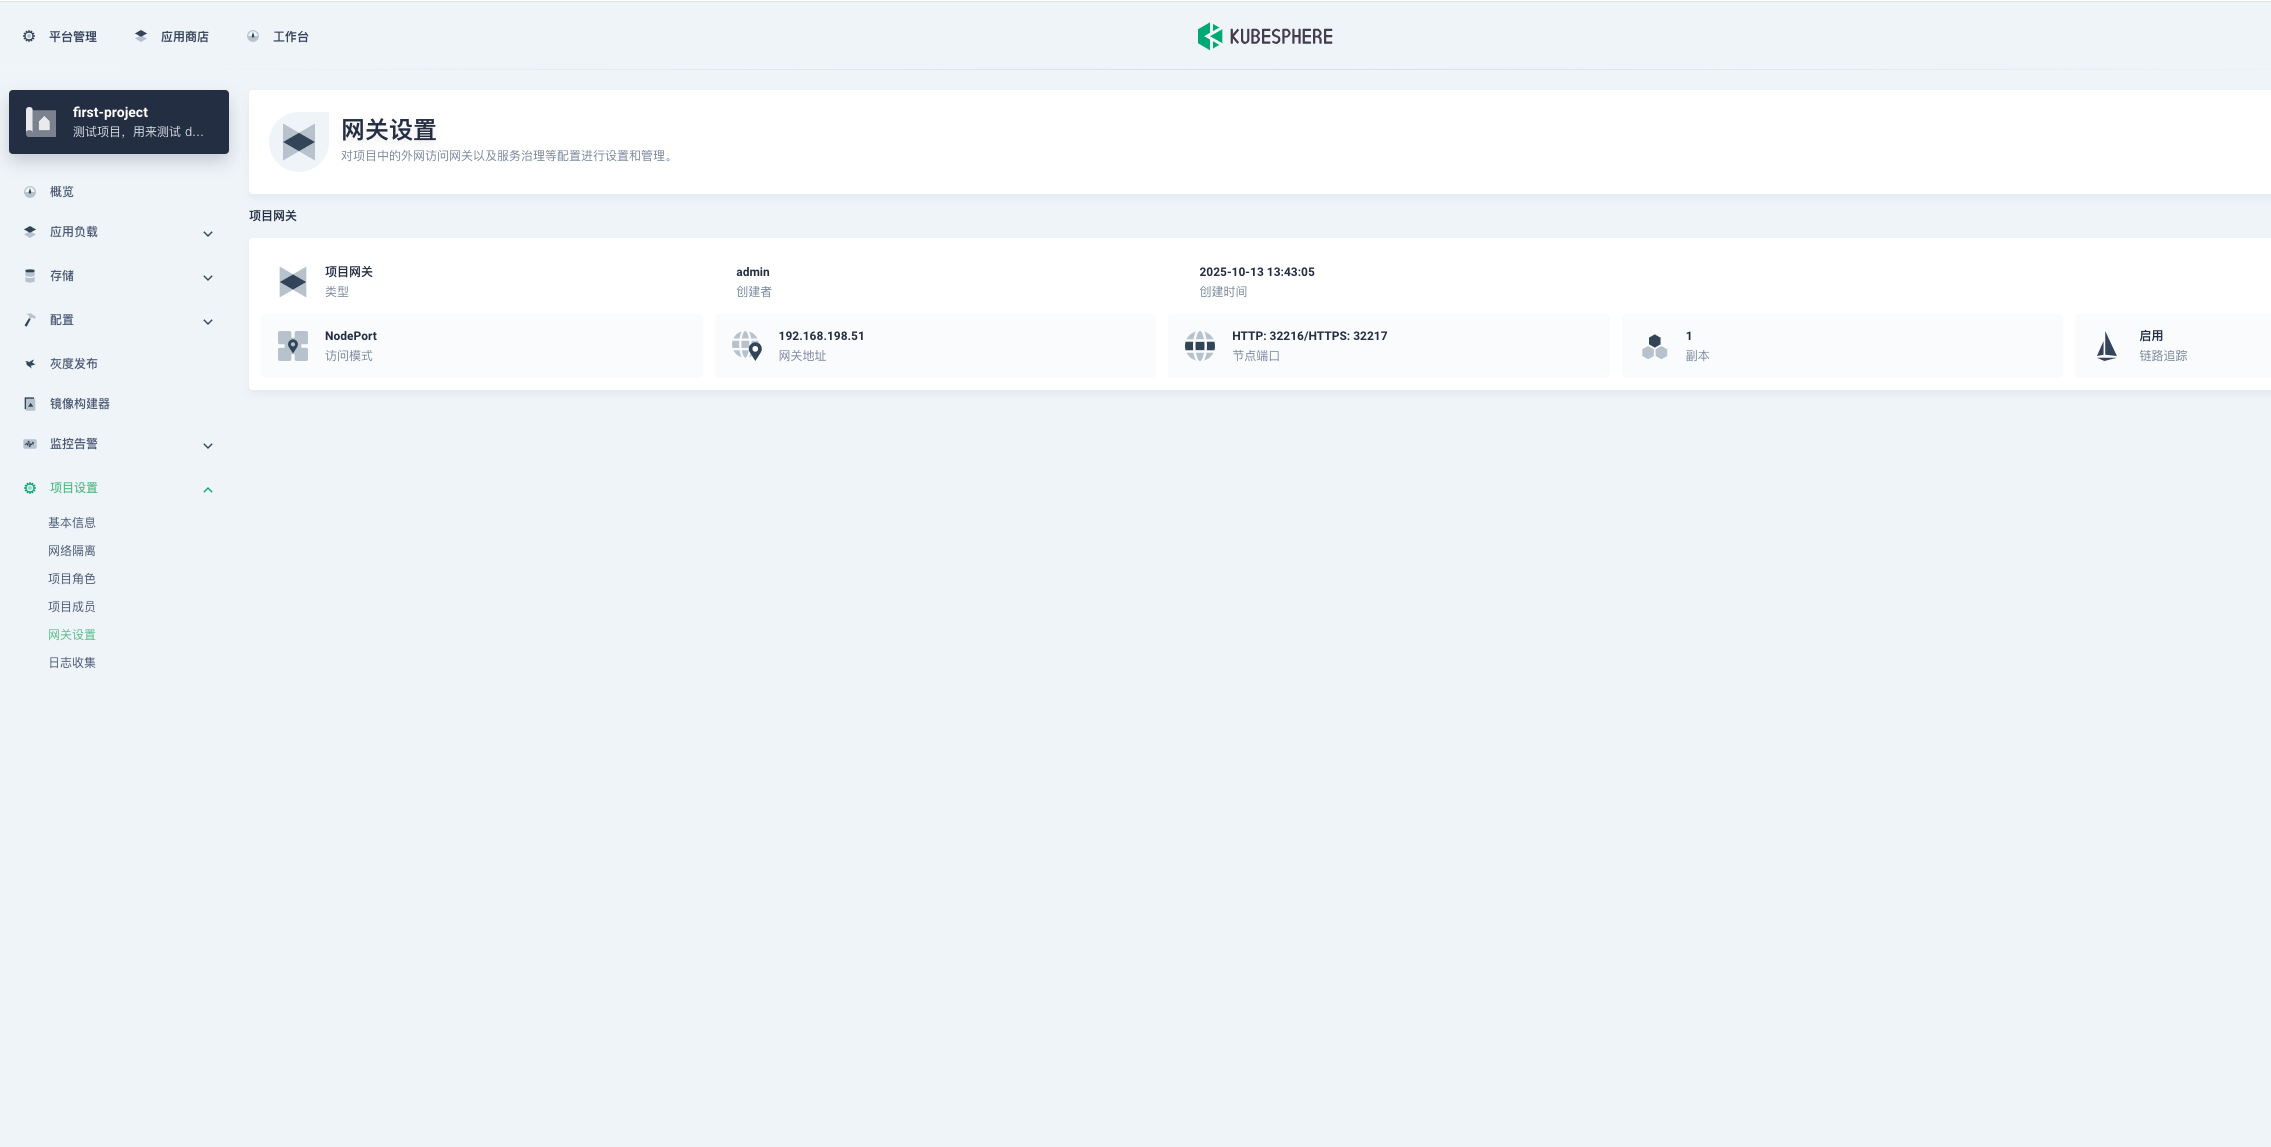
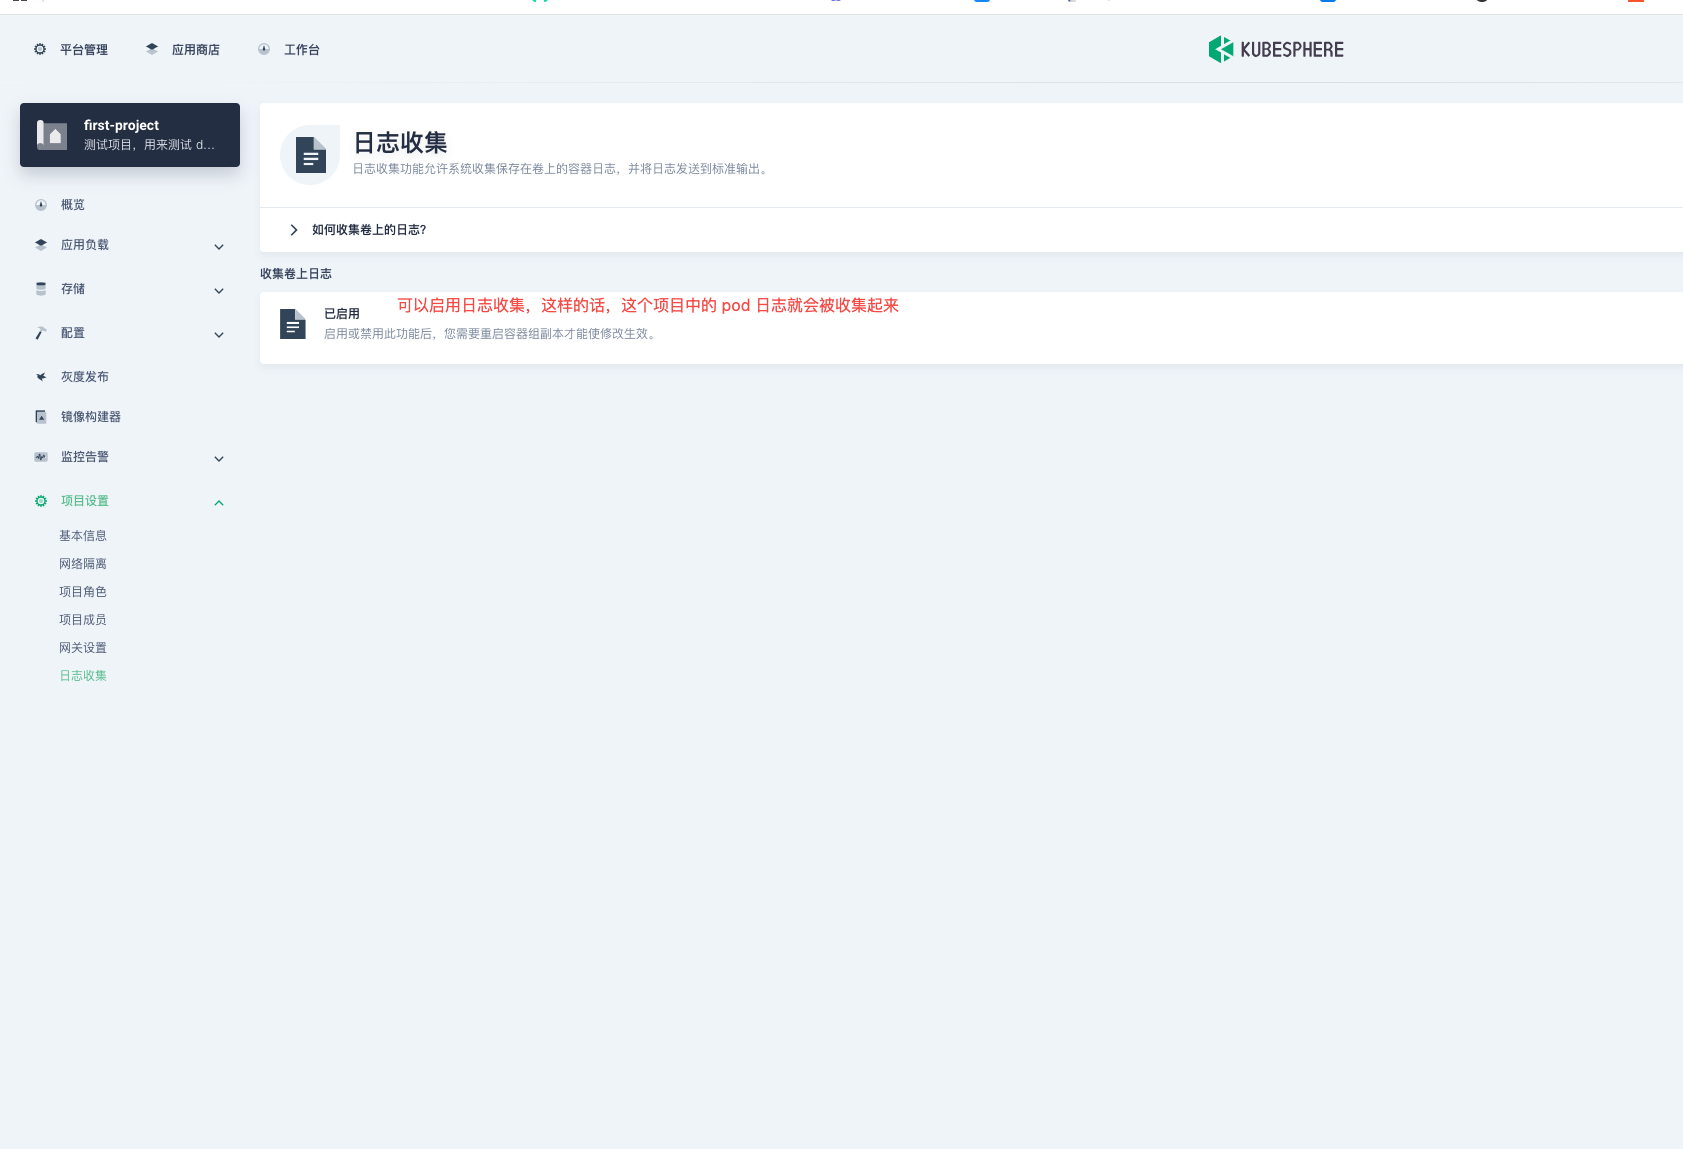
3. 启用网关和日志
启用网关,表示这个项目中的服务要启用 istio 服务,此时项目中的 pod 才会注入 sidecar 容器,才会被 istio-proxy 所接管流量
启用网关,kubesphere-controls-system 命名空间下会出现一个工作负载,比如:"kubesphere-router-first-project",这个工作负载就是 istio 的 Gateway 网关服务,http 层应用流量进入的接口就是他接管
在此说明一下: 需要集群中事先部署好 nginx-ingress-controller,因为这个 gateway 就是在调用 ingress


可以把日志收集功能开启
三、负载均衡入口
网关启用后,gateway 的端口是 node port,我们在浏览器访问的时候还要加上端口,这种方式适合本地开发,并不适合生产环境,所以我们要在外层加一层负载均衡,作为流量的第一入口,而gateway作为第二入口
原则上生产环境要高可用集群,我这里只有两台机器就凑合演示一下吧,正常来说这两台机器要脱离 k8s 集群,不应该在集群中
1. 部署配置 nginx
我这里就不详细演示怎么安装了,只是给大家看一下 nginx 的配置文件即可
tianxiang@k8s-master1:~$ cat /etc/nginx/nginx.conf
user www-data;
worker_processes auto;
events { worker_connections 1024; }
pid /run/nginx.pid;
http {
log_format main '[$time_local] - '
'Request IP: $remote_addr - '
'Host: $http_host - '
'Path: "$request"'
'Status: $status BodyBytesSent: $body_bytes_sent '
'Referer: "$http_referer" '
'UserAgent: "$http_user_agent" '
'XForwardedFor: "$http_x_forwarded_for" '
'Upgrade: $http_upgrade Connection: $http_connection '
'CacheStatus: $upstream_cache_status '
'RequestTime: $request_time';
##
# Basic Settings
##
sendfile on;
tcp_nopush on;
types_hash_max_size 2048;
# server_tokens off;
# server_names_hash_bucket_size 64;
# server_name_in_redirect off;
include /etc/nginx/mime.types;
default_type application/octet-stream;
##
# SSL Settings
##
ssl_protocols TLSv1 TLSv1.1 TLSv1.2 TLSv1.3; # Dropping SSLv3, ref: POODLE
ssl_prefer_server_ciphers on;
##
# Logging Settings
##
access_log /var/log/nginx/access.log main;
error_log /var/log/nginx/error.log;
##
# Gzip Settings
##
# 开启 gzip 压缩
gzip on;
gzip_vary on;
gzip_proxied any;
gzip_comp_level 9;
gzip_buffers 16 8k;
gzip_http_version 1.1;
gzip_types text/plain text/css application/json application/javascript text/xml application/xml application/xml+rss text/javascript;
##
# Virtual Host Configs
##
client_max_body_size 10240m;
proxy_connect_timeout 3000s;
proxy_read_timeout 3000s;
proxy_send_timeout 3000s;
include /etc/nginx/conf.d/*.conf;
include /etc/nginx/sites-available/*;
server {
listen 1180;
server_name _;
root /usr/share/nginx/html;
index index.html;
location / {
try_files $uri $uri/ /index.html;
}
}
}这里的文件名称命名,以及 upstream 命名一定要规范,因为以后肯定不止这一个
32216 和 32217 端口是 istio gateway 工作负载的 node port 端口
tianxiang@k8s-master1:~$ kubectl get pod,svc -n kubesphere-controls-system
NAME READY STATUS RESTARTS AGE
pod/default-http-backend-58959794d9-thszn 1/1 Running 0 26d
pod/kubectl-admin-585c75768f-9mxnh 1/1 Running 0 26d
pod/kubesphere-router-first-project-6b678b857c-r8b2f 2/2 Running 0 156m
NAME TYPE CLUSTER-IP EXTERNAL-IP PORT(S) AGE
service/default-http-backend ClusterIP 10.96.14.250 <none> 80/TCP 26d
service/kubesphere-router-first-project NodePort 10.96.109.46 <none> 80:32216/TCP,443:32217/TCP 38h
service/kubesphere-router-first-project-metrics ClusterIP 10.96.3.136 <none> 10254/TCP 38h
tianxiang@k8s-master1:~$ cat /etc/nginx/conf.d/first-project.conf
# first-project 项目网关 http 代理
upstream first-project-http {
server 192.168.198.51:32216; # Node1
server 192.168.198.52:32216; # Node2
# 原则上这里要多些几台机器,并且这些机器原则上不跑业务,只提供流量的通信
}
# first-project 项目网关 https 代理
upstream first-project-https {
server 192.168.198.51:32217; # Node1
server 192.168.198.52:32217; # Node2
# 原则上这里要多些几台机器,并且这些机器原则上不跑业务,只提供流量的通信
}
# HTTP负载均衡
server {
listen 80;
access_log /var/log/nginx/access.log main;
location / {
proxy_pass http://first-project-http; # 指定 HTTP 上游
proxy_http_version 1.1;
proxy_set_header Host $host;
proxy_set_header X-Real-IP $remote_addr;
proxy_set_header X-Forwarded-For $proxy_add_x_forwarded_for;
proxy_set_header X-Forwarded-Proto $scheme;
}
# WebSocket 请求代理转发(统一处理所有 wss 协议请求)
location ~* ^/api/websocket {
proxy_pass http://first-project-http; # 将请求转发到 Nginx 上游集群
proxy_http_version 1.1; # 必须使用 HTTP/1.1 来支持 WebSocket
proxy_set_header Upgrade $http_upgrade; # 设置 Upgrade 头以支持 WebSocket 协议
proxy_set_header Connection "upgrade"; # 设置 Connection 头以确认升级请求
proxy_set_header Host $host;
proxy_set_header X-Real-IP $remote_addr;
proxy_set_header X-Forwarded-For $proxy_add_x_forwarded_for;
proxy_set_header X-Forwarded-Proto $scheme;
# 设置超时时间,确保 WebSocket 连接能够长时间保持
proxy_read_timeout 86400s;
proxy_send_timeout 86400s;
}
}
# HTTPS负载均衡
server {
listen 443 ssl;
access_log /var/log/nginx/access.log main;
ssl_certificate /etc/nginx/tls/*.tianxiang-m6.love.cert;
ssl_certificate_key /etc/nginx/tls/*.tianxiang-m6.love.key;
ssl_protocols TLSv1.2 TLSv1.3;
ssl_ciphers 'TLS_AES_128_GCM_SHA256:TLS_AES_256_GCM_SHA384:ECDHE-RSA-AES128-GCM-SHA256:ECDHE-RSA-AES256-GCM-SHA384';
ssl_prefer_server_ciphers on;
location / {
proxy_pass https://first-project-https; # 指定 HTTPS 上游
proxy_http_version 1.1;
proxy_set_header Host $host;
proxy_set_header X-Real-IP $remote_addr;
proxy_set_header X-Forwarded-For $proxy_add_x_forwarded_for;
proxy_set_header X-Forwarded-Proto $scheme;
}
# WebSocket 请求代理转发(统一处理所有 wss 协议请求)
location ~* ^/api/websocket {
proxy_pass https://first-project-https; # 将请求转发到 Nginx 上游集群
proxy_http_version 1.1; # 必须使用 HTTP/1.1 来支持 WebSocket
proxy_set_header Upgrade $http_upgrade; # 设置 Upgrade 头以支持 WebSocket 协议
proxy_set_header Connection "upgrade"; # 设置 Connection 头以确认升级请求
proxy_set_header Host $host;
proxy_set_header X-Real-IP $remote_addr;
proxy_set_header X-Forwarded-For $proxy_add_x_forwarded_for;
proxy_set_header X-Forwarded-Proto $scheme;
# 设置超时时间,确保 WebSocket 连接能够长时间保持
proxy_read_timeout 86400s;
proxy_send_timeout 86400s;
}
}以上就是 nginx 4 层流量代理的过程,同一份配置文件,部署在多台机器上,然后利用 keepalived 做高可用,这样的话把 VIP 解析到 DNS 服务器上去就完成了业务的正常通信,当然也可以不用做 keepalived ,直接把所有 nginx 机器的 IP 地址解析到 DNS 上面去,利用 DNS 的负载均衡和高可用完成业务的通信。
2. 配置 keepalived
主节点配置
tianxiang@k8s-master1:~$ cat /etc/keepalived/keepalived.conf
! Configuration File for keepalived
global_defs {
notification_email {
acassen@firewall.loc
failover@firewall.loc
sysadmin@firewall.loc
}
notification_email_from Alexandre.Cassen@firewall.loc
smtp_server 127.0.0.1
smtp_connect_timeout 30
router_id istio-gateway
}
vrrp_script check_service {
script "/etc/keepalived/check_nginx.sh"
interval 3
weight -20 # 检查失败时,权重减少20
fall 2 # 连续失败2次才认为节点失败
rise 1 # 成功1次就认为节点恢复
}
vrrp_instance VI_1 {
state MASTER
interface em1
virtual_router_id 41 # VRRP 路由 ID实例,每个实例是唯一的
priority 100 # 动态优先级
advert_int 1 # 指定VRRP 心跳包通告间隔时间,默认1秒
authentication {
auth_type PASS
auth_pass istio-gateway
}
virtual_ipaddress {
192.168.198.50/24
}
track_script {
check_service
}
}nginx 进程存活脚本
#!/bin/bash
# 检查 nginx 进程是否存在
if pgrep -x "nginx" > /dev/null
then
exit 0
else
exit 1
fi备用节点
tianxiang@k8s-master1:~$ cat /etc/keepalived/keepalived.conf
! Configuration File for keepalived
global_defs {
notification_email {
acassen@firewall.loc
failover@firewall.loc
sysadmin@firewall.loc
}
notification_email_from Alexandre.Cassen@firewall.loc
smtp_server 127.0.0.1
smtp_connect_timeout 30
router_id istio-gateway
}
vrrp_script check_service {
script "/etc/keepalived/check_nginx.sh"
interval 3
weight -20 # 检查失败时,权重减少20
fall 2 # 连续失败2次才认为节点失败
rise 1 # 成功1次就认为节点恢复
}
vrrp_instance VI_1 {
state BACKUP
interface em1
virtual_router_id 41 # VRRP 路由 ID实例,每个实例是唯一的
priority 90 # 动态优先级
advert_int 1 # 指定VRRP 心跳包通告间隔时间,默认1秒
authentication {
auth_type PASS
auth_pass istio-gateway
}
virtual_ipaddress {
192.168.198.50/24
}
track_script {
check_service
}
}至此高可用的 4 层代理也完成了
四、部署应用
接下来我们在 kubesphere 上部署应用,来体验一下微服务流量治理的效果,感受一下服务网格
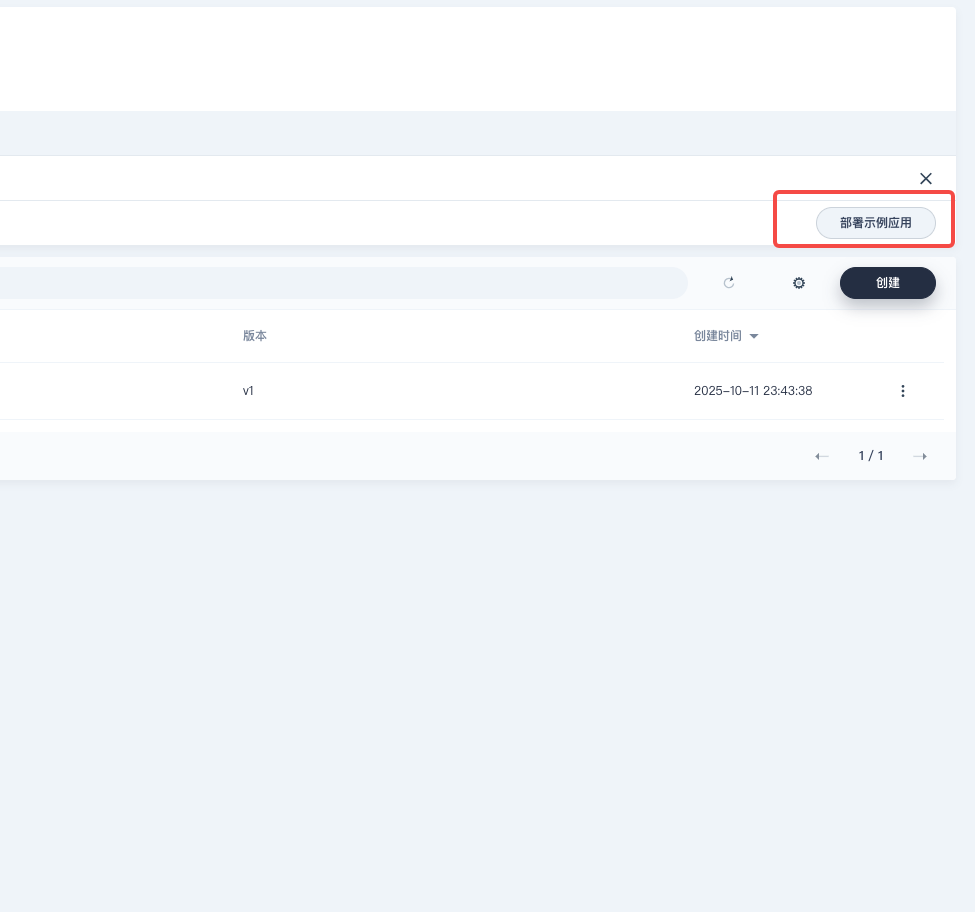
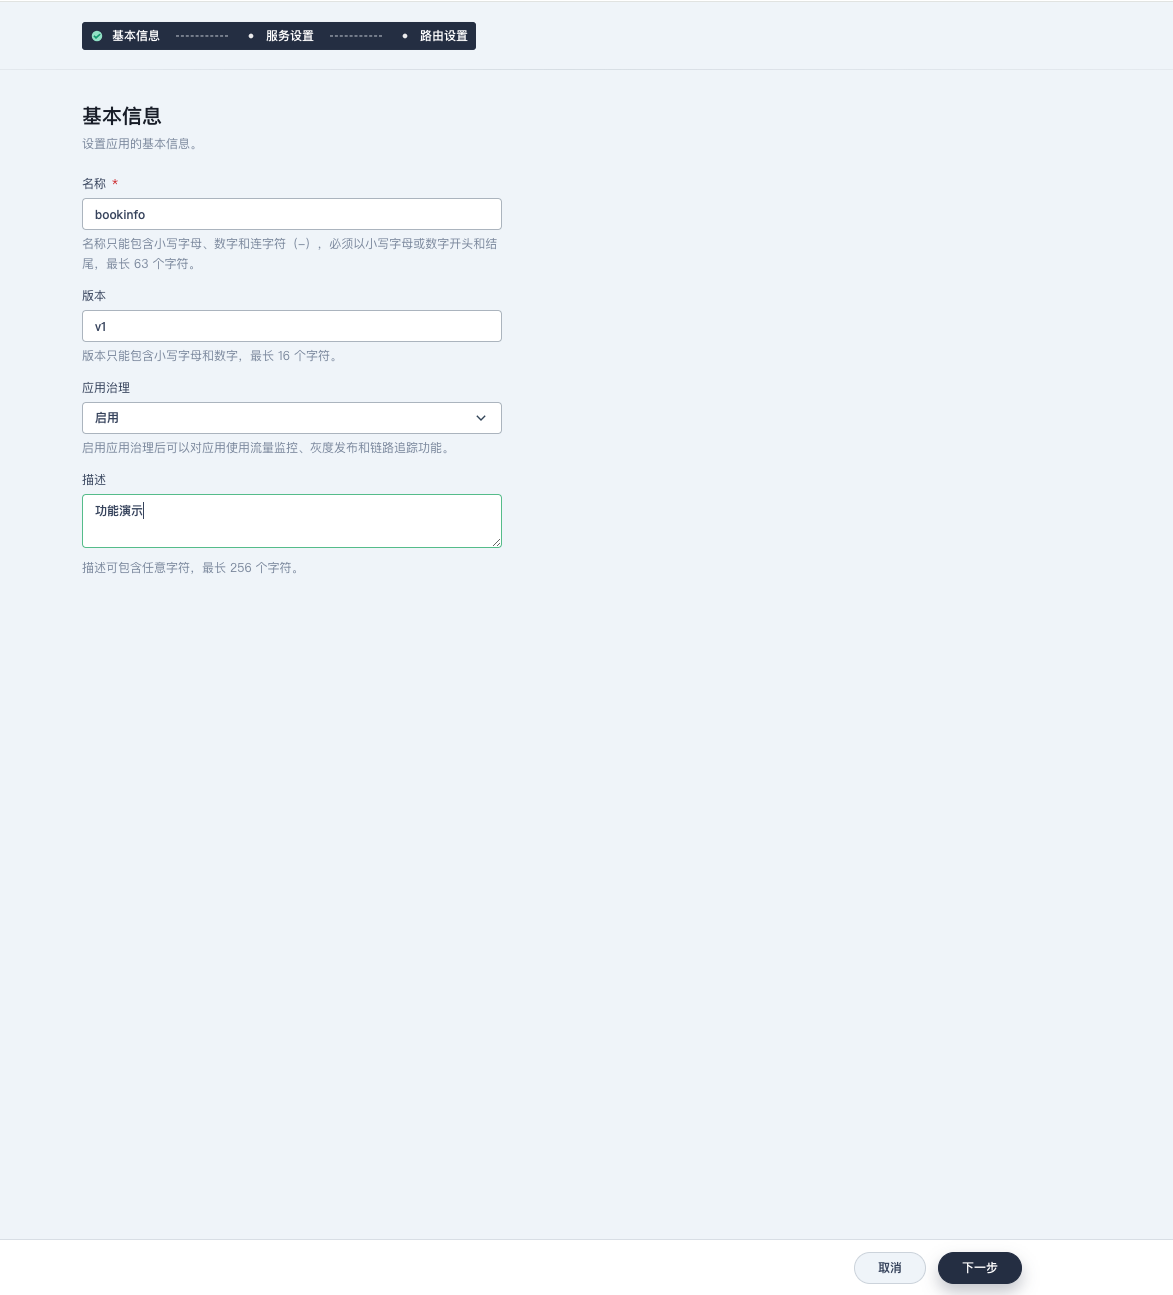
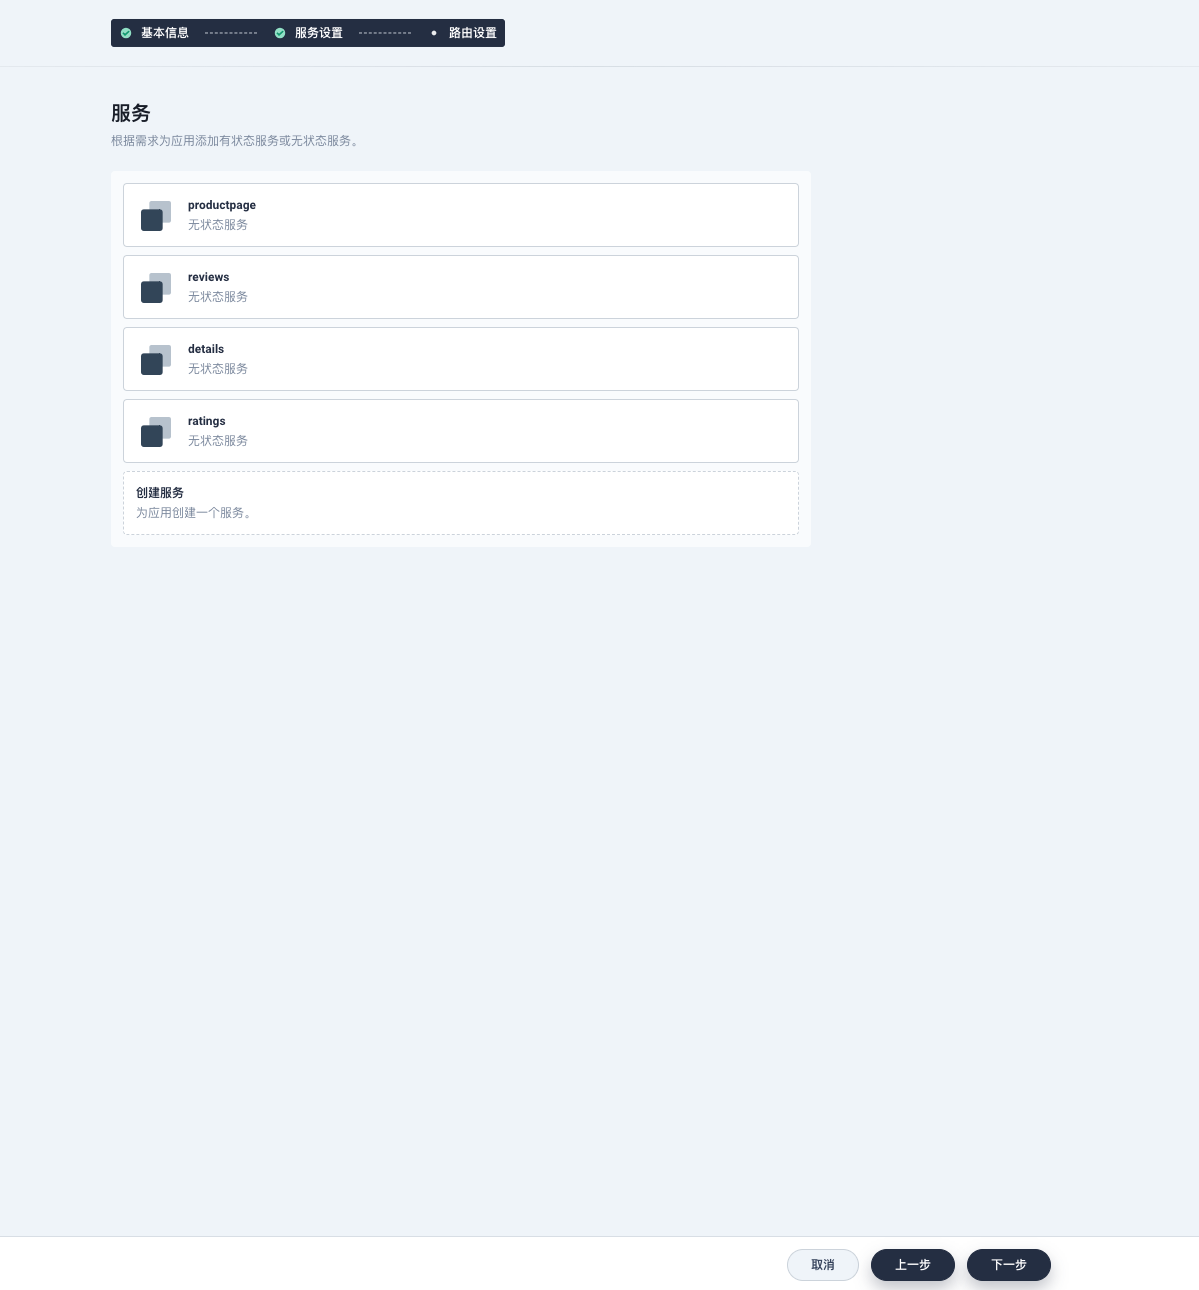
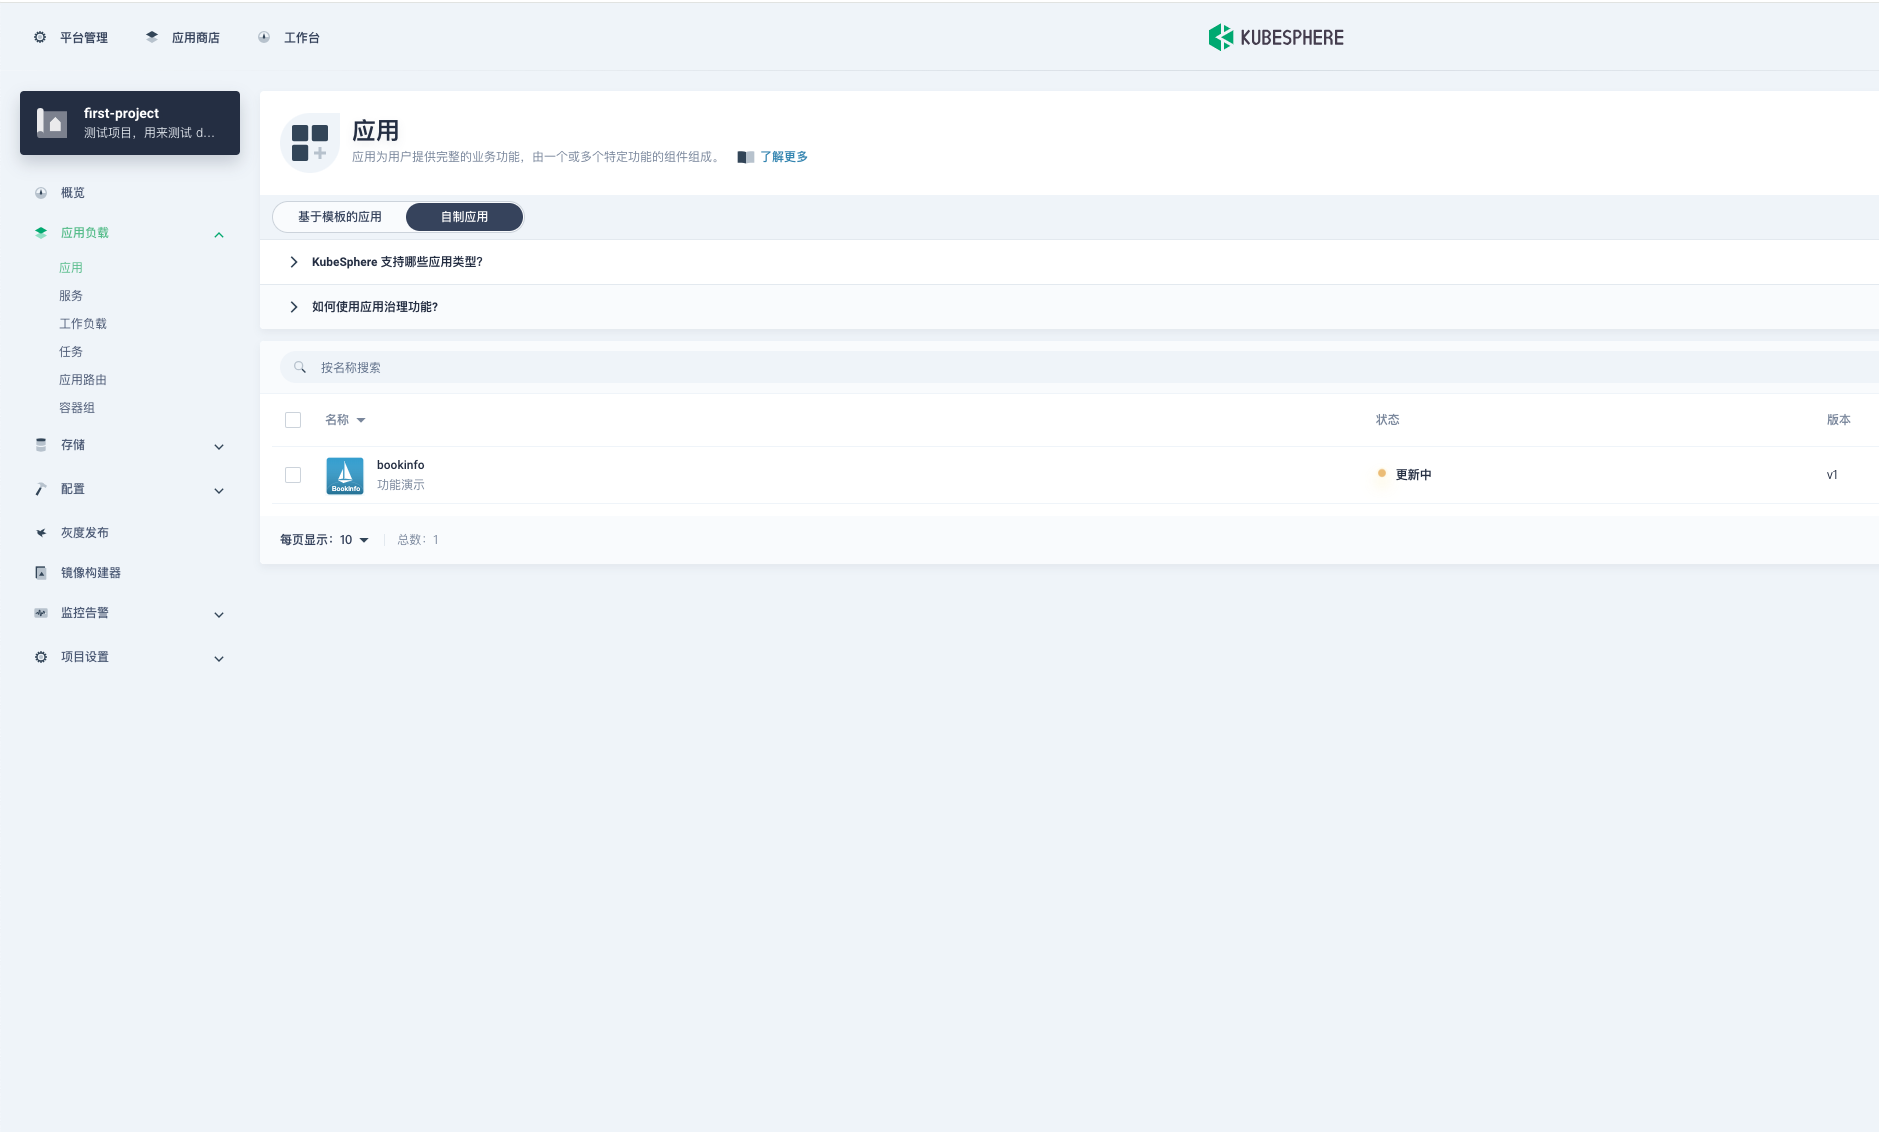
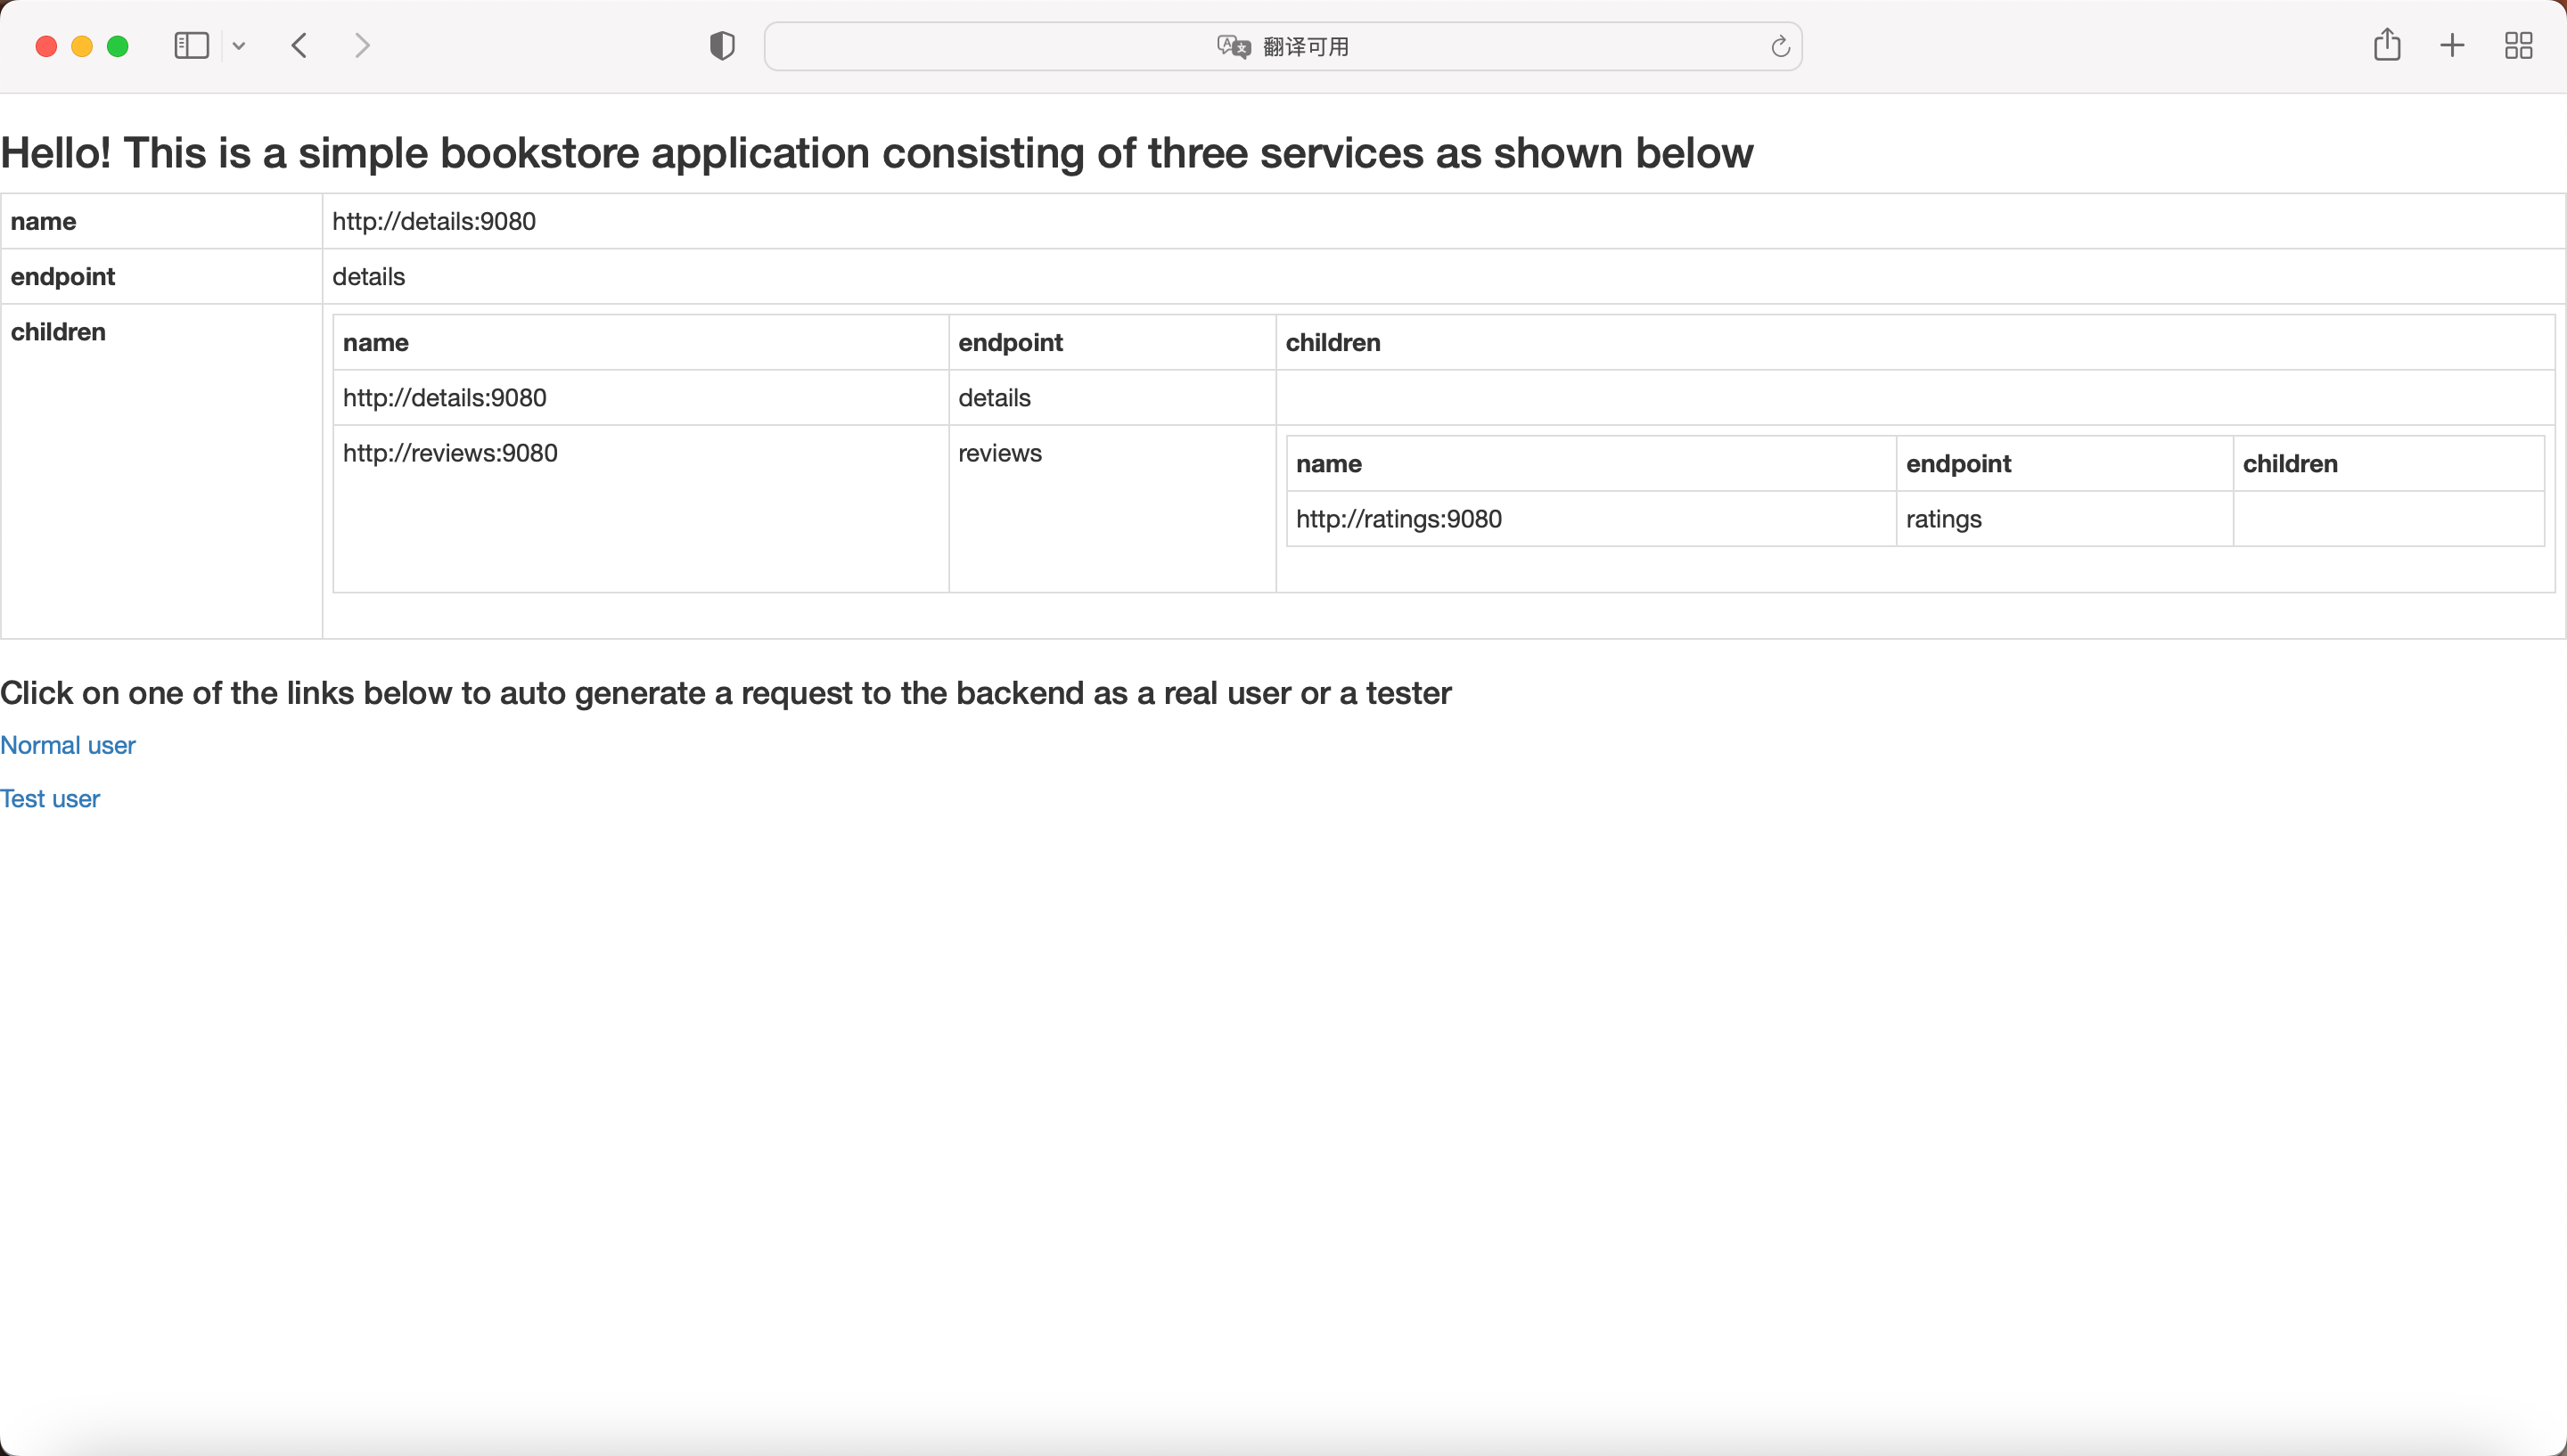
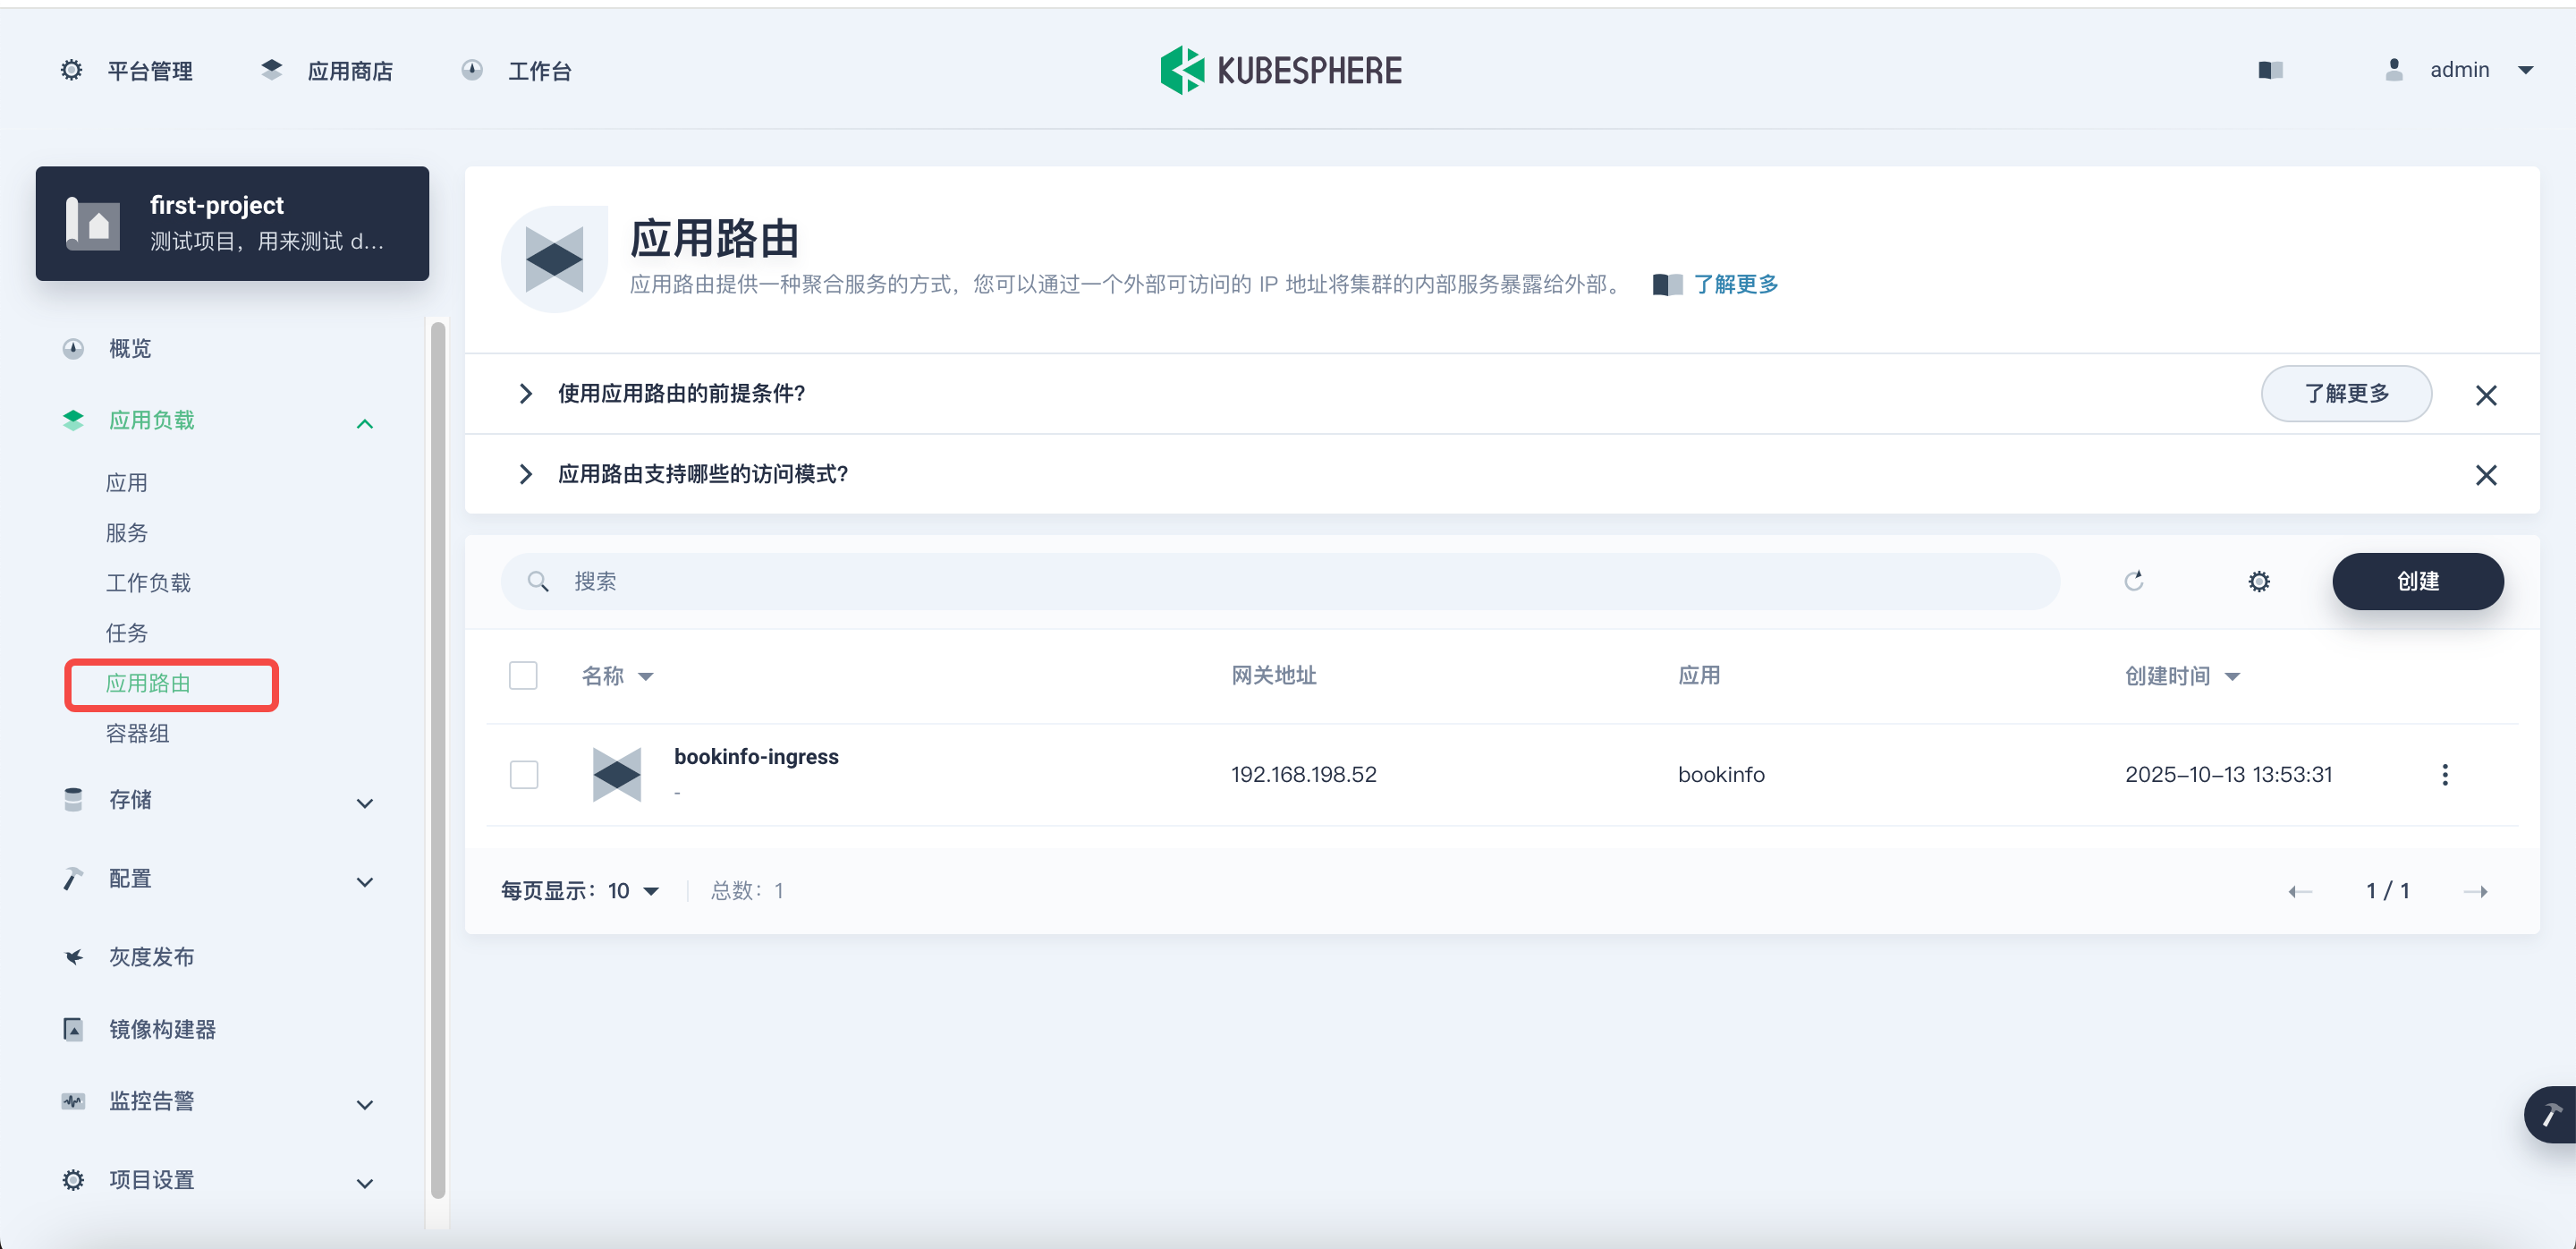
1. 创建一个示例应用
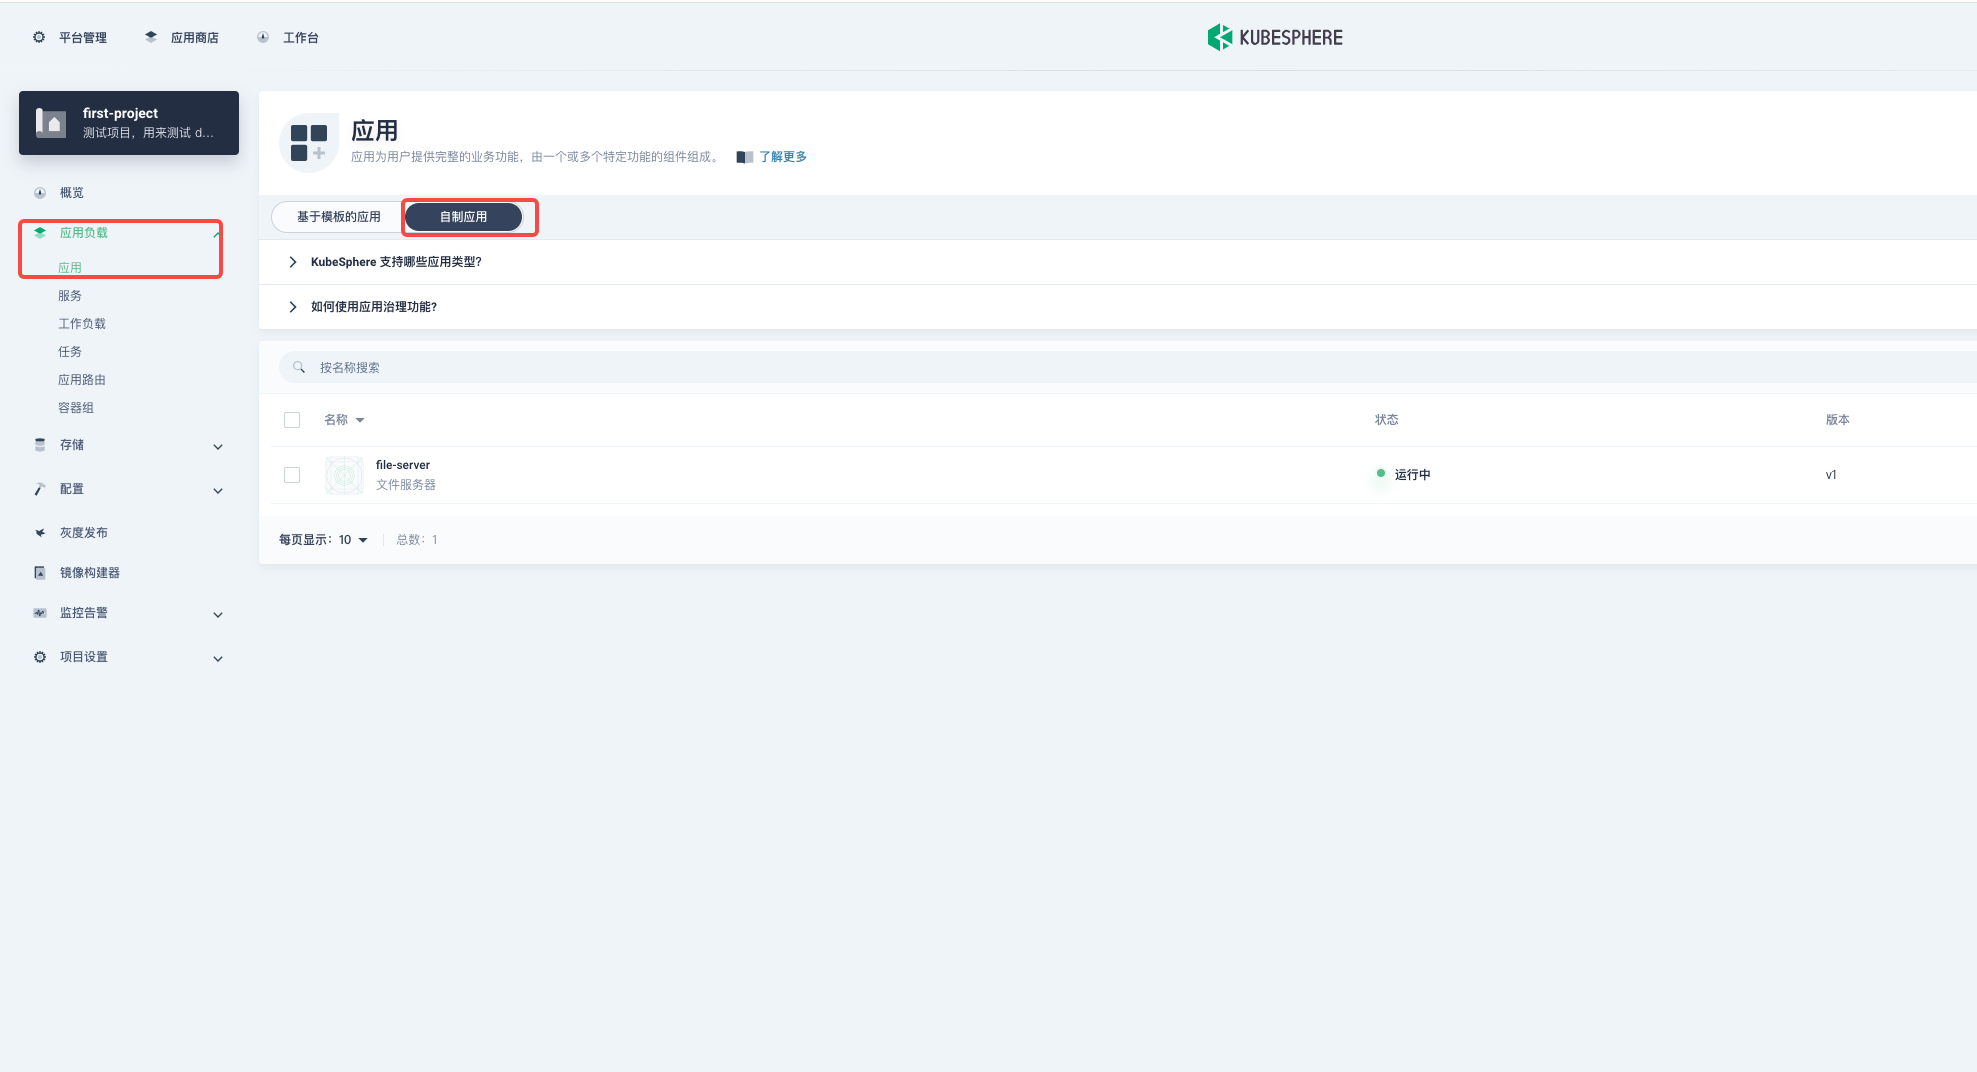
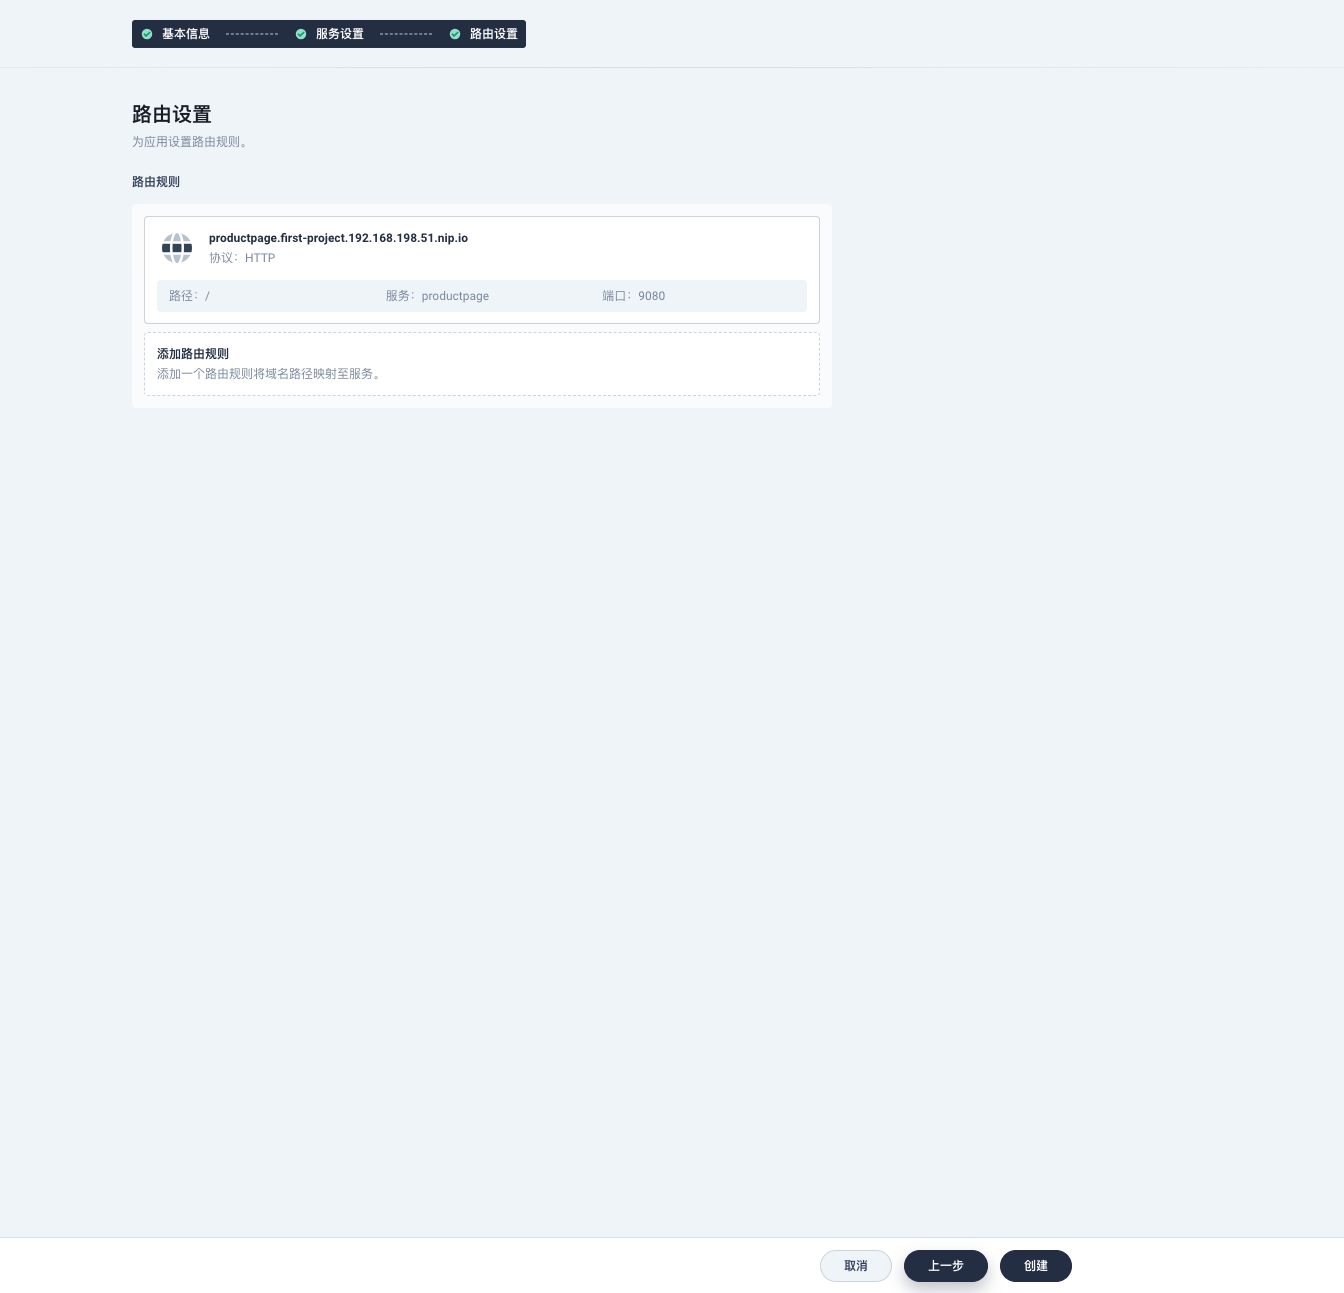
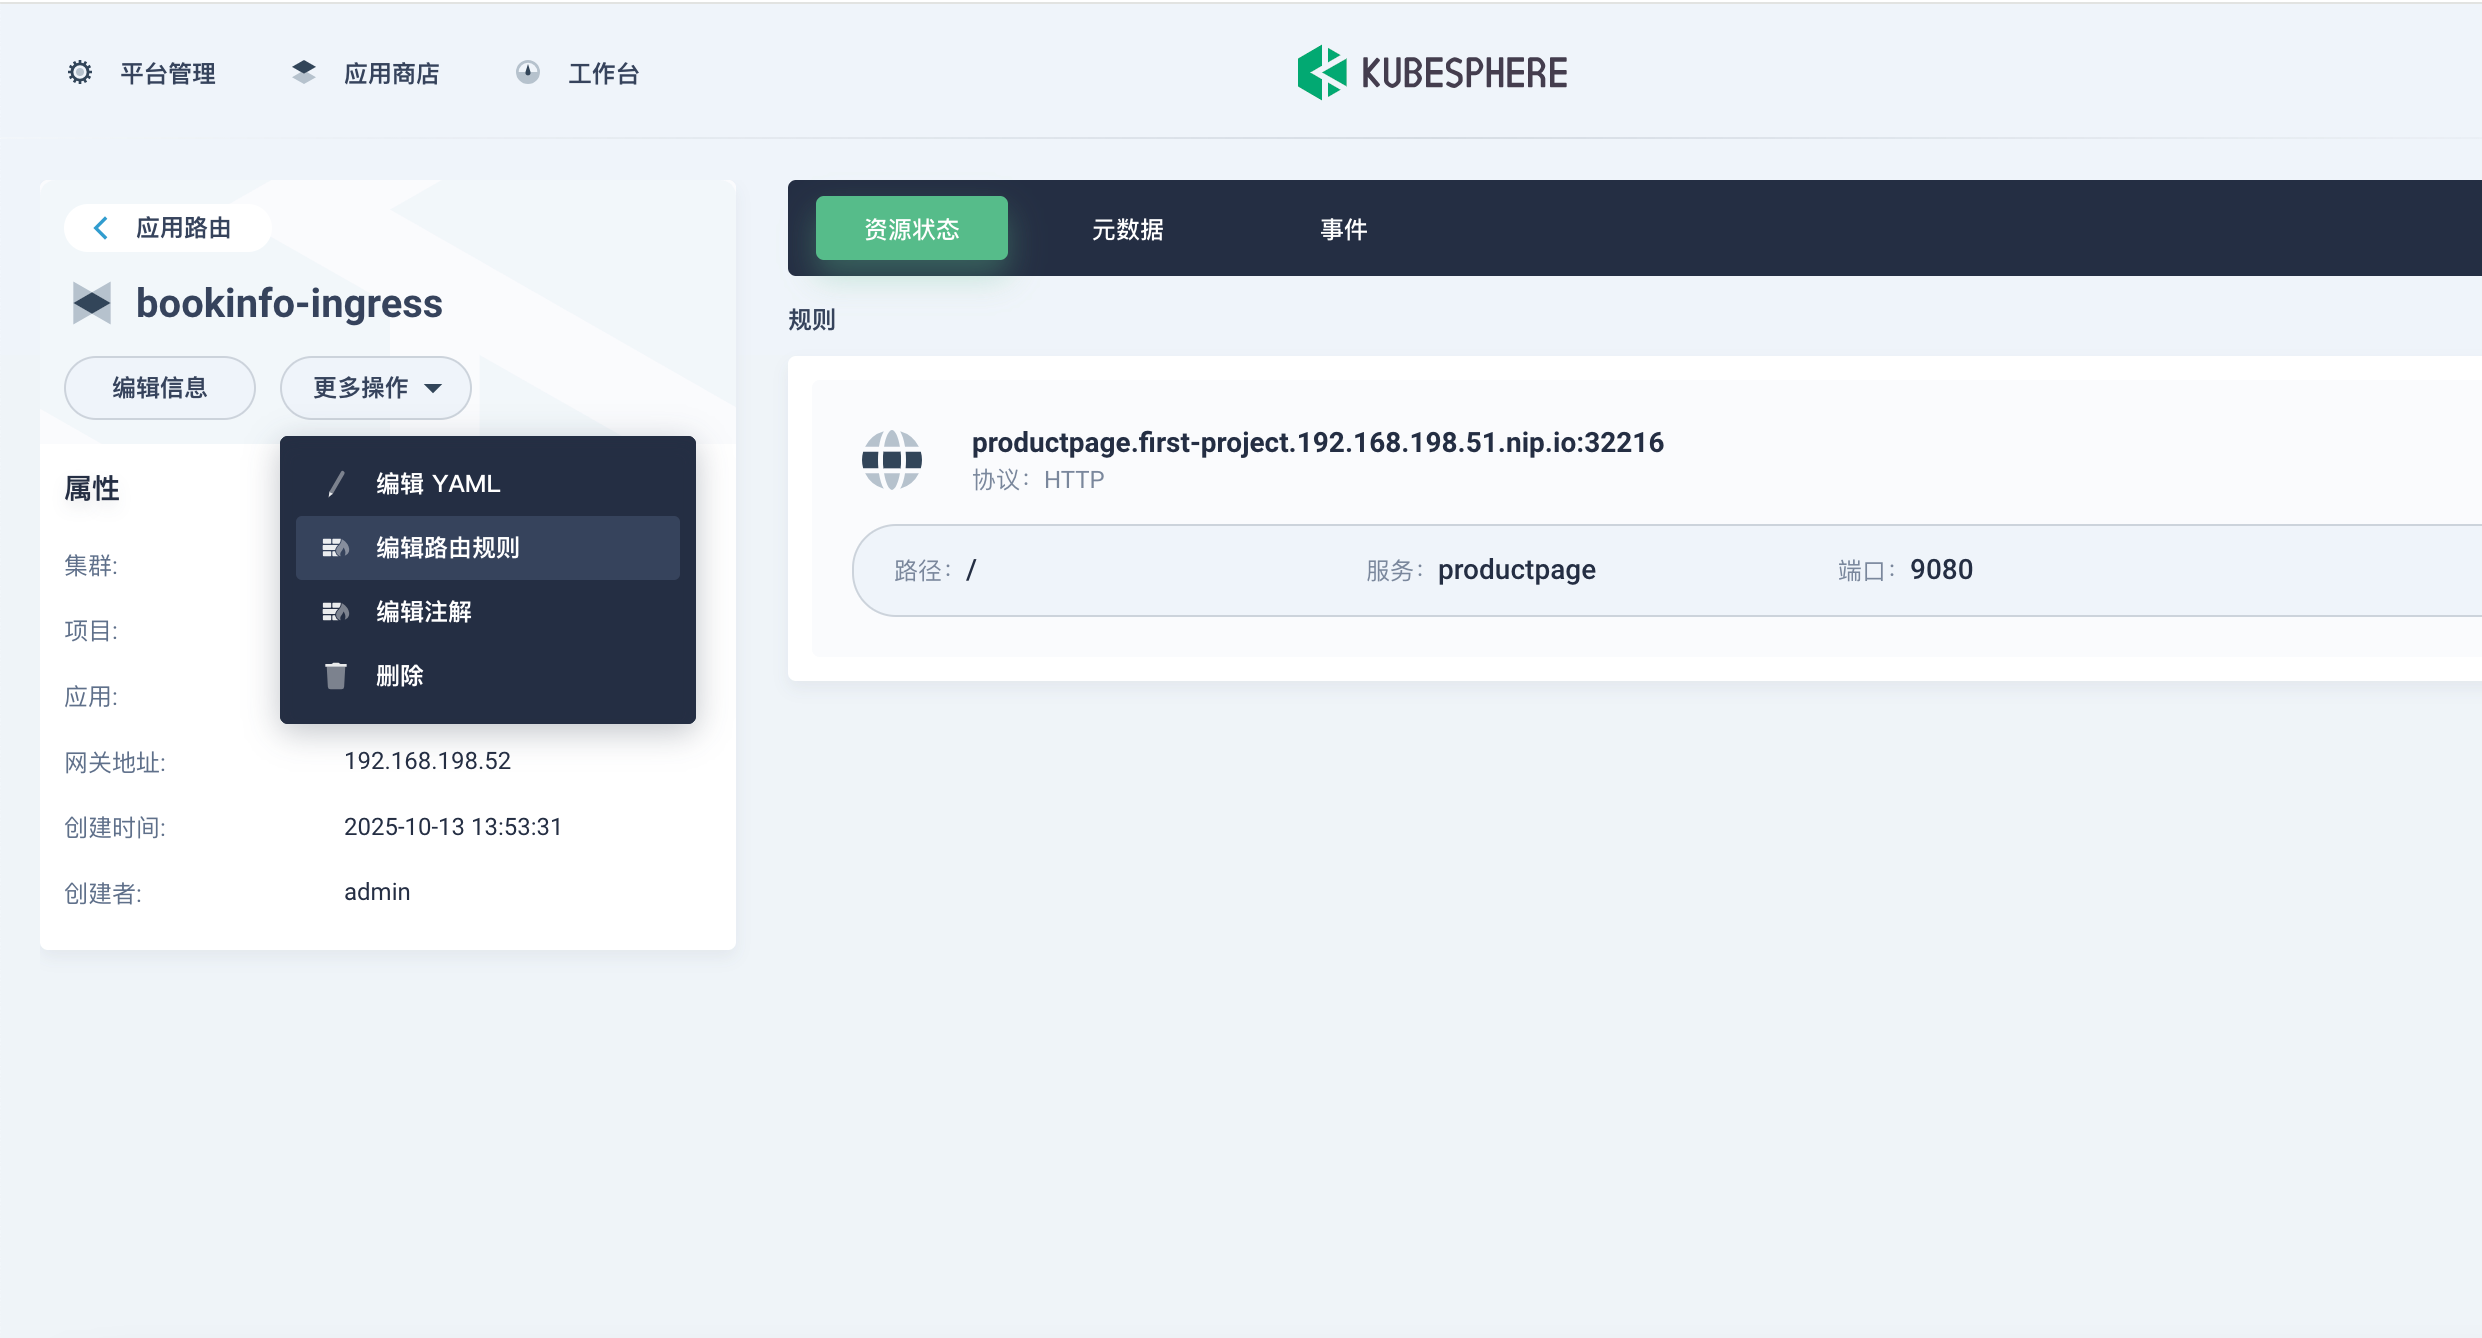
1.1 访问应用路由
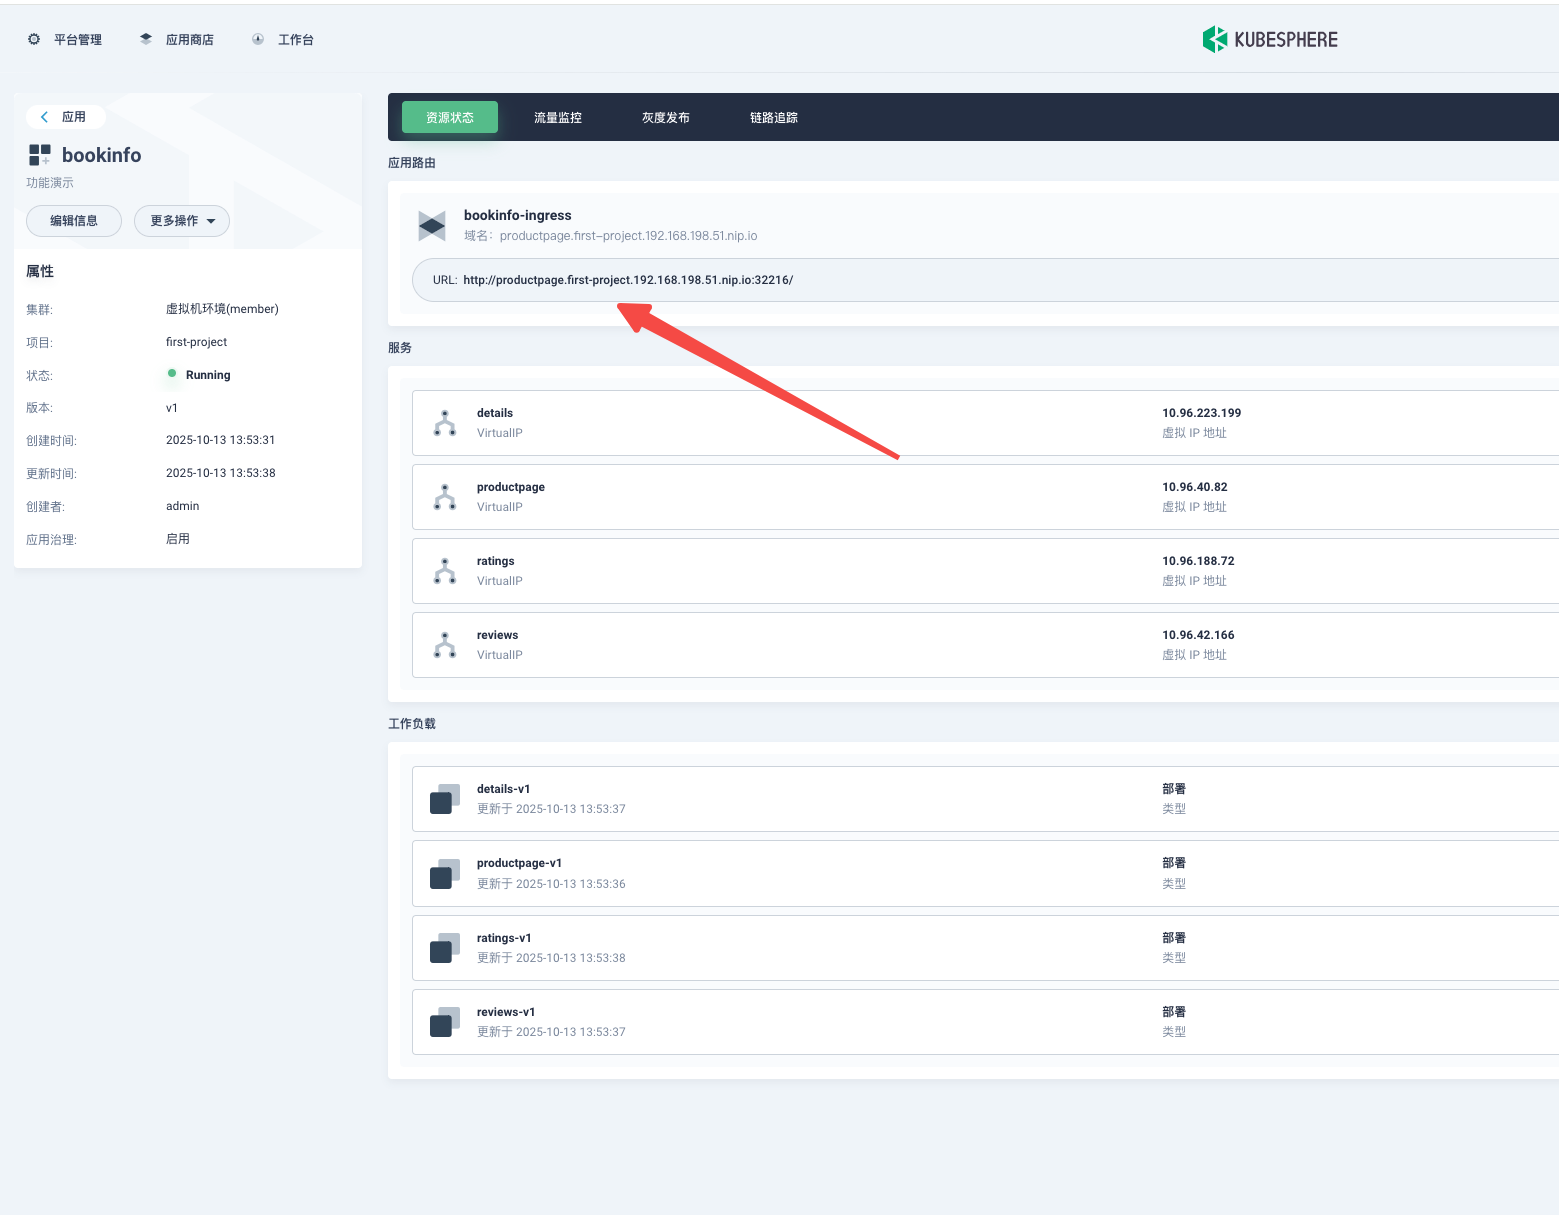
此时你发现这个路由的域名和咱们平常见的不一样
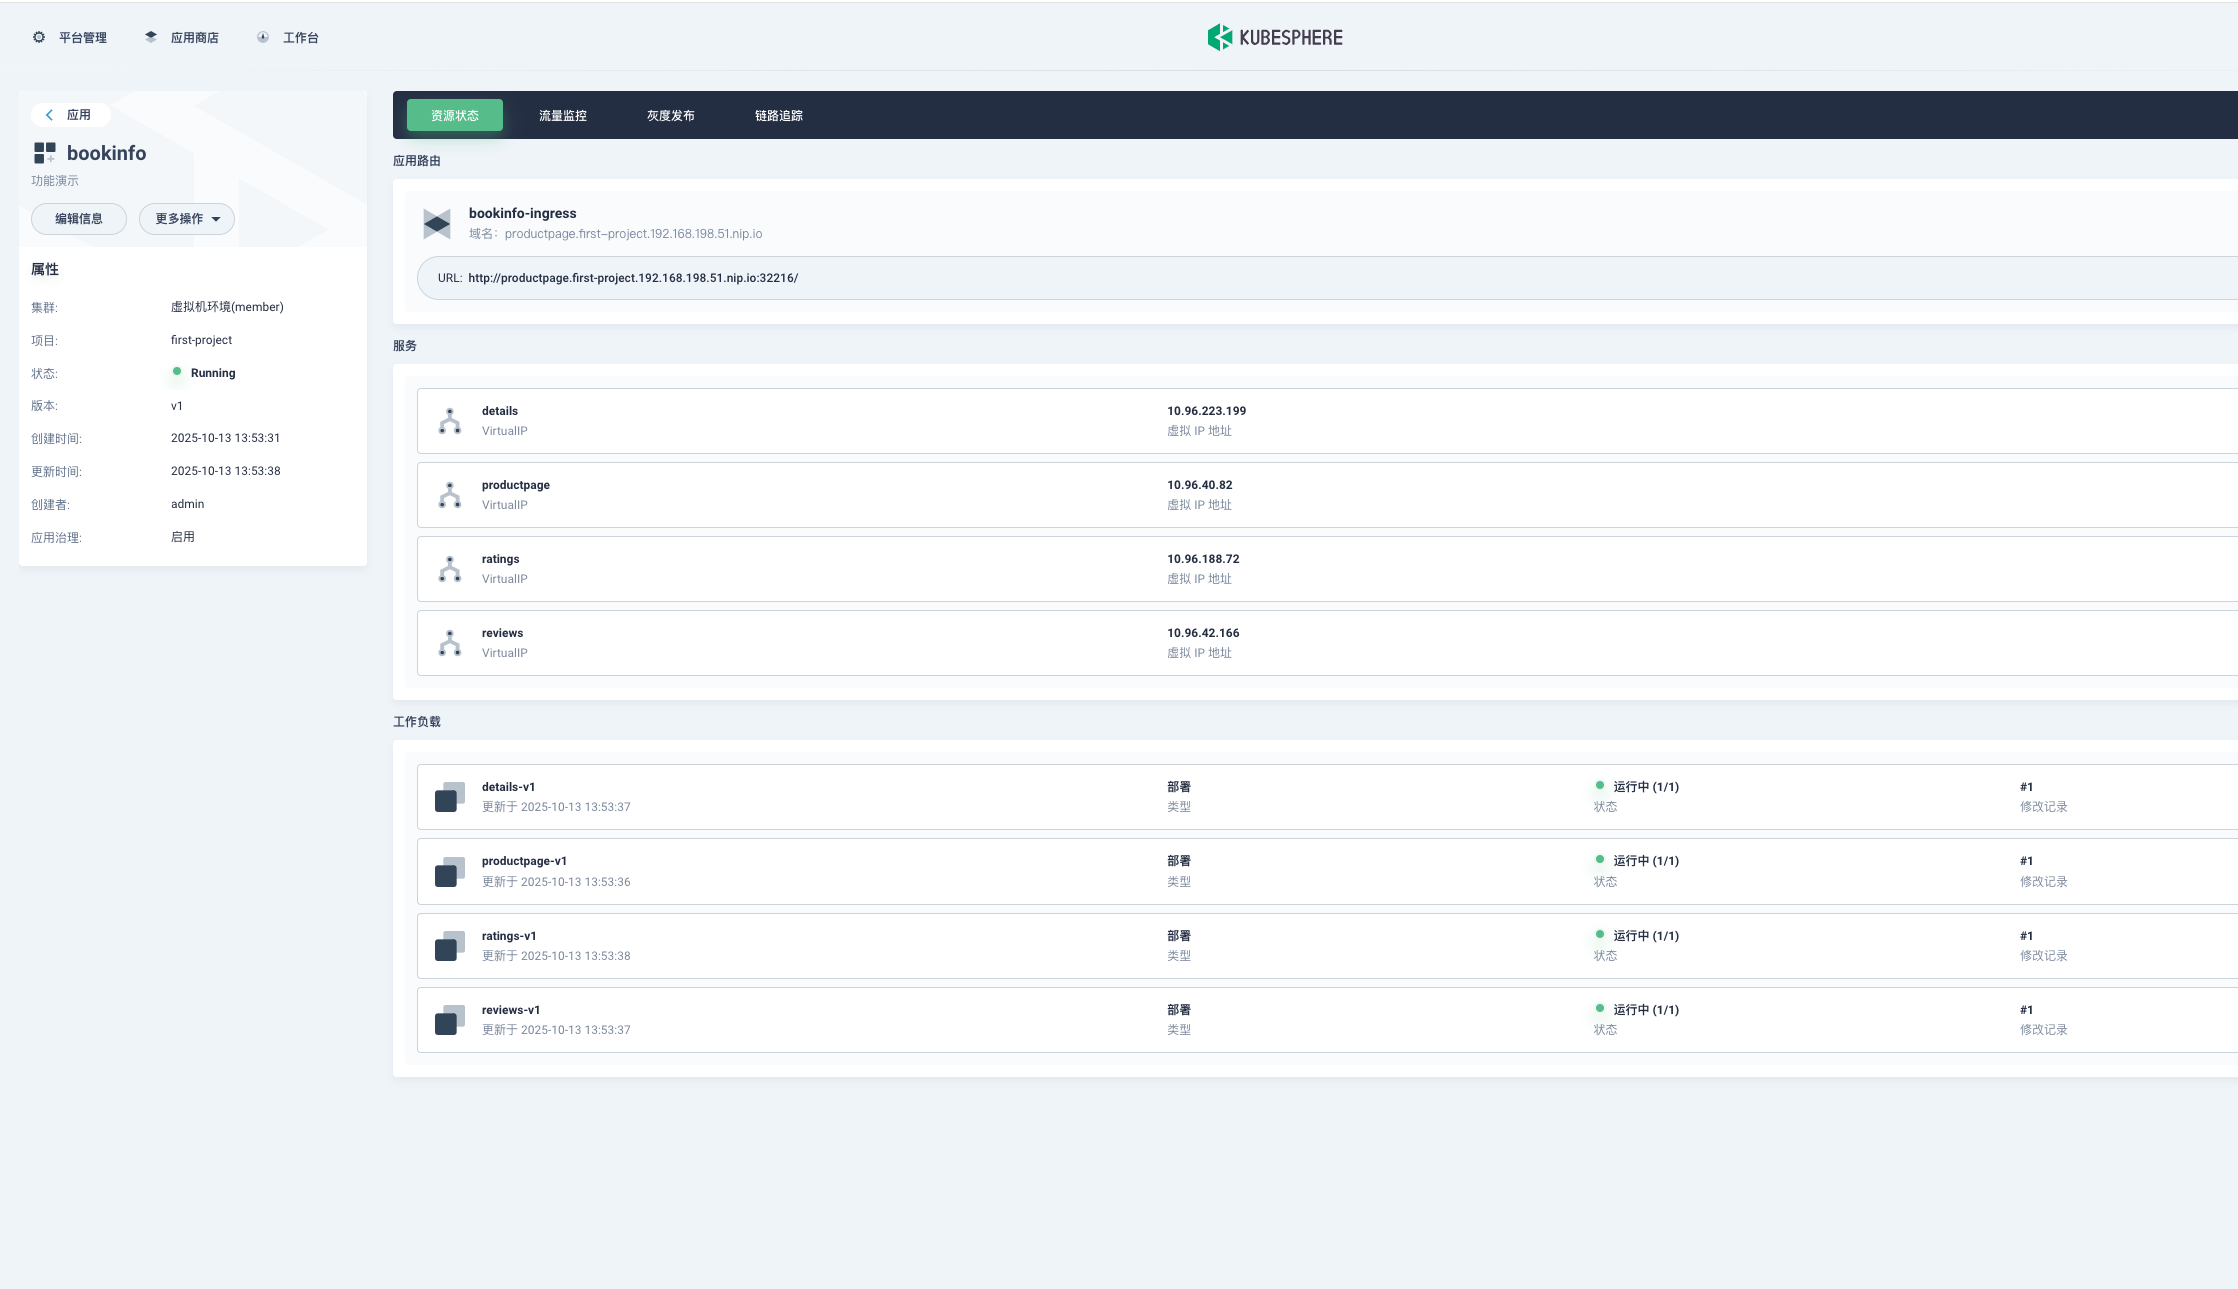
🎯 这是什么?
http://productpage.first-project.192.168.198.51.nip.io:32216/ 是一个动态DNS域名,它的工作原理是:
<任意前缀>.<IP地址>.nip.io在这个例子中:
productpage.first-project- 任意前缀(通常是服务名、项目名)192.168.198.51- 你的实际IP地址nip.io- 动态DNS服务商32216- NodePort端口
🔍 为什么能ping通和访问?
nip.io的神奇之处在于:
当DNS查询
*.192.168.198.51.nip.io时nip.io服务器直接返回
192.168.198.51所以本质上你还是通过IP地址访问,但用了域名的形式
🚀 这种设计的好处
开发测试友好 - 不需要购买域名和配置DNS
多环境管理 - 可以用不同前缀区分服务:
# 同一IP的不同服务
http://reviews.192.168.198.51.nip.io:32216/
http://details.192.168.198.51.nip.io:32216/
符合Ingress规范 - 让配置看起来更像生产环境
🛠 在实际使用中
对于Bookinfo项目:
这个地址就是你的Bookinfo应用入口
可以直接在浏览器中访问
适合演示和测试
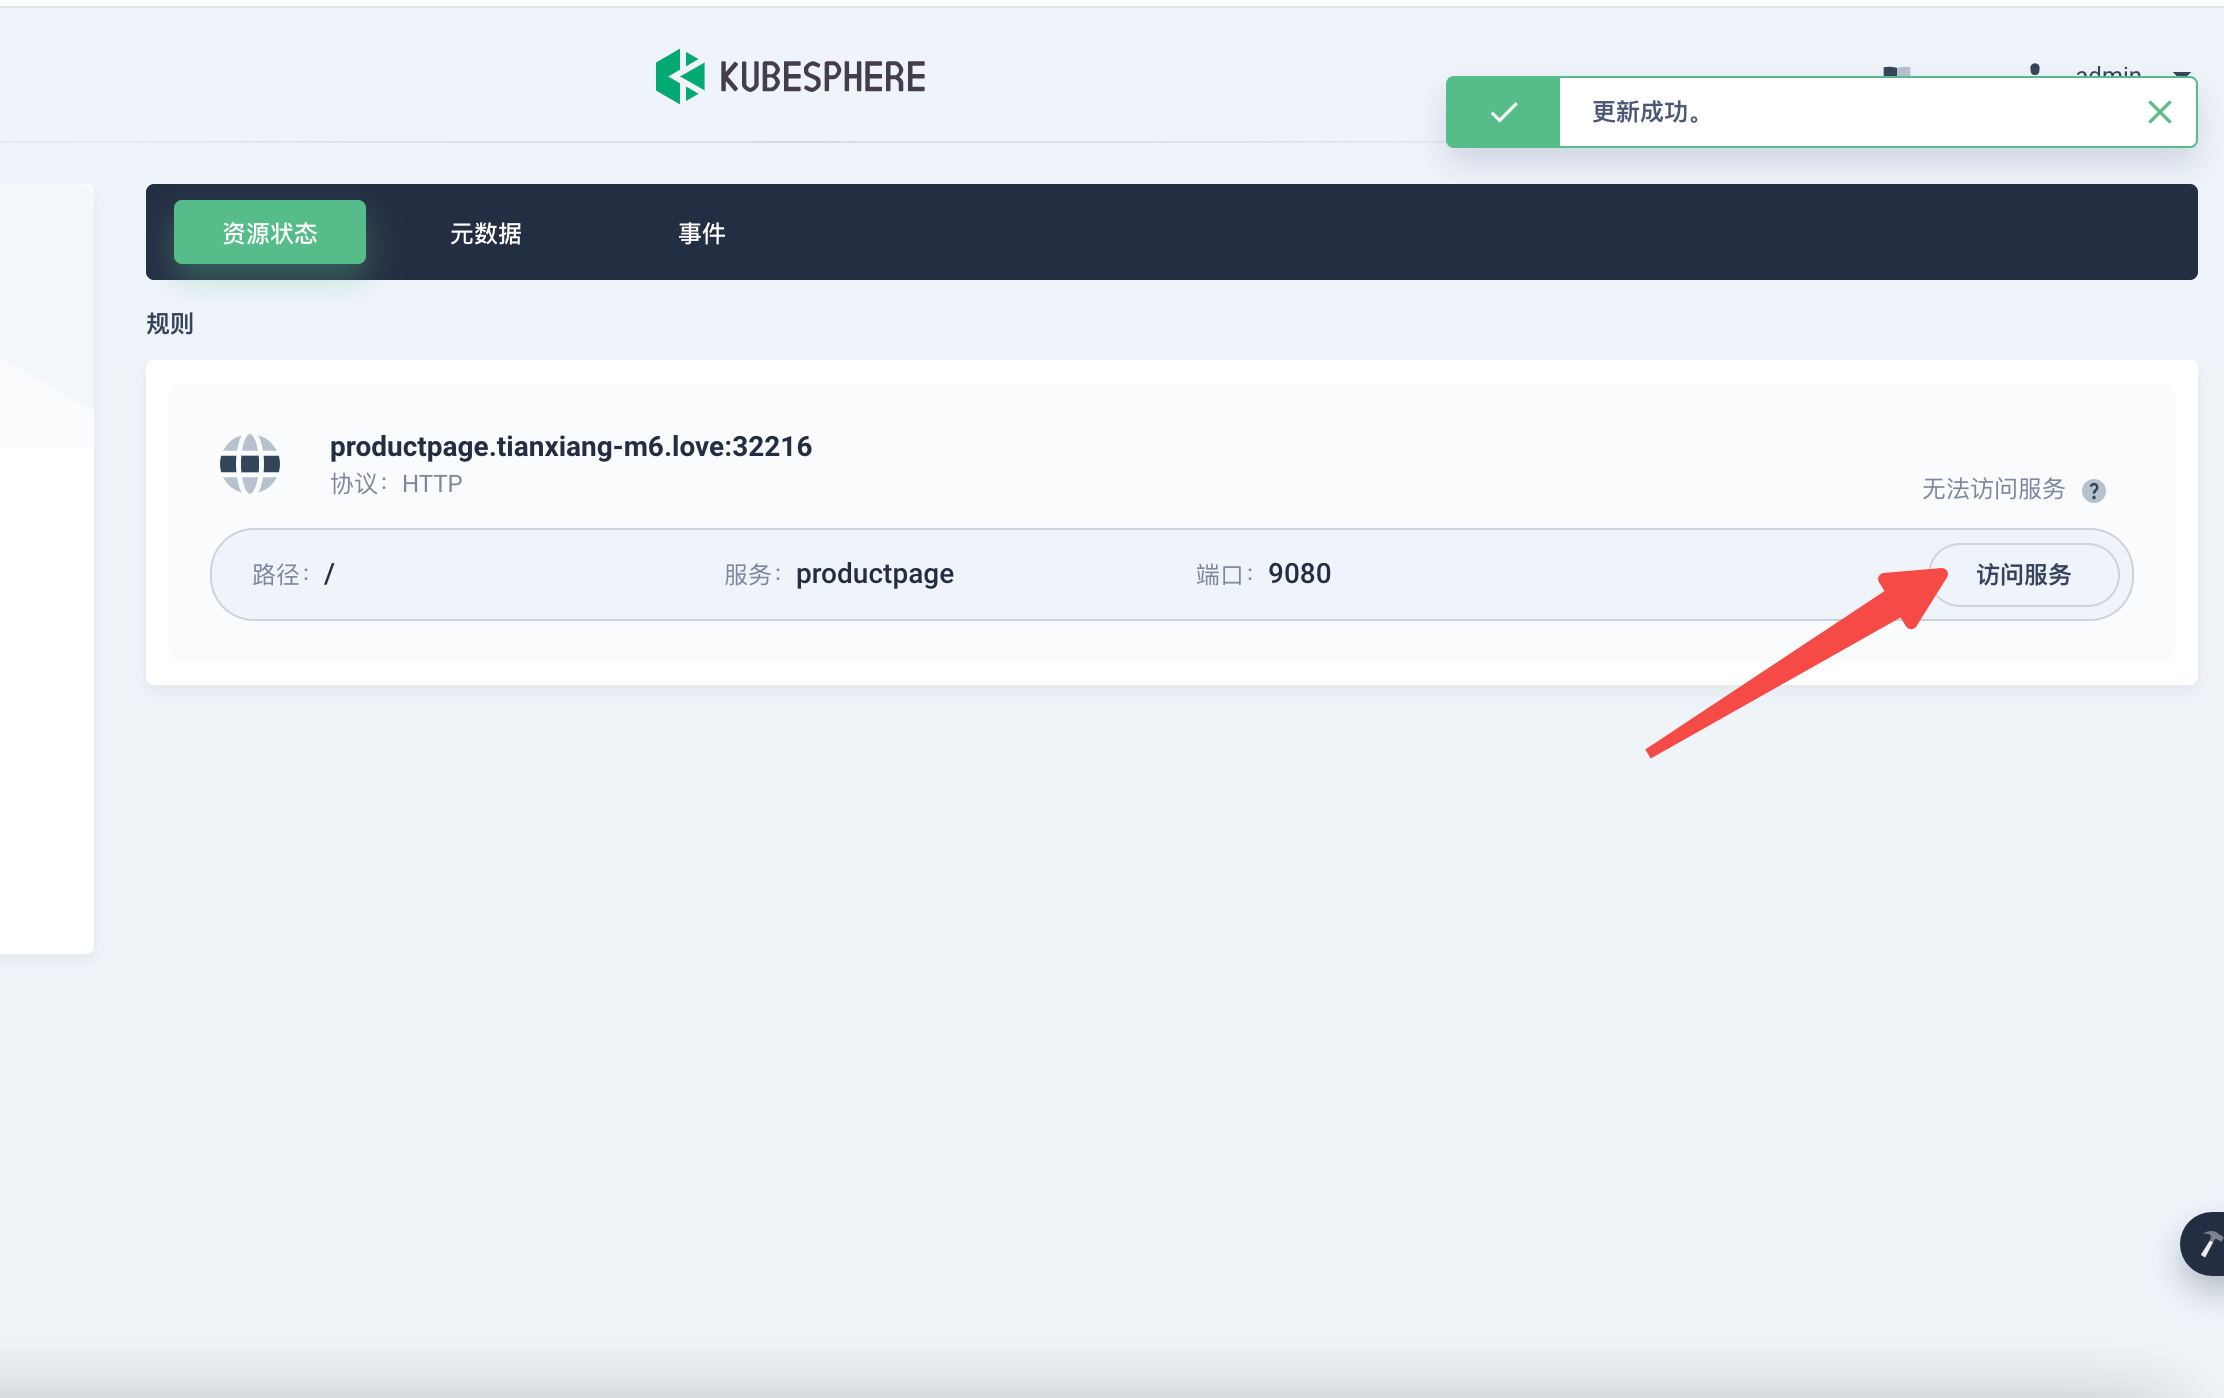
1.2 修改应用路由
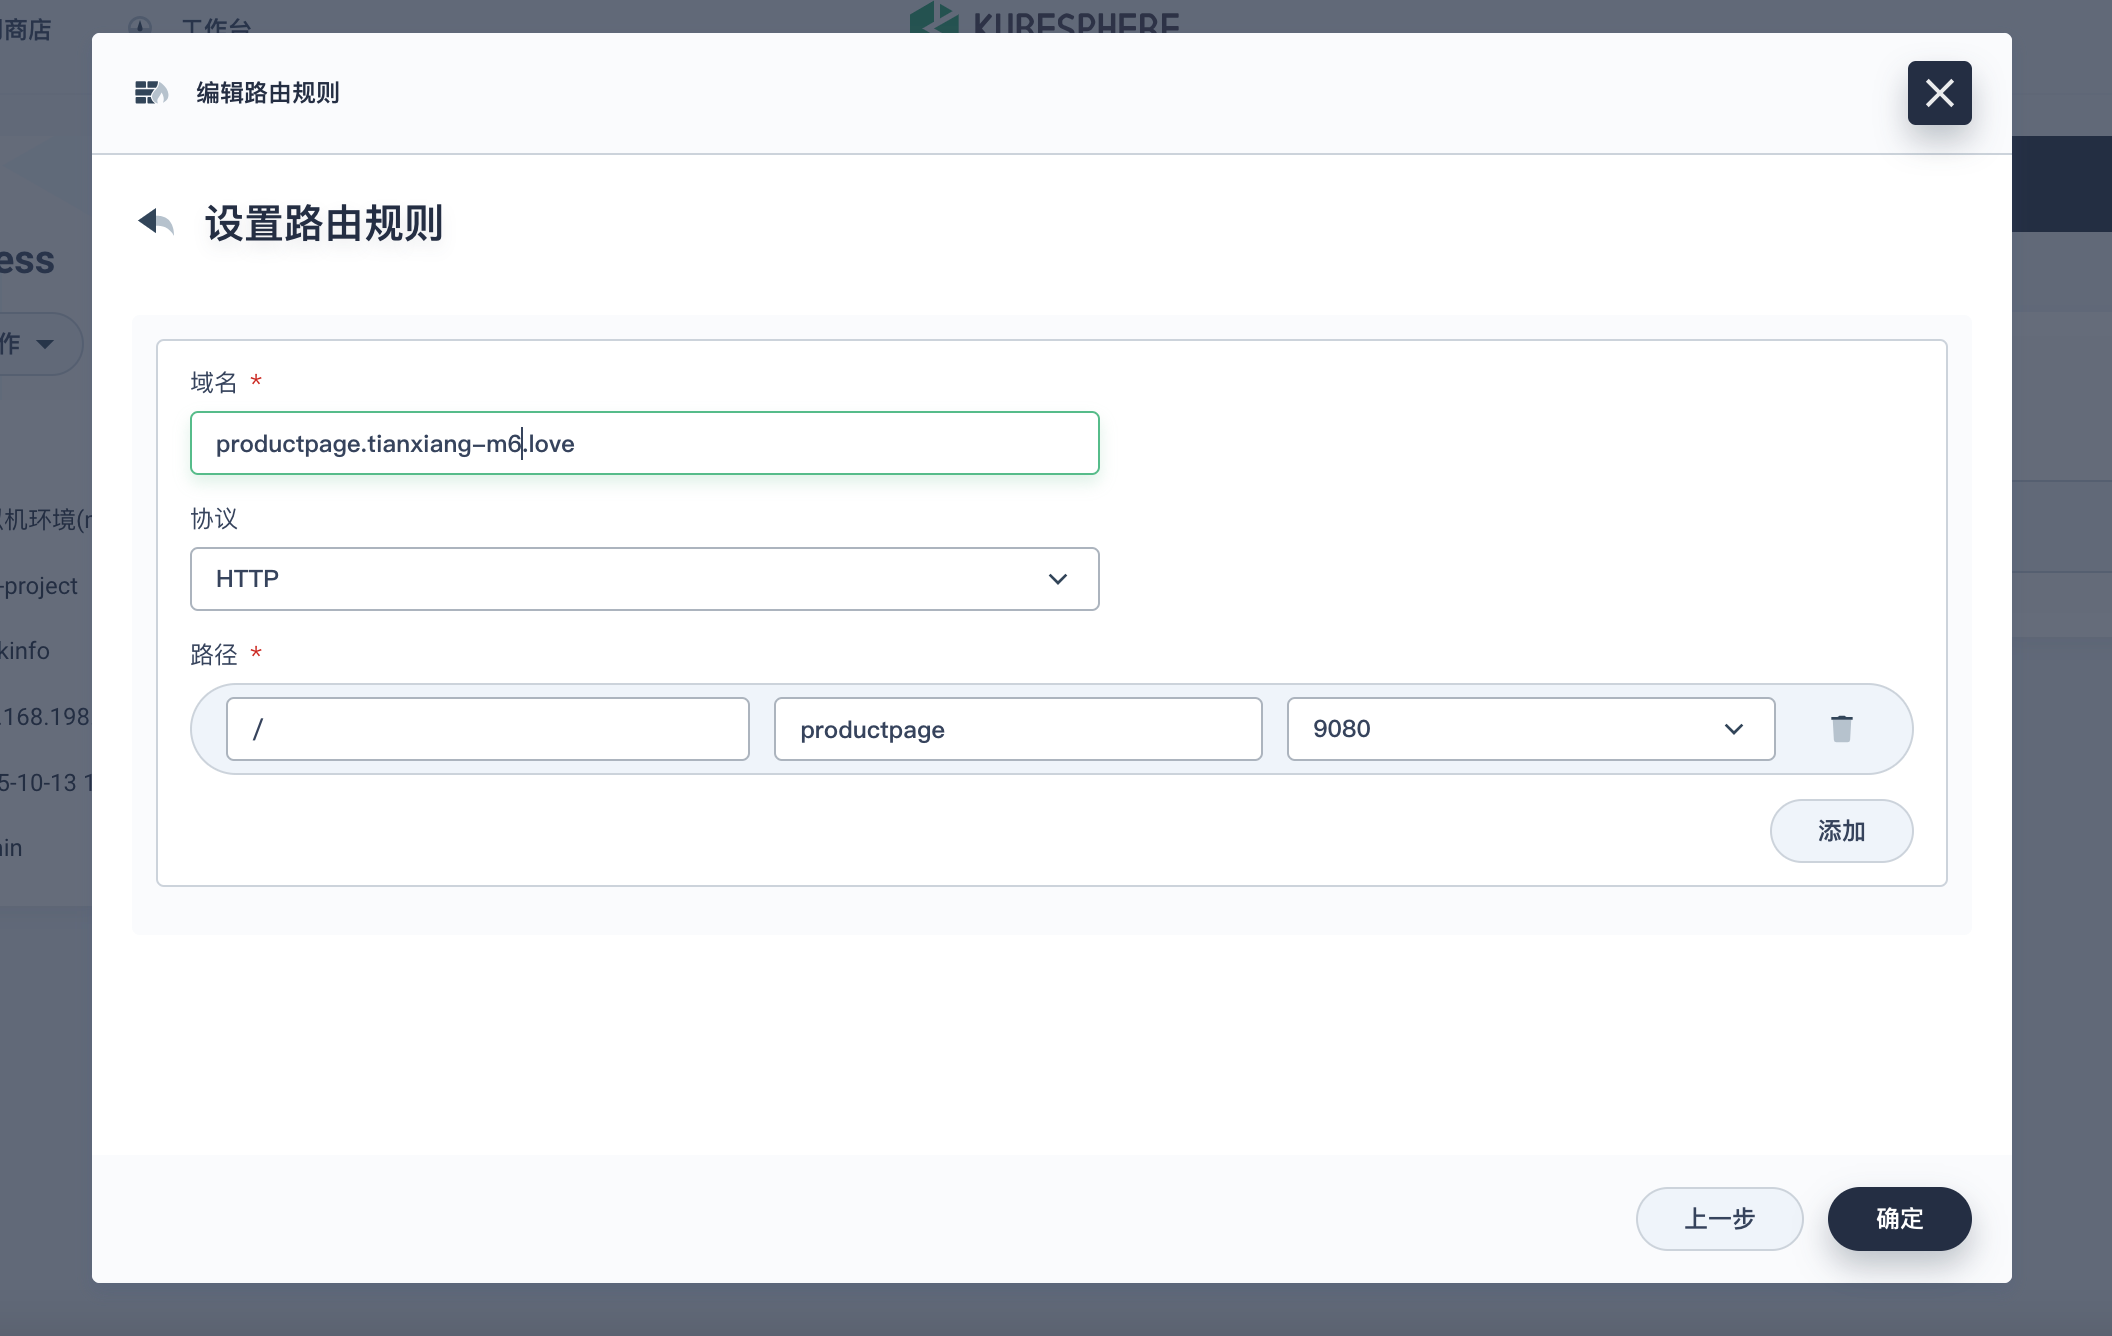
配置域名解析
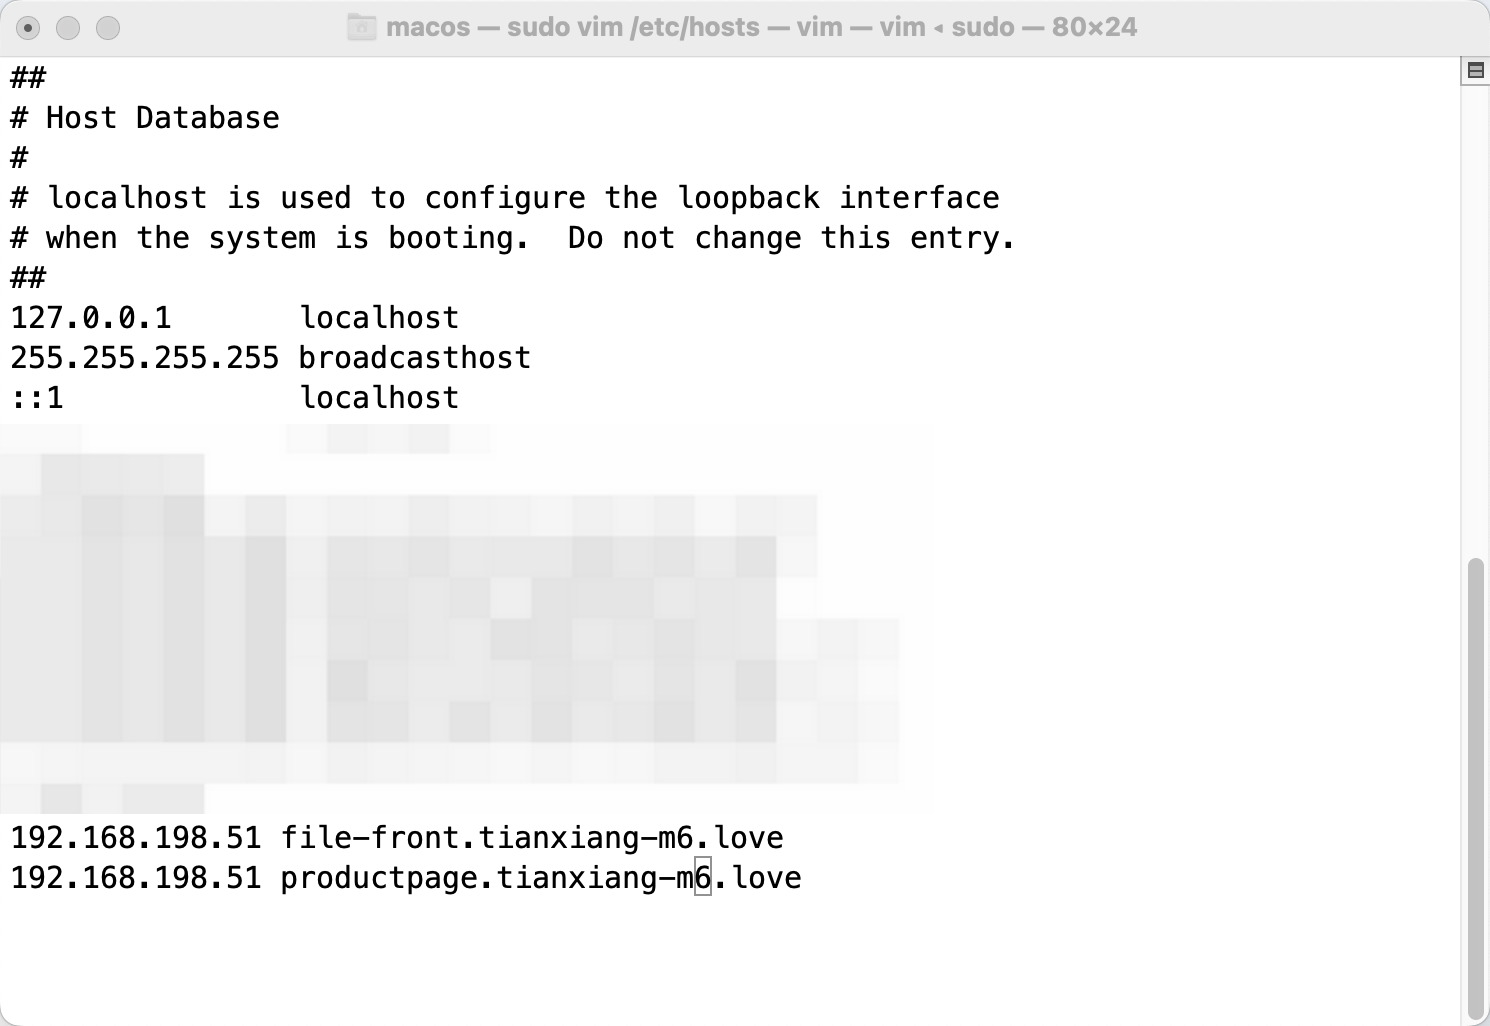
测试访问
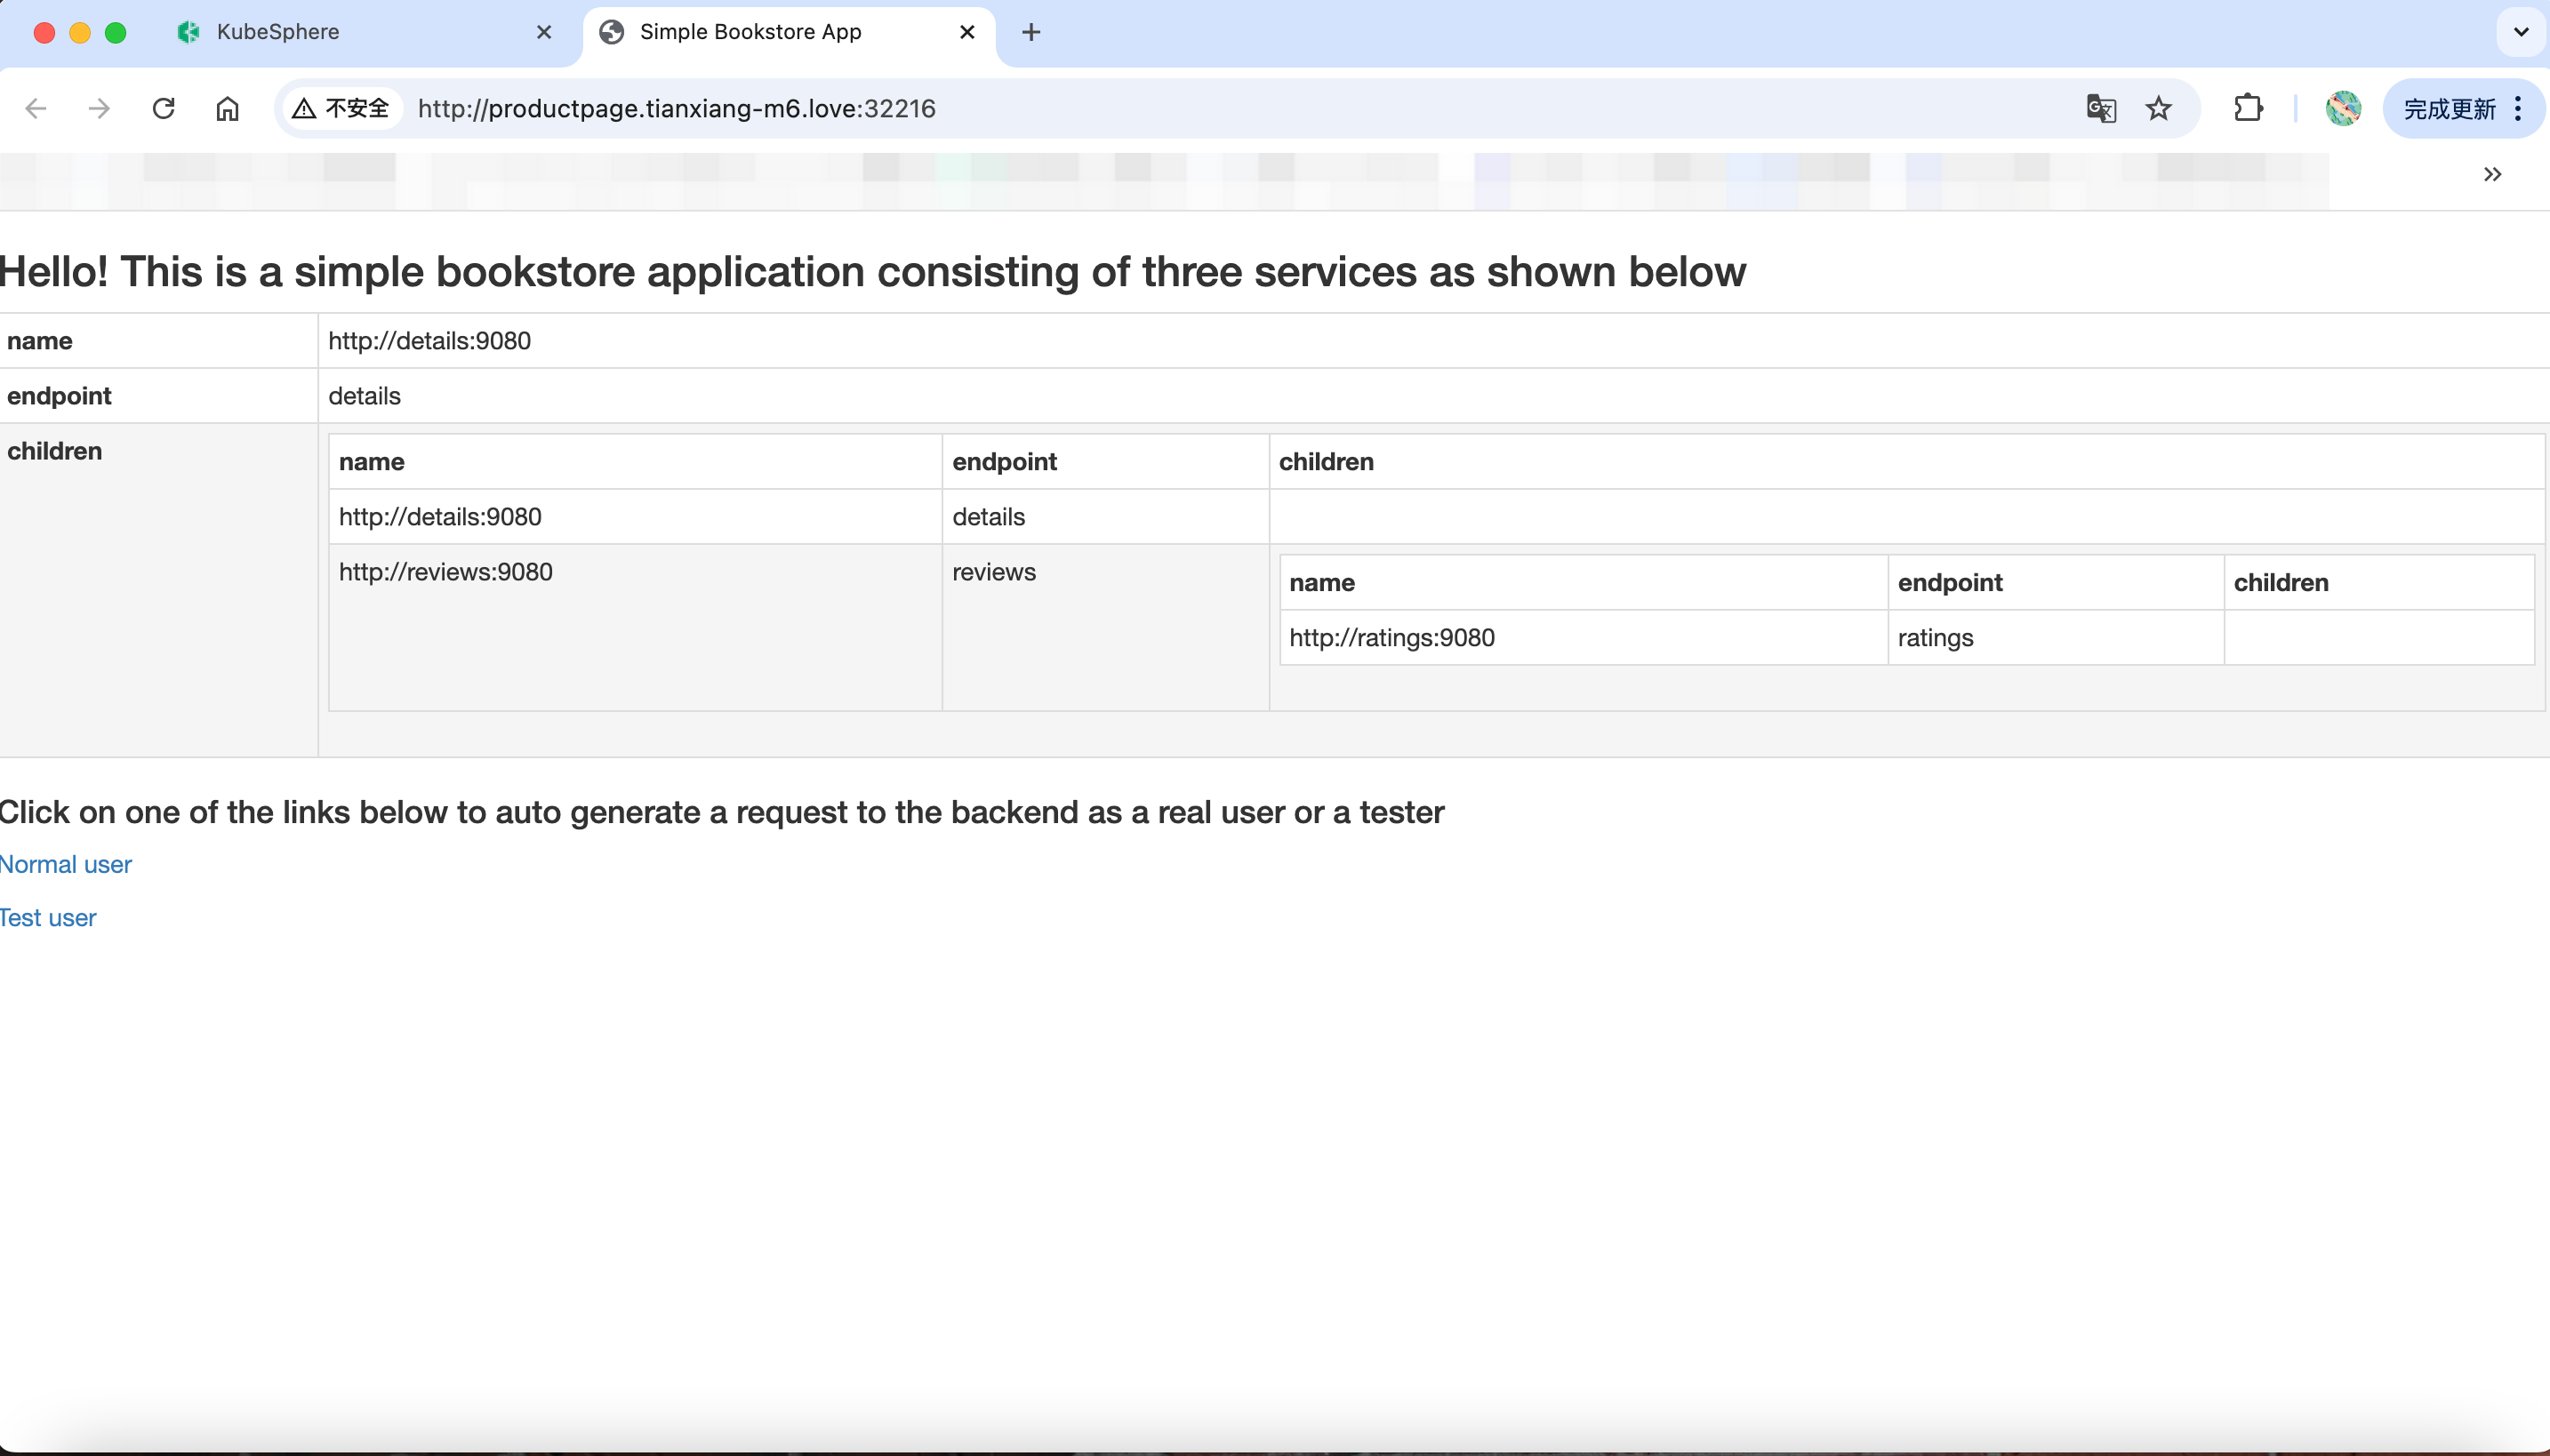
1.3 测试访问域名不加端口
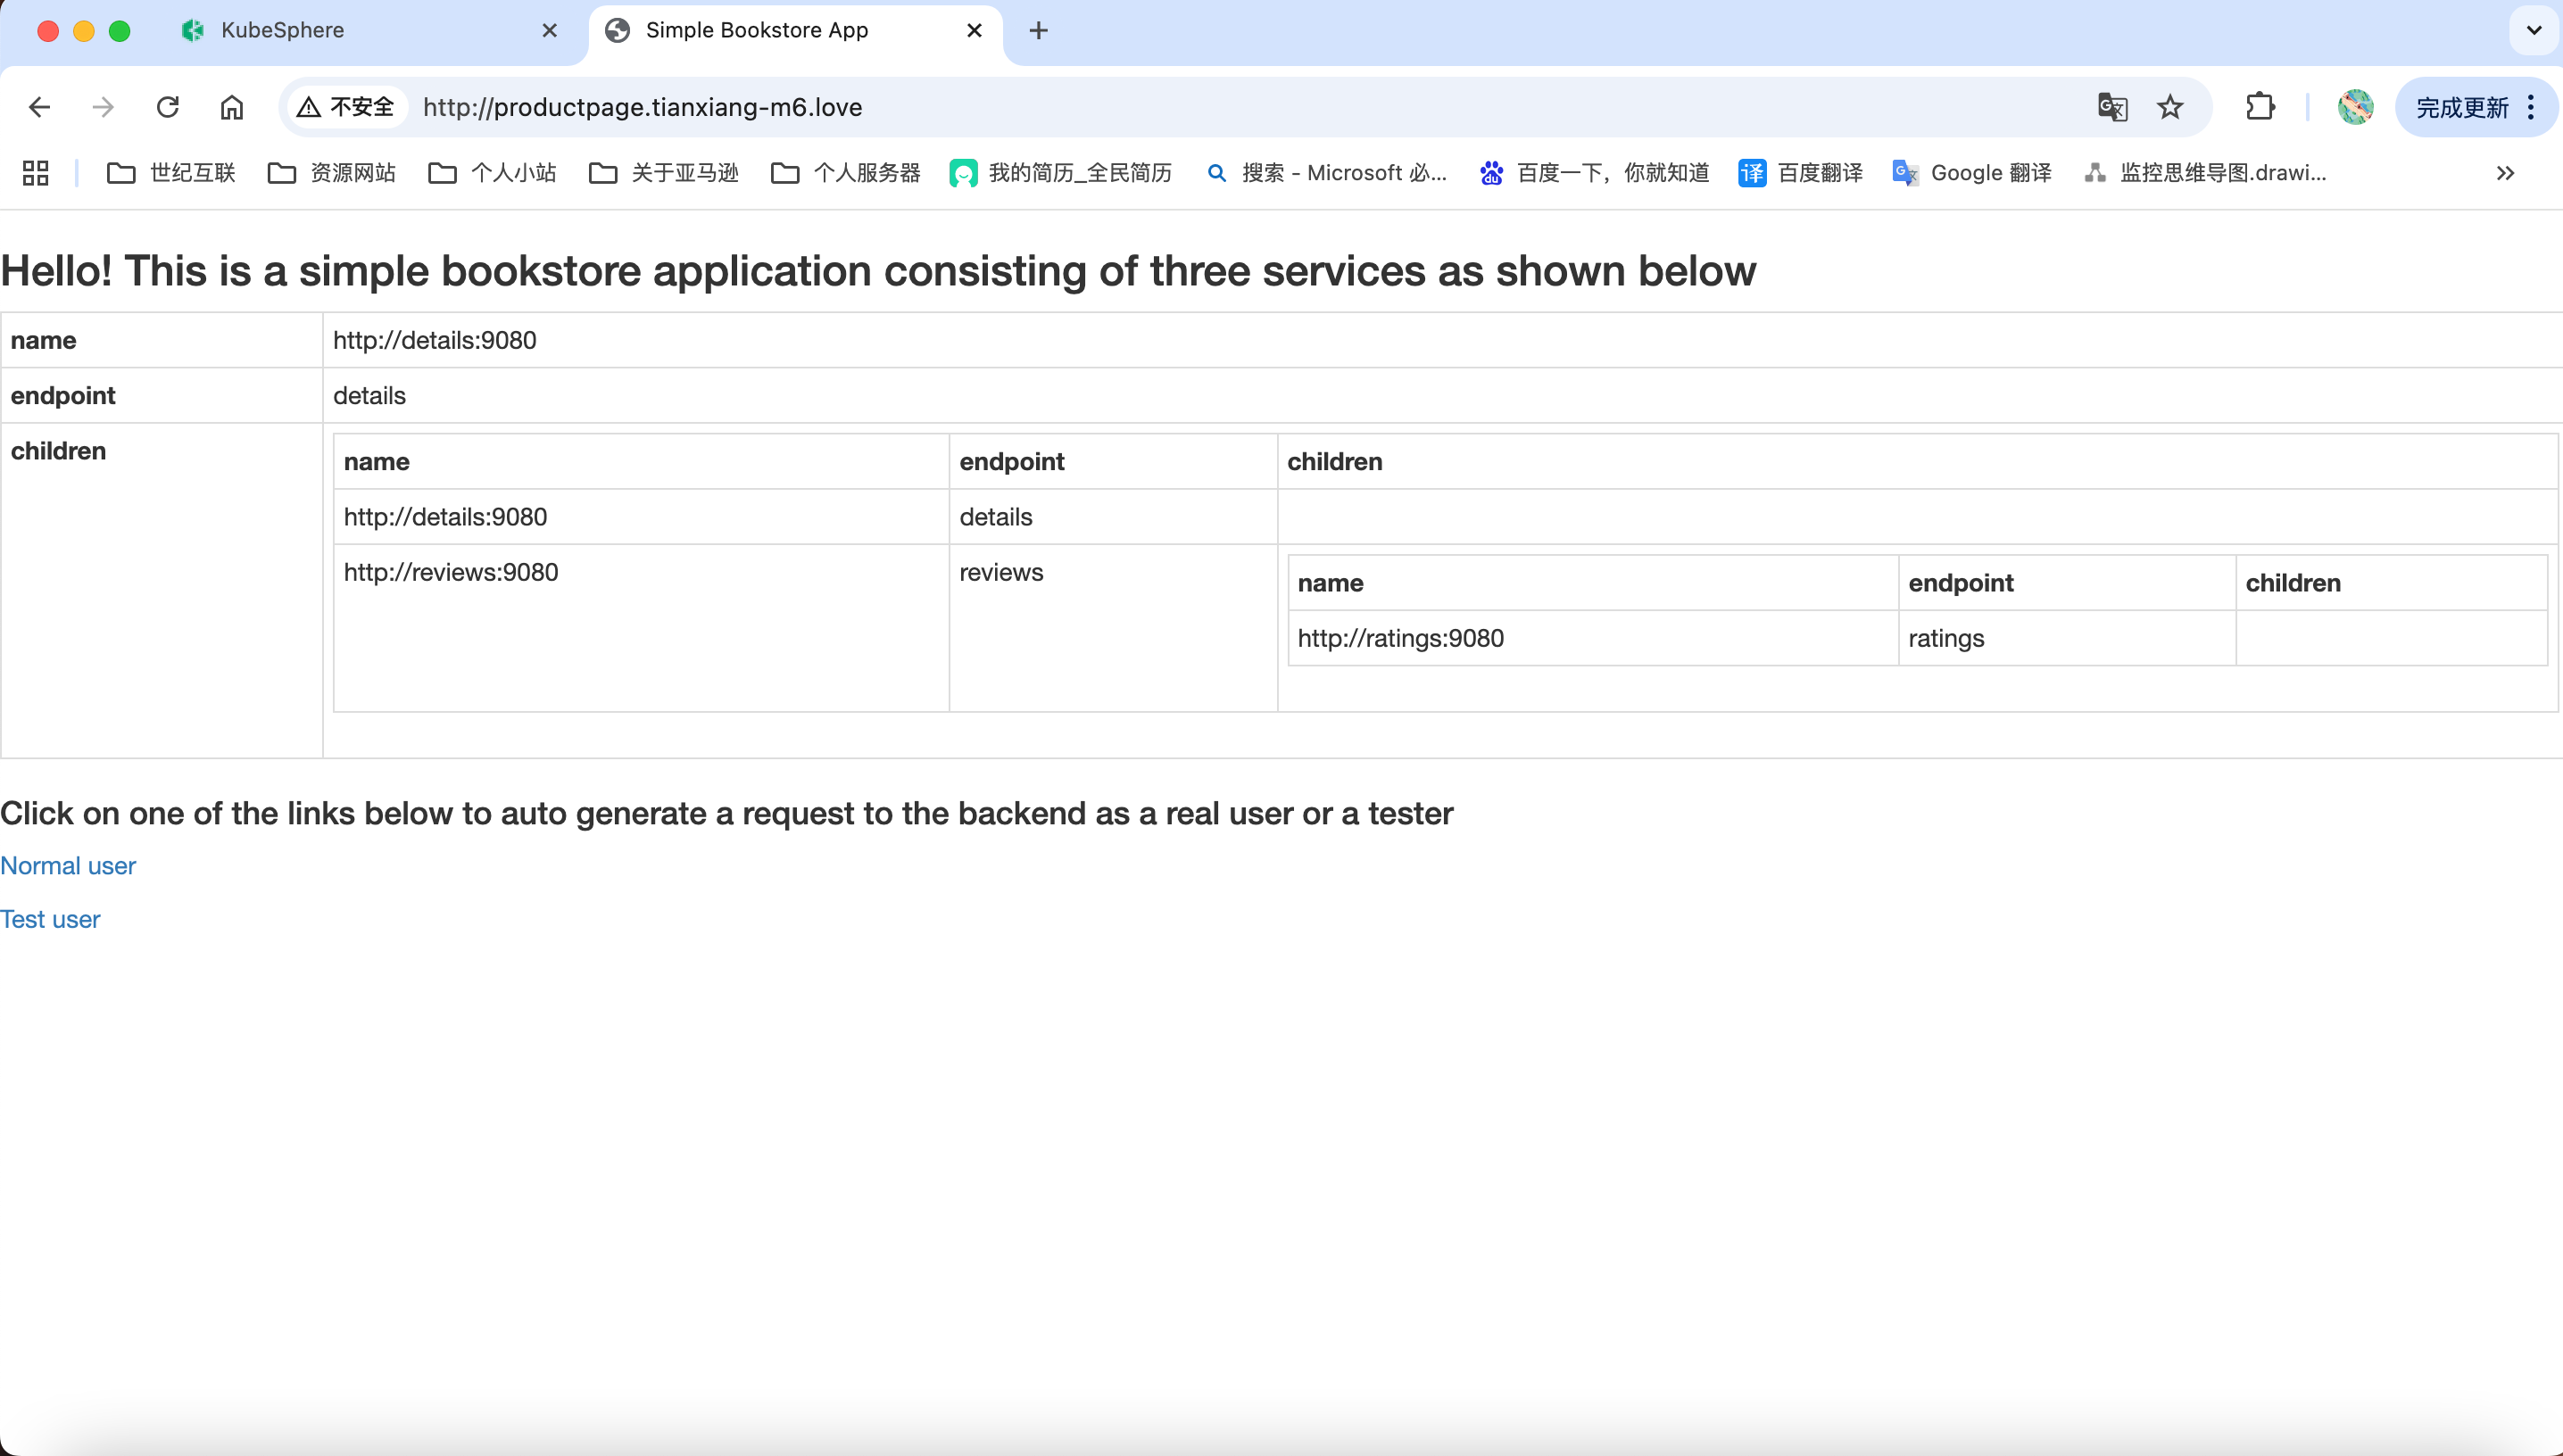
查看 nginx 日志

五、灰度发布
Kubernetes灰度发布实现平滑应用升级。蓝绿部署:同时运行新旧两版,通过流量切换实现零停机。金丝雀发布:将少量流量导入新版本,验证通过后逐步扩大比例。流量镜像:复制生产流量到新版本进行真实测试,不影响线上用户。三种策略均通过Service Mesh精细控制流量分配。
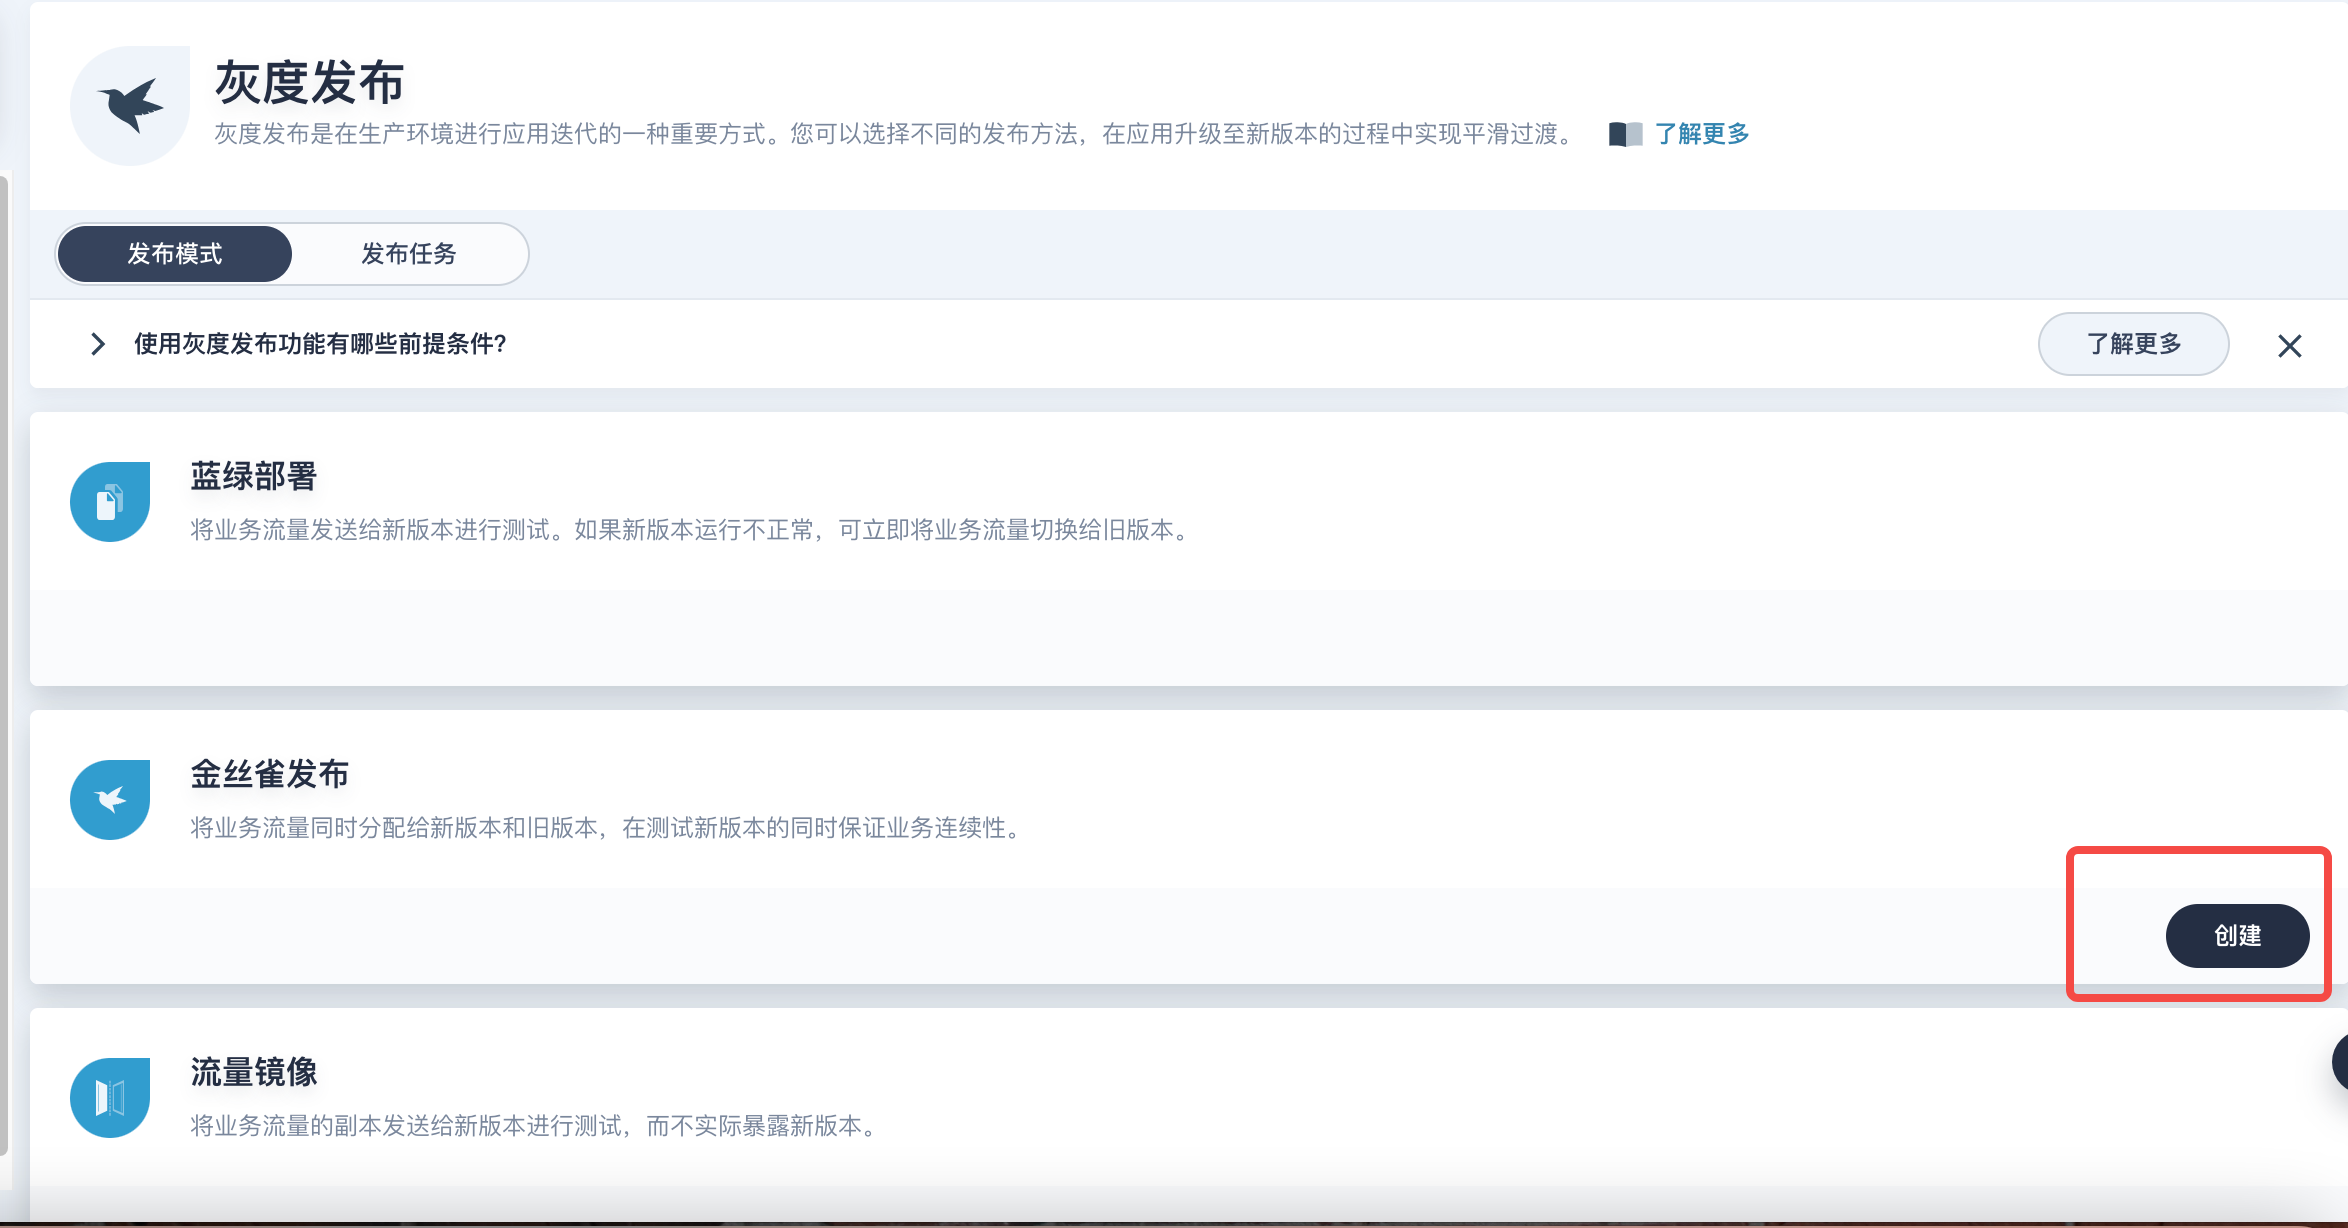
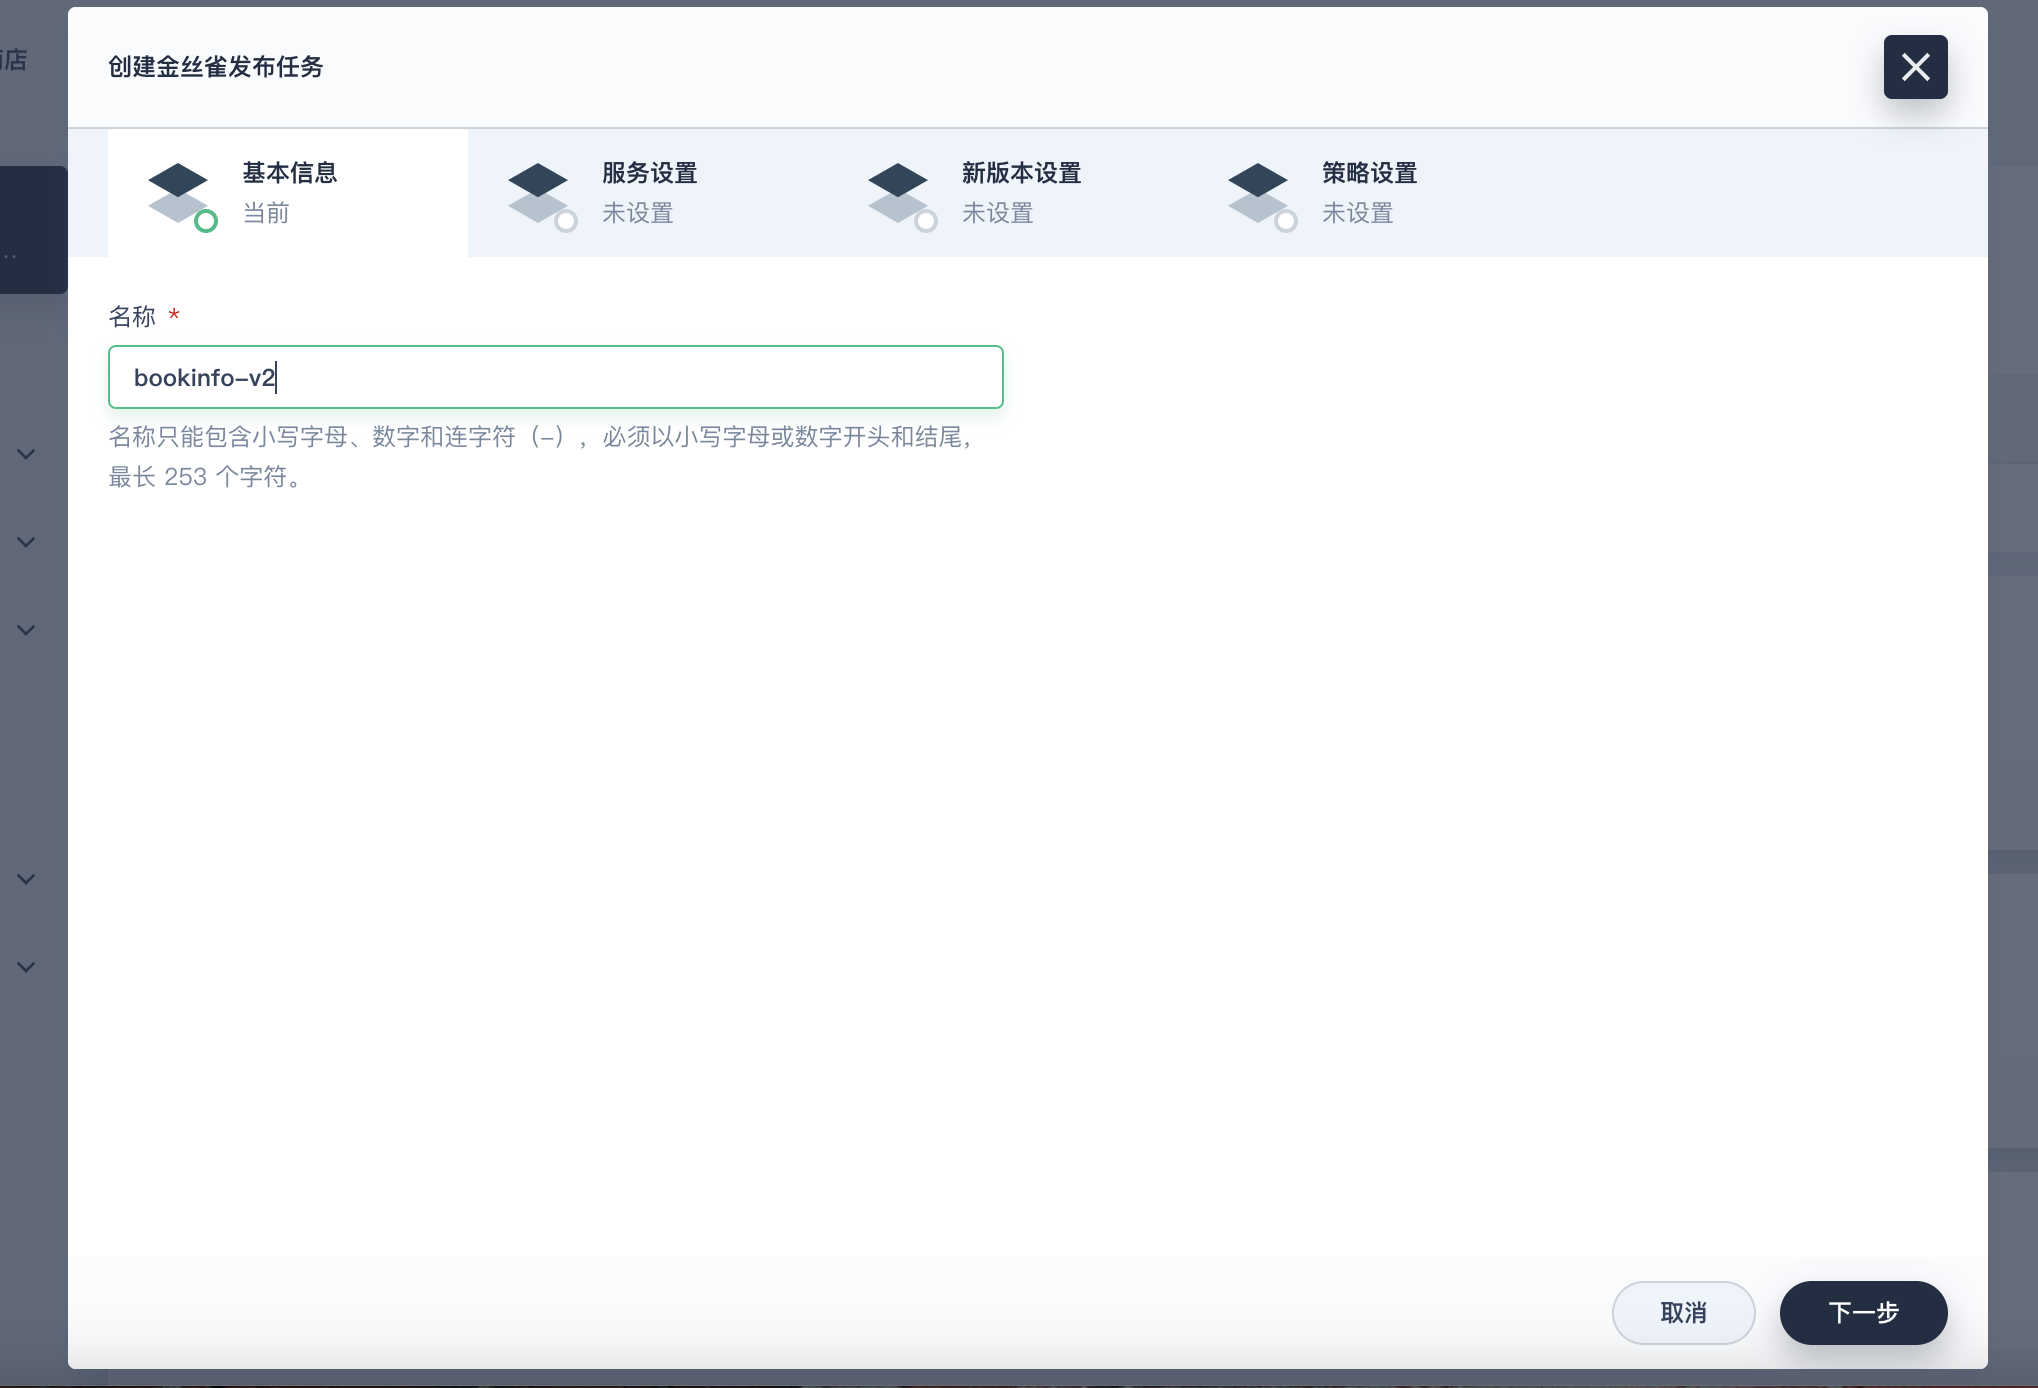
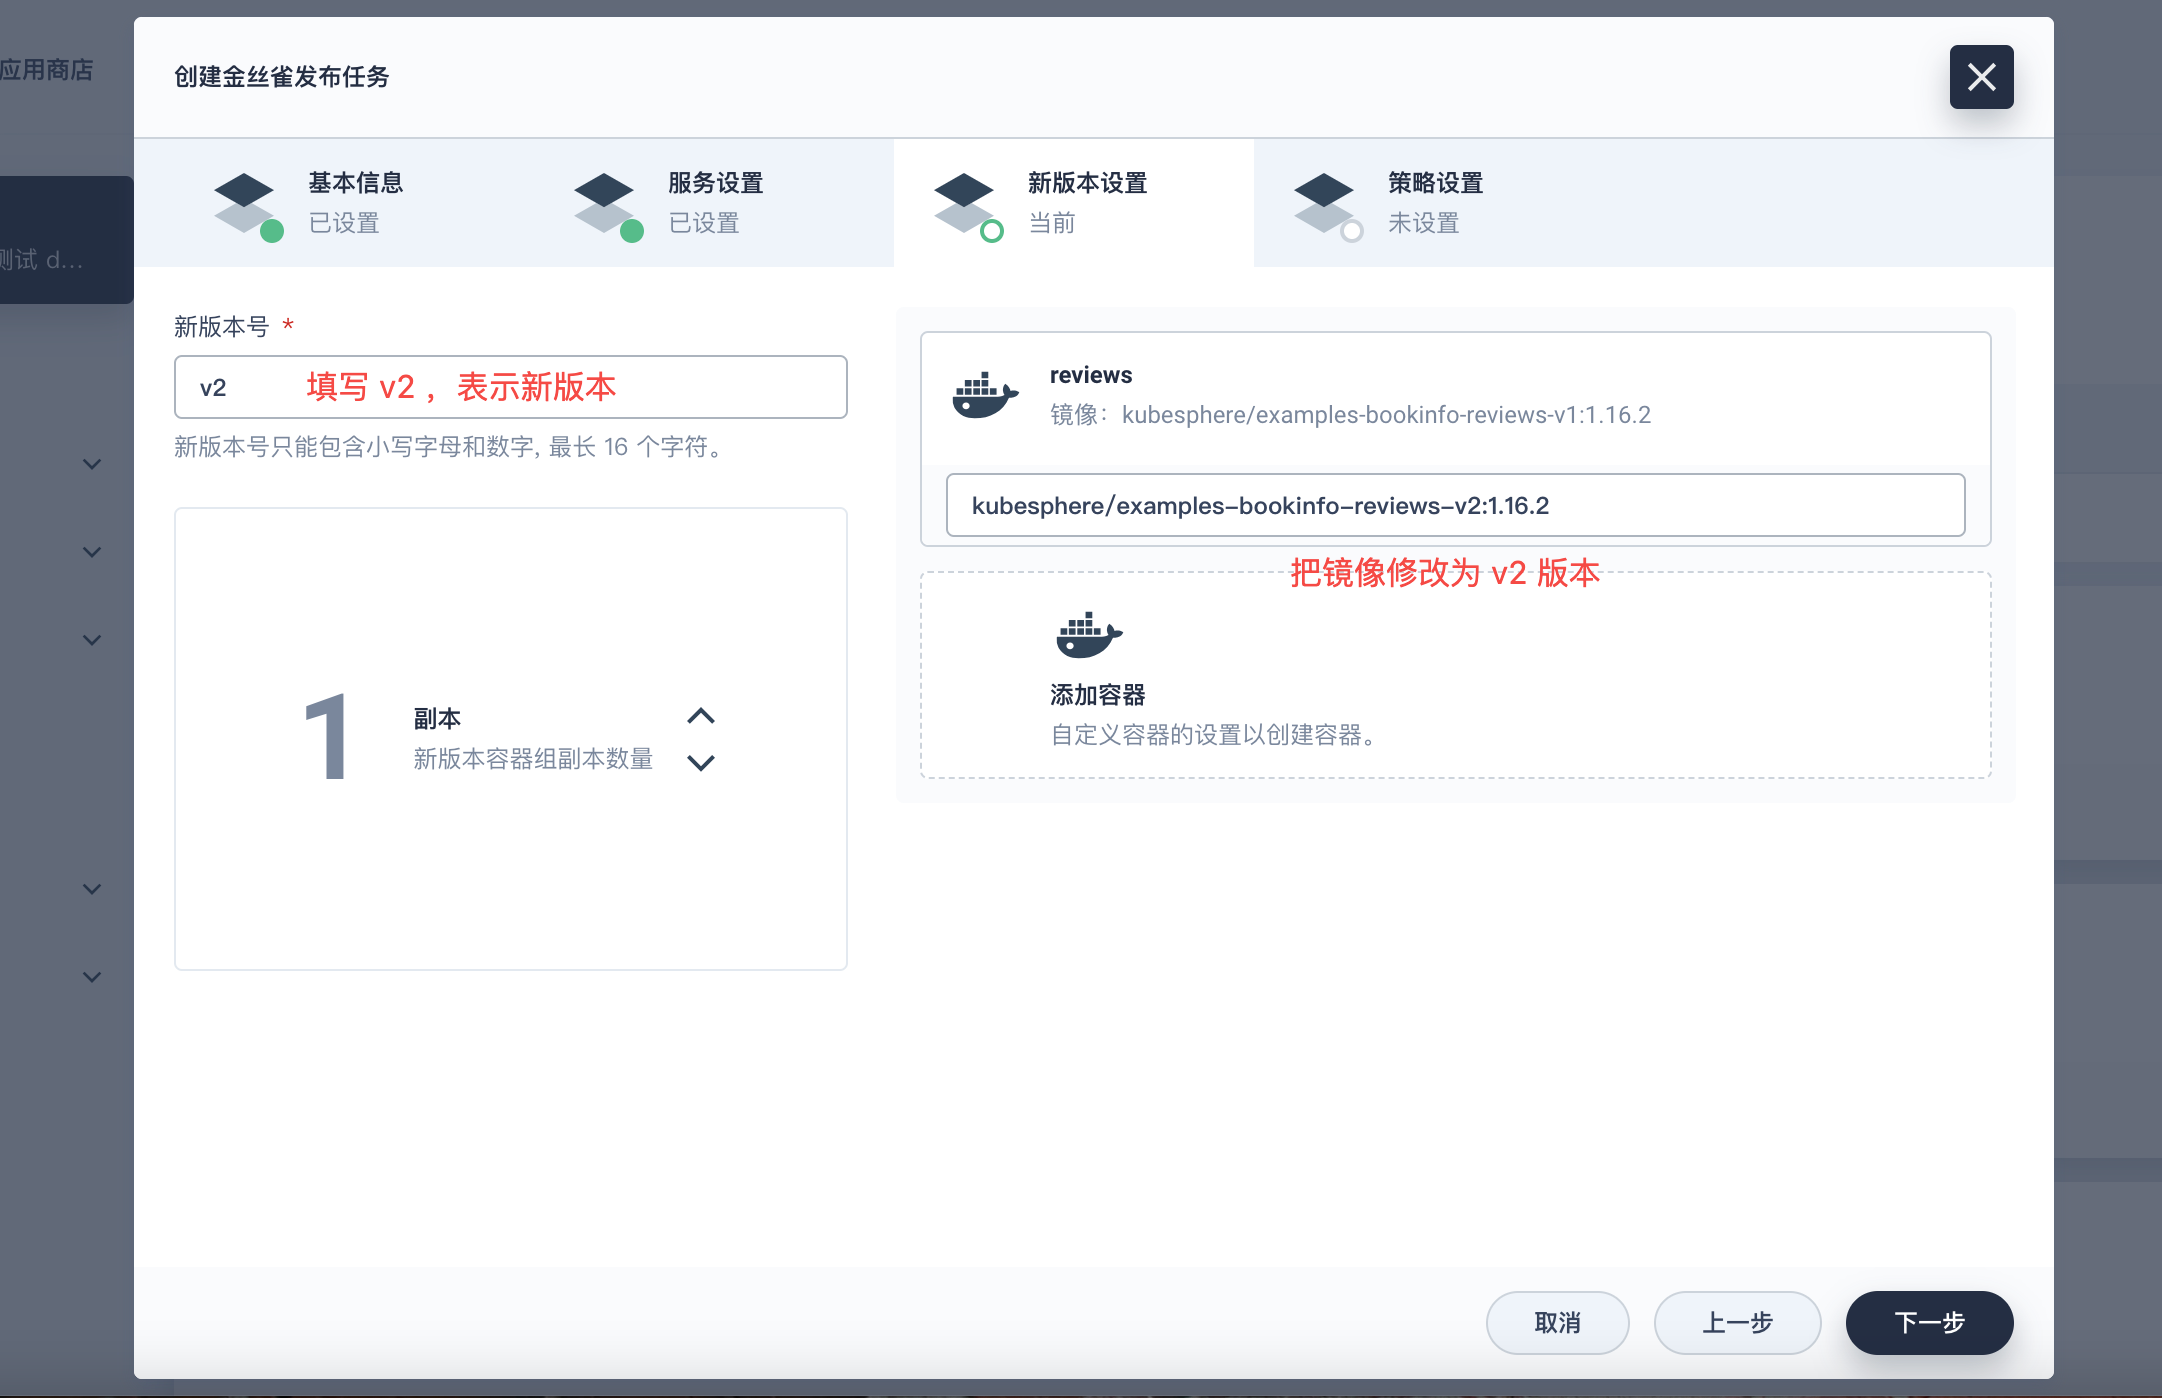
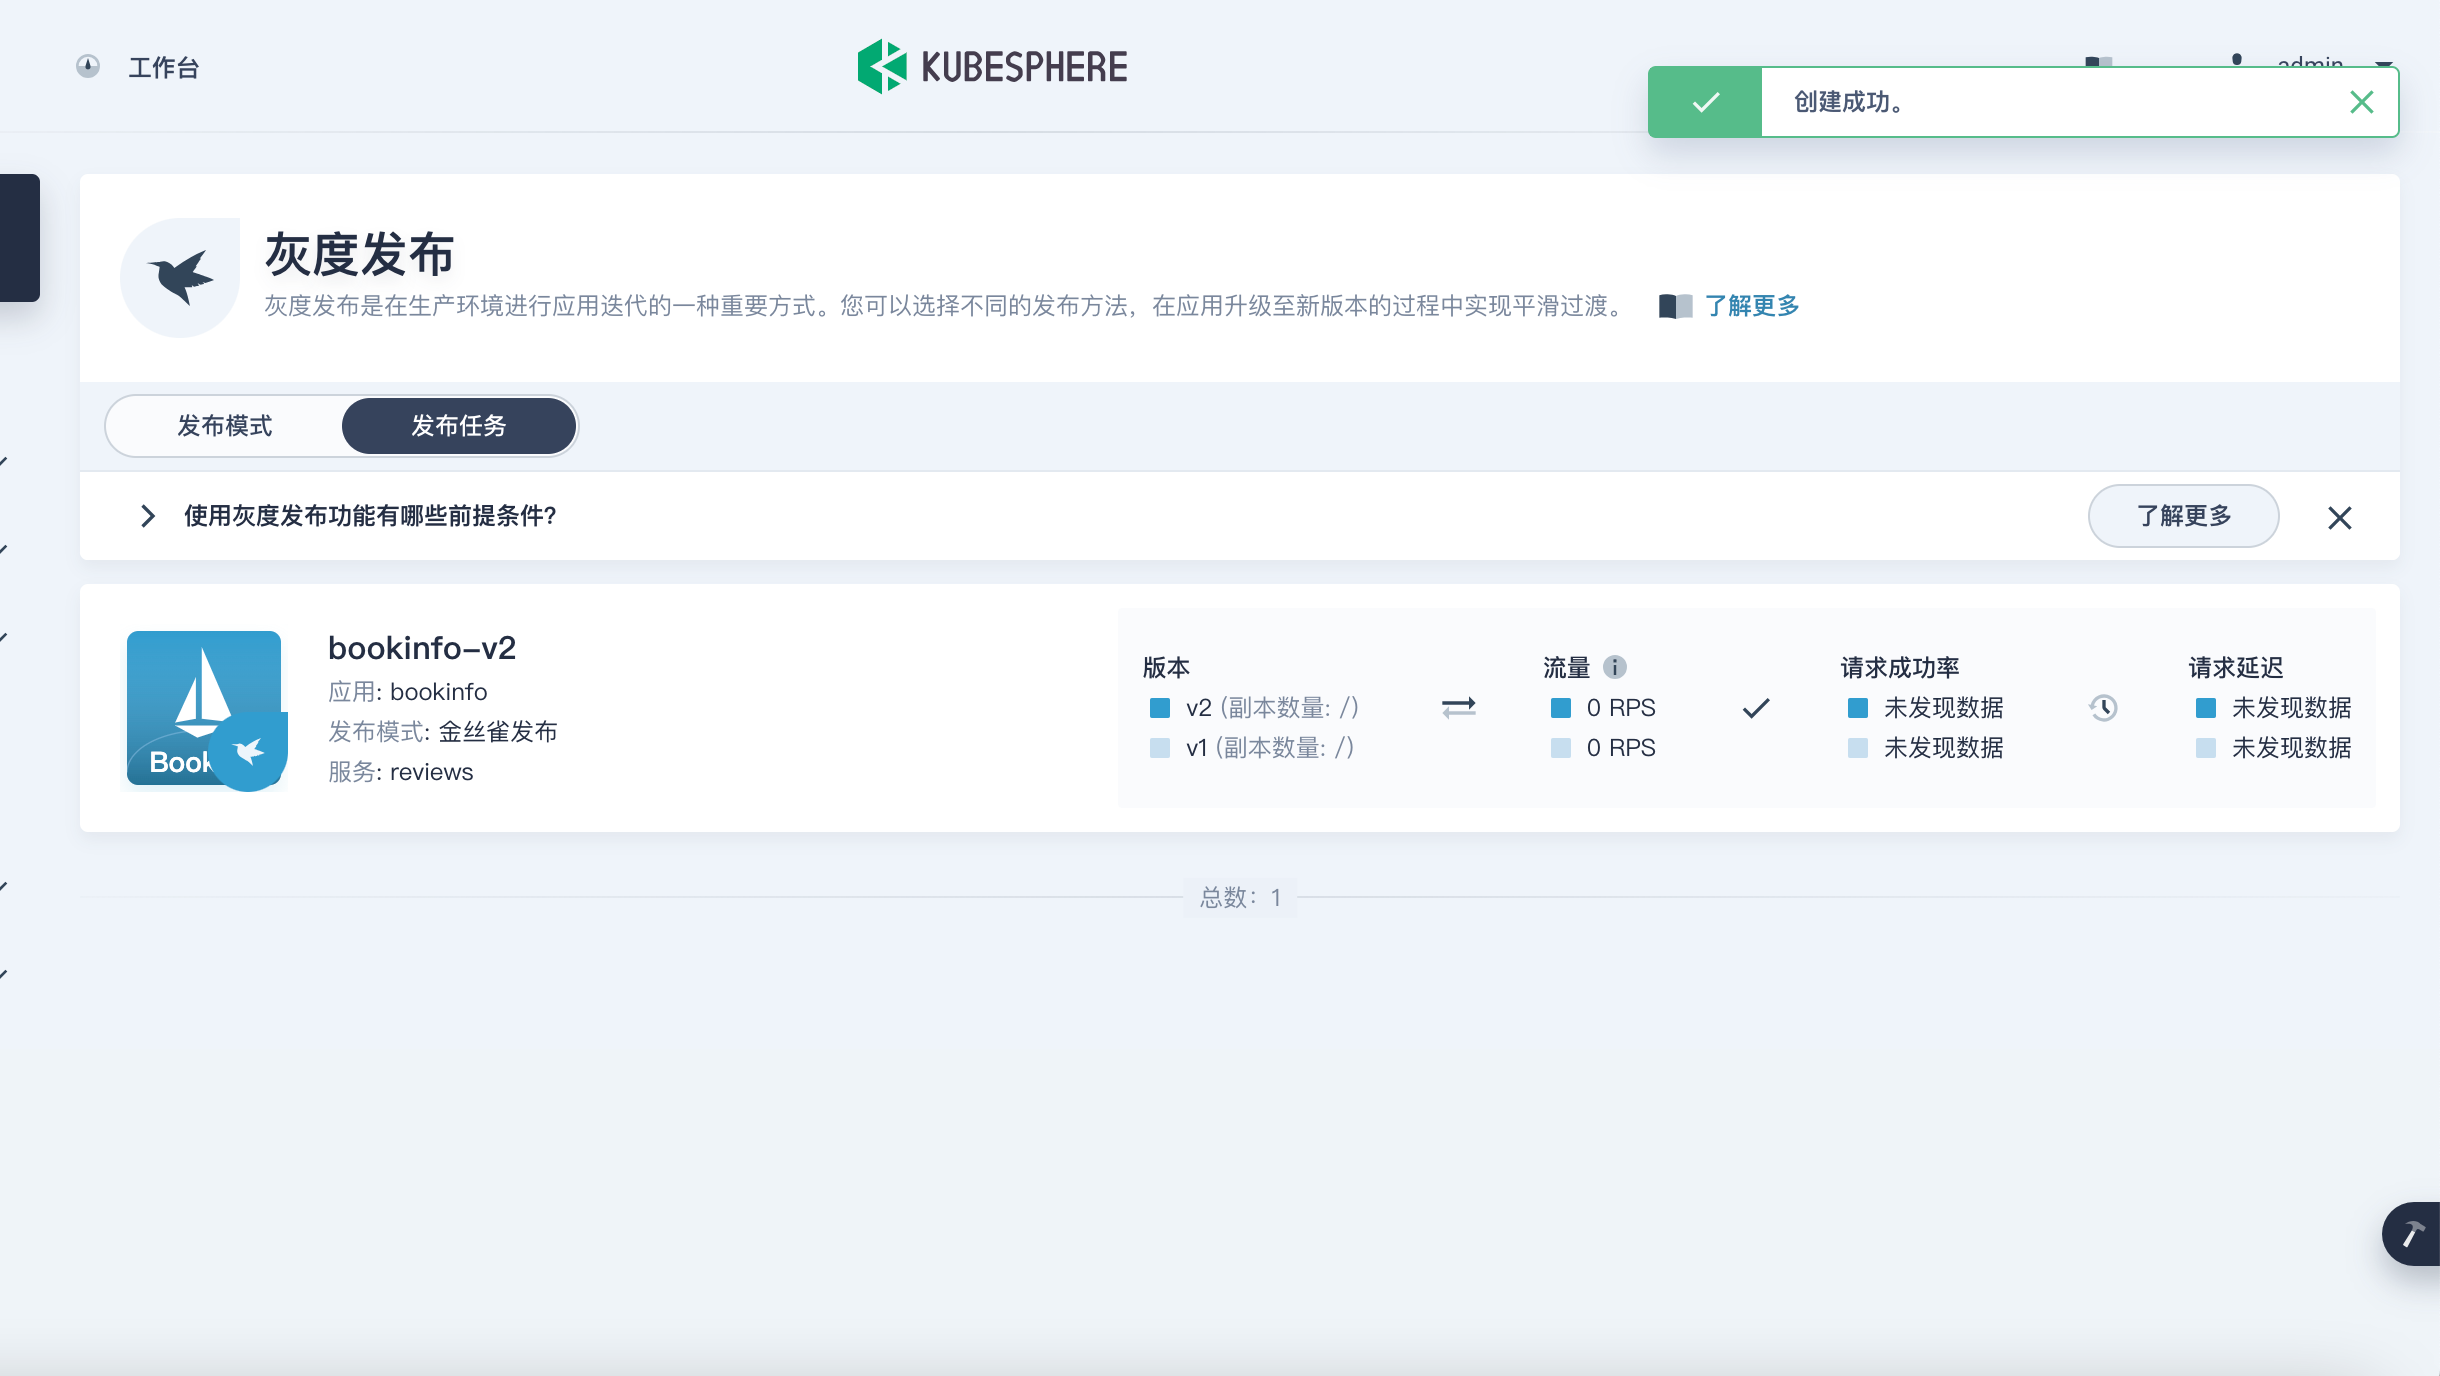
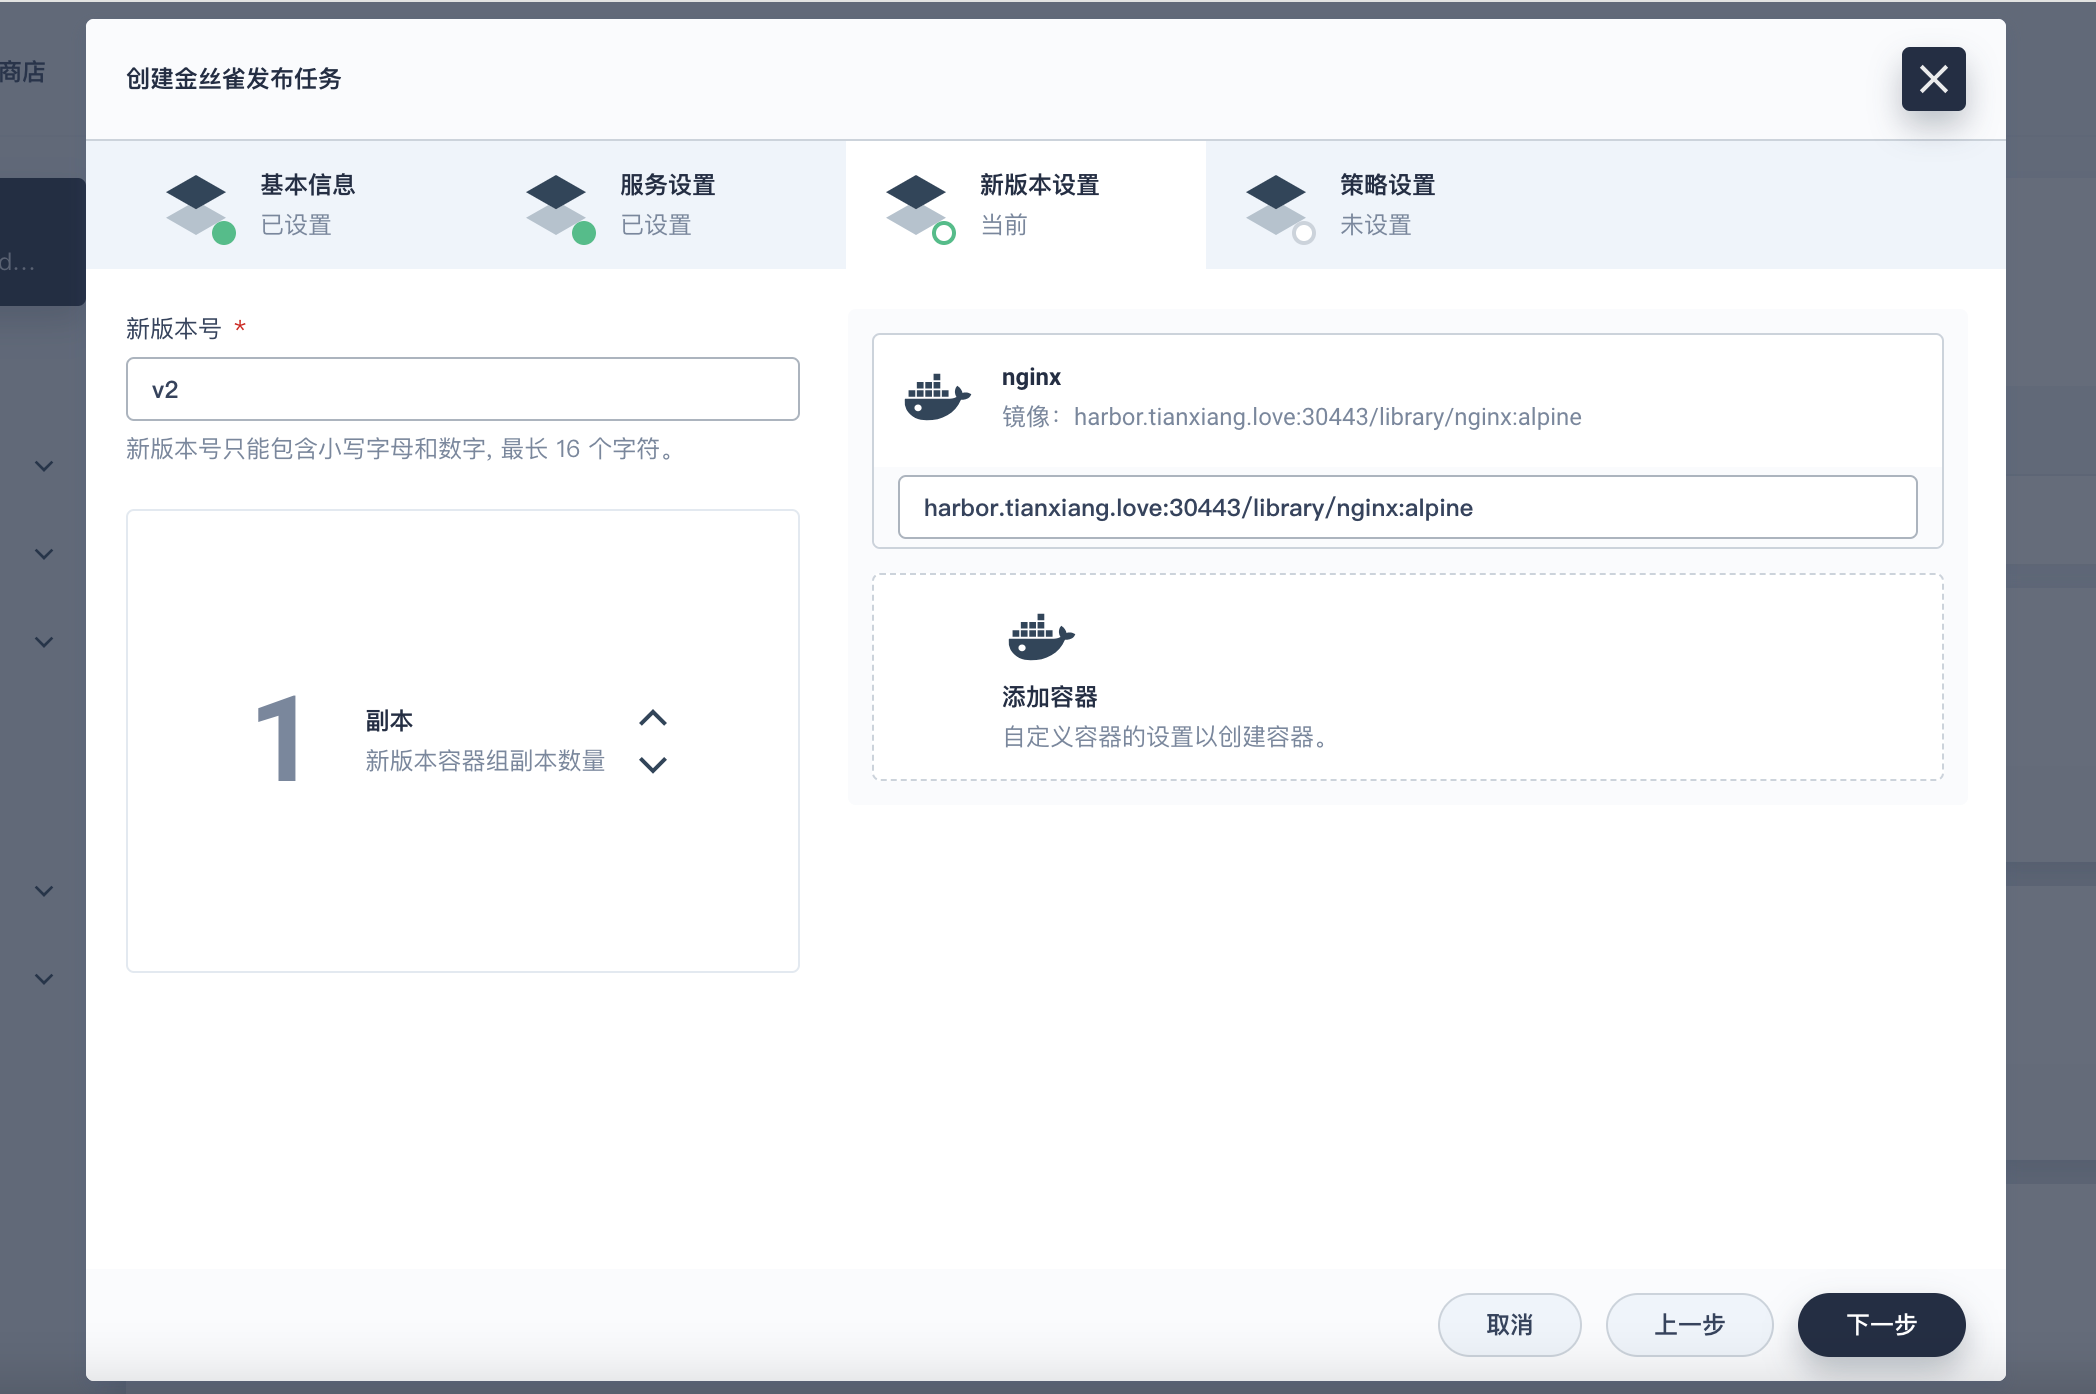
1. 创建金丝雀发布
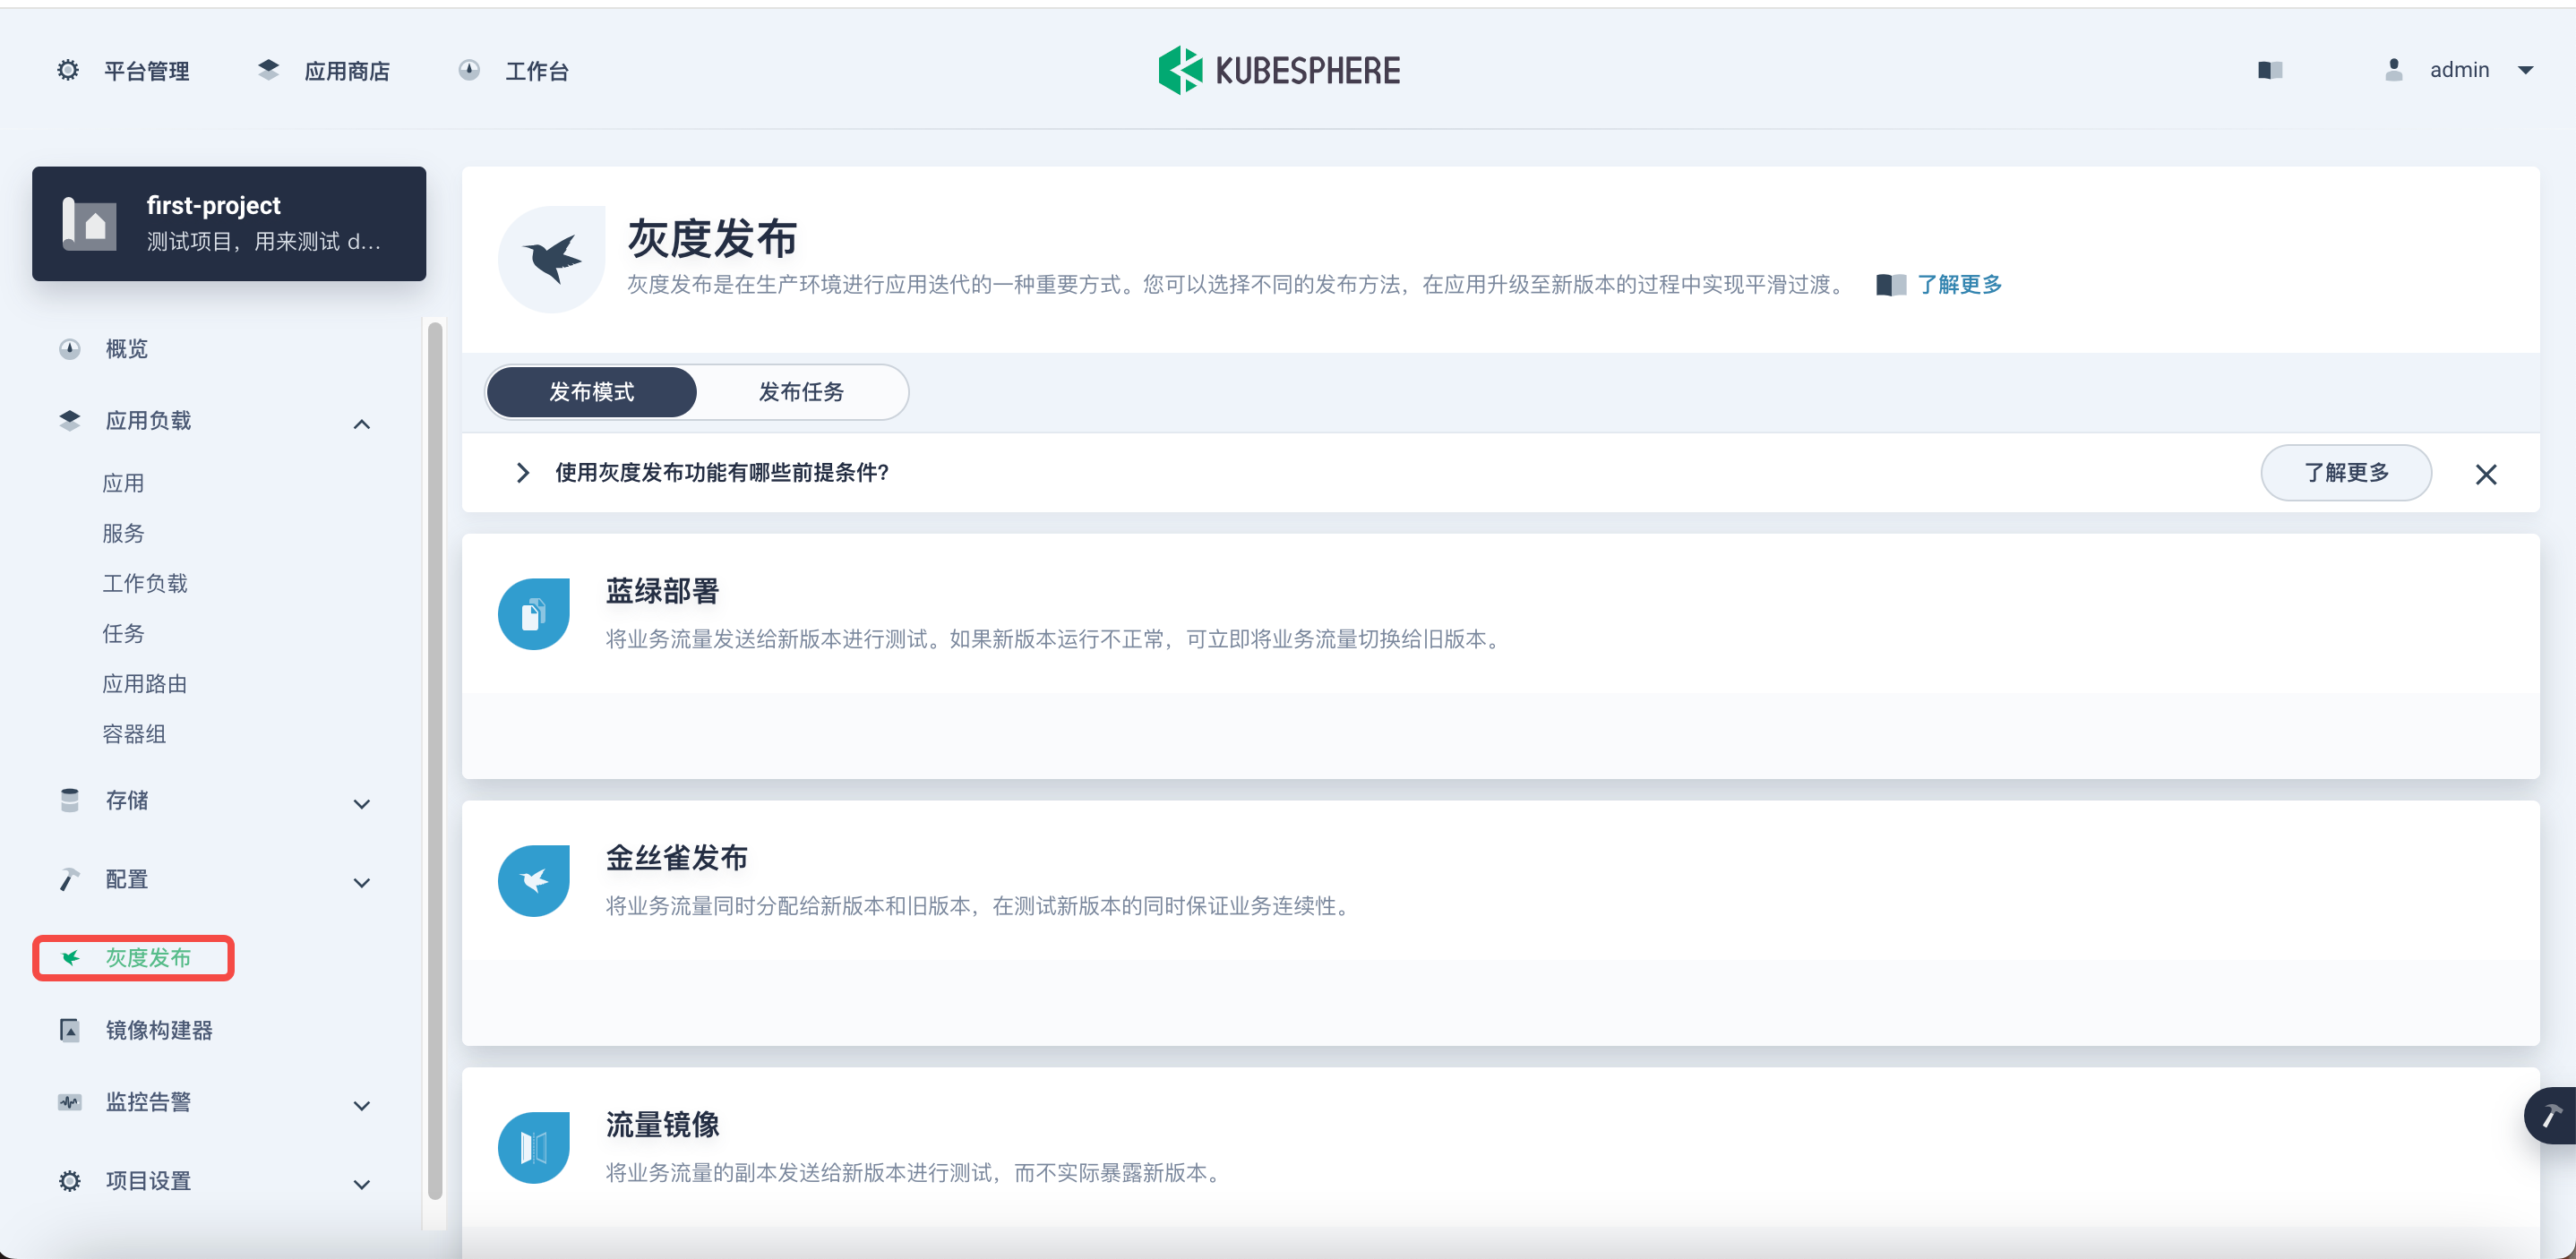
创建一个金丝雀发布
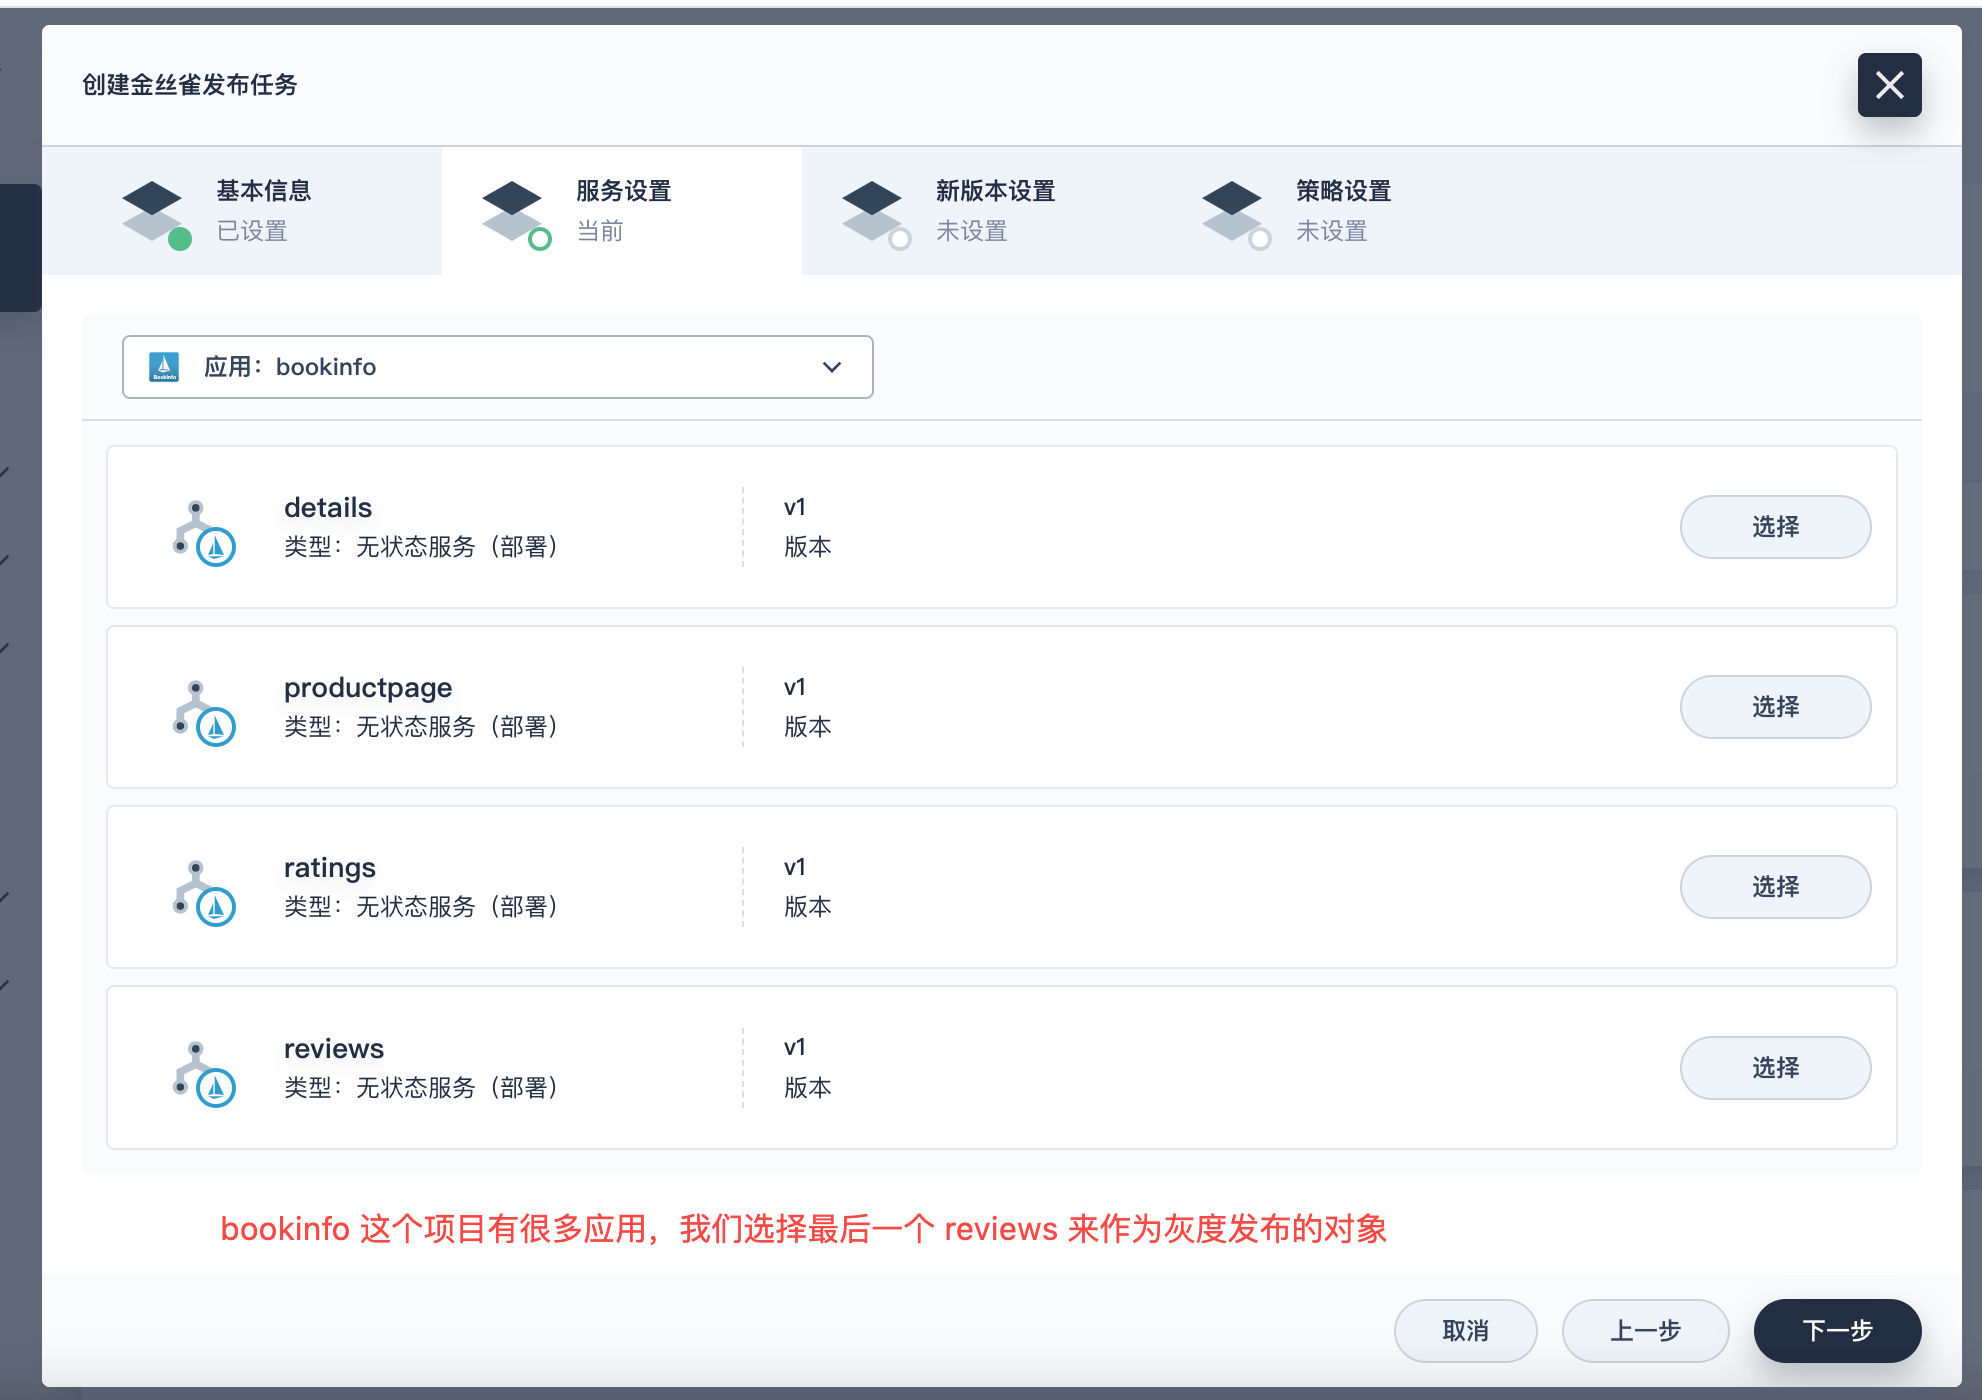
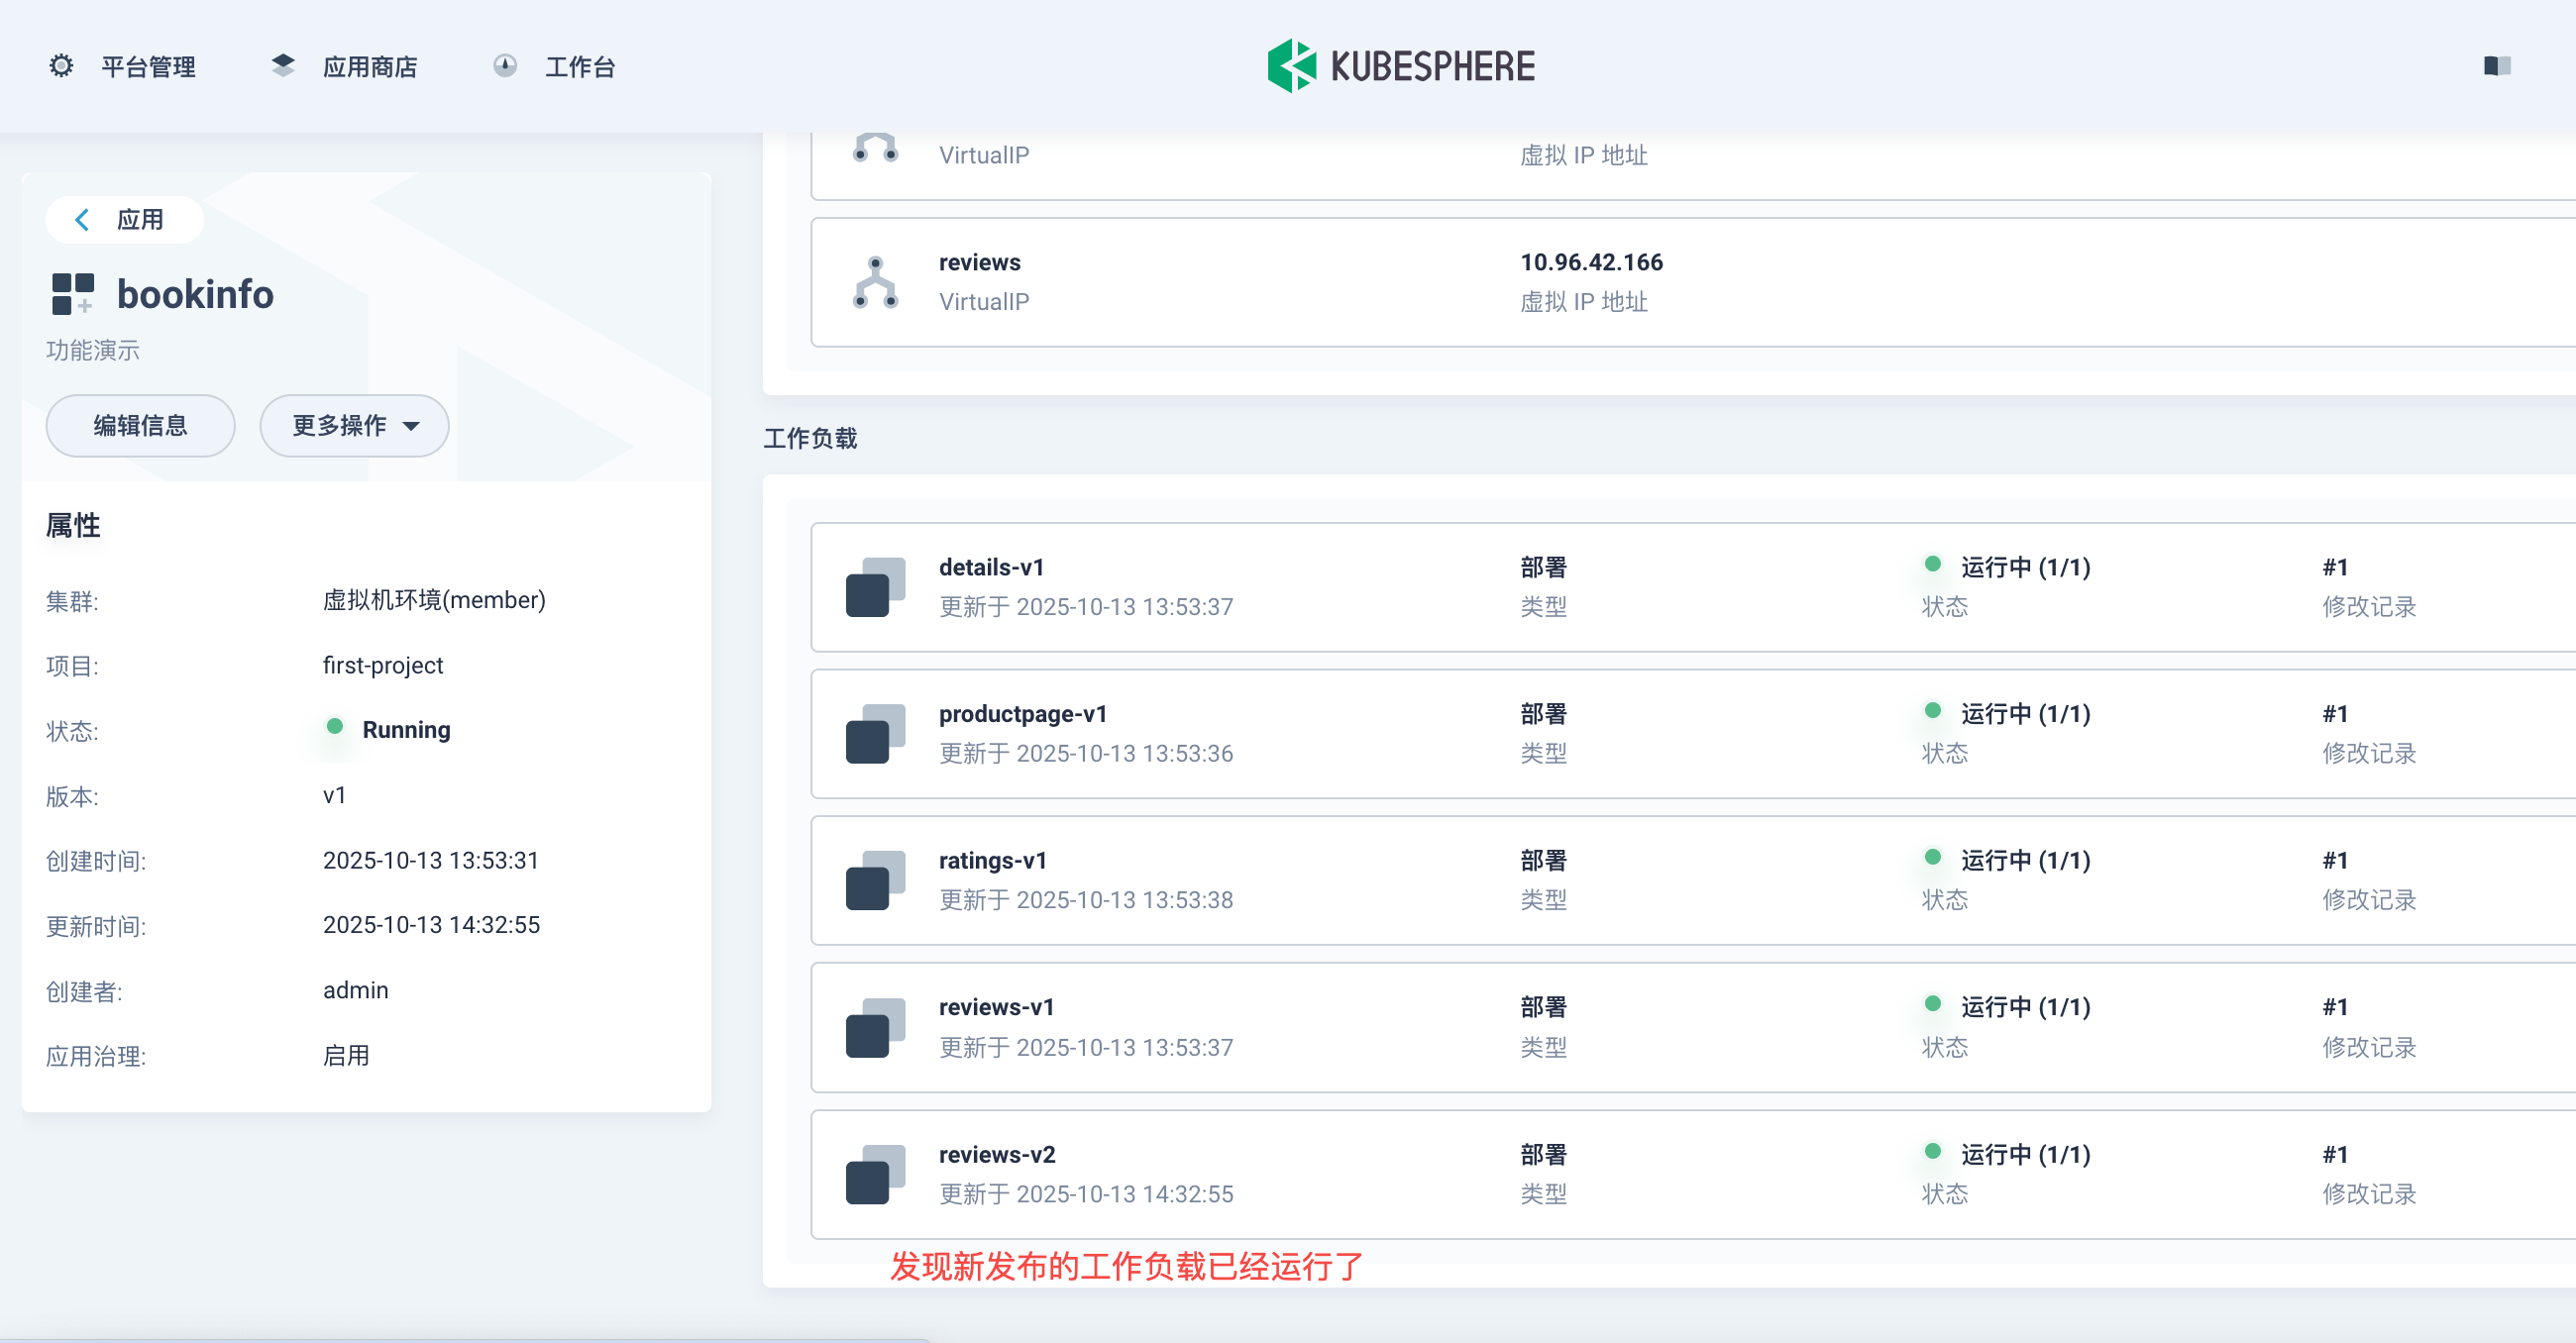
2. 选择要发版的工作负载
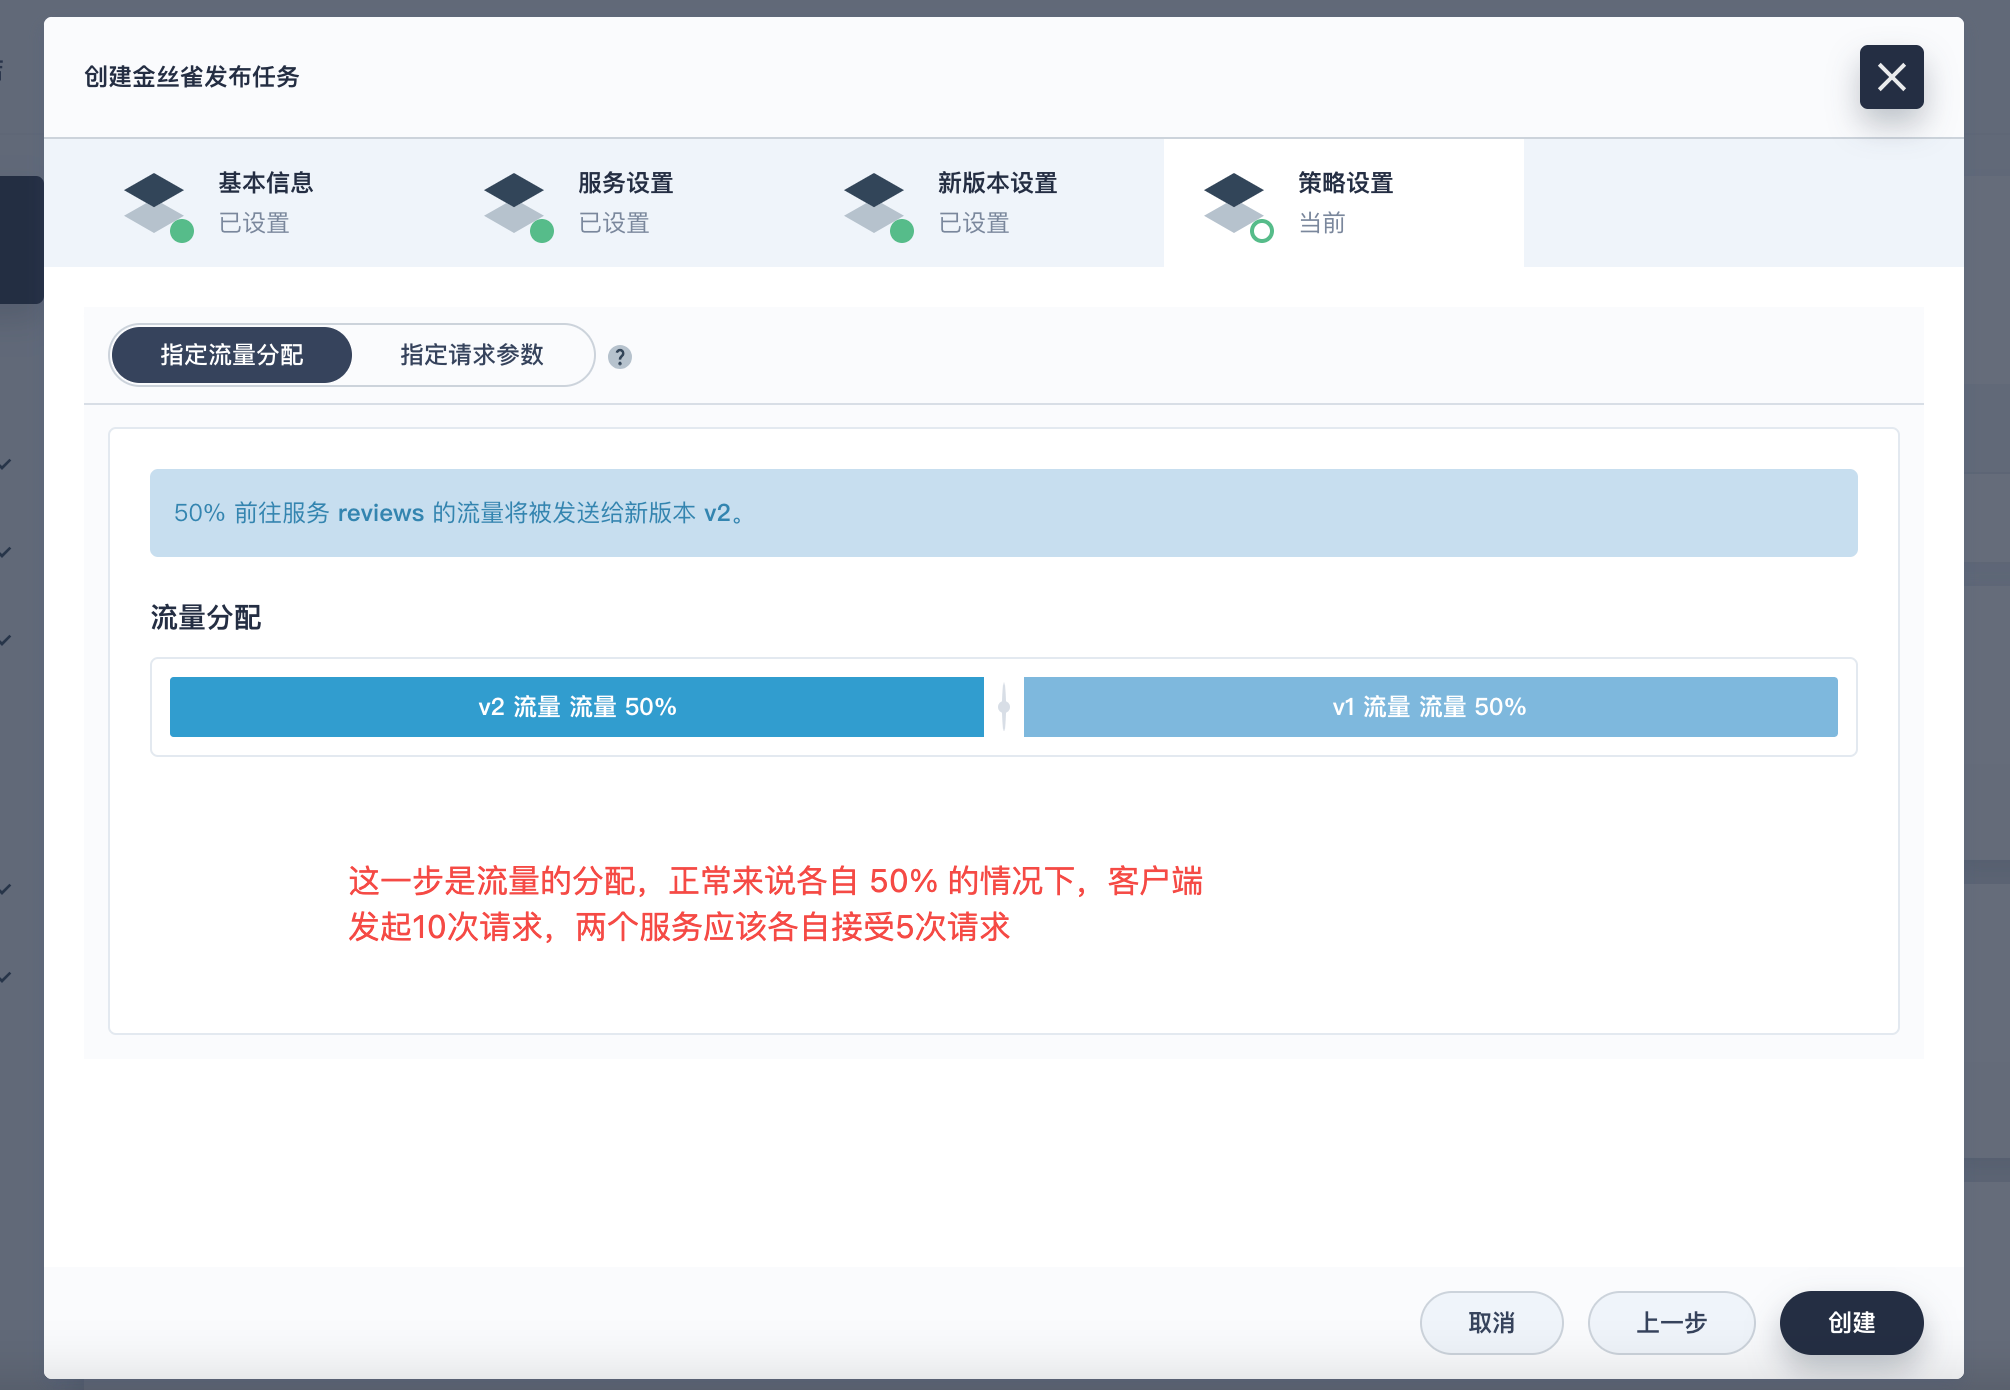
3. 调整流量分配
4. 验证流量切换
浏览器来回刷新测试,最好强刷新
5. 查看流量监控图
6. v2 版本接管流量
如果持续运行一段时间,v2 版本没有异常问题的话则可以把流量全部让 v2 接管,此时删除金丝雀发布,旧的 v1 版本就会自动下线删除了
六、部署业务应用
1. 在页面上创建
我这里就以视频的方式快速演示一下,所用的镜像我贴到下面
# 前端
harbor.tianxiang.love:30443/first-project/file-front:v1.0.0
harbor.tianxiang.love:30443/first-project/file-front:v2.0.0
# 后端
harbor.tianxiang.love:30443/first-project/file-backend:v1.0.0
harbor.tianxiang.love:30443/first-project/file-backend:v2.0.0
七、传统应用改造
1. 创建一个传统的应用
比如我们先在命令行创建一个 nginx-app,deployment 和 service 必须要有 app 这个标签
apiVersion: apps/v1
kind: Deployment
metadata:
  name: nginx-app-v1
  namespace: first-project
  labels:
    app: nginx-app
spec:
  replicas: 1
  selector:
    matchLabels:
      app: nginx-app
  template:
    metadata:
      labels:
        app: nginx-app
    spec:
      containers:
      - name: nginx
        image: harbor.tianxiang.love:30443/library/nginx:alpine
        ports:
        - containerPort: 80
        command: ["/bin/sh", "-c"]
        args:
          - |
            cat > /usr/share/nginx/html/index.html << 'EOF'
            <!DOCTYPE html>
            <html lang="zh-CN">
            <head>
                <meta charset="UTF-8">
                <meta name="viewport" content="width=device-width, initial-scale=1.0">
                <title>K8s Nginx应用 - V1</title>
                <style>
                    * { margin: 0; padding: 0; box-sizing: border-box; }
                    body {
                        font-family: 'Segoe UI', Tahoma, Geneva, Verdana, sans-serif;
                        background: linear-gradient(135deg, #667eea 0%, #764ba2 100%);
                        min-height: 100vh;
                        display: flex;
                        align-items: center;
                        justify-content: center;
                    }
                    .container {
                        background: white;
                        padding: 40px;
                        border-radius: 15px;
                        box-shadow: 0 20px 40px rgba(0,0,0,0.1);
                        text-align: center;
                        max-width: 600px;
                    }
                    .header {
                        margin-bottom: 30px;
                    }
                    .version-badge {
                        display: inline-block;
                        background: #ff6b6b;
                        color: white;
                        padding: 5px 15px;
                        border-radius: 20px;
                        font-size: 14px;
                        font-weight: bold;
                        margin-bottom: 15px;
                    }
                    h1 {
                        color: #333;
                        margin-bottom: 20px;
                        font-size: 2.5em;
                    }
                    .features {
                        display: grid;
                        grid-template-columns: repeat(2, 1fr);
                        gap: 15px;
                        margin: 30px 0;
                    }
                    .feature-item {
                        background: #f8f9fa;
                        padding: 15px;
                        border-radius: 8px;
                        border-left: 4px solid #667eea;
                    }
                    .status {
                        background: #d4edda;
                        color: #155724;
                        padding: 15px;
                        border-radius: 8px;
                        margin: 20px 0;
                        font-weight: bold;
                    }
                    .info-grid {
                        display: grid;
                        grid-template-columns: repeat(2, 1fr);
                        gap: 10px;
                        margin: 20px 0;
                        text-align: left;
                    }
                    .info-item {
                        background: #e9ecef;
                        padding: 10px;
                        border-radius: 5px;
                        font-size: 14px;
                    }
                    .footer {
                        margin-top: 30px;
                        color: #6c757d;
                        font-size: 12px;
                    }
                </style>
            </head>
            <body>
                <div class="container">
                    <div class="header">
                        <div class="version-badge">版本 v1.0.0</div>
                        <h1>🚀 Nginx on Kubernetes</h1>
                        <p>基于Alpine的轻量级Nginx容器应用</p>
                    </div>

                    <div class="status">
                        ✅ 应用状态:运行正常 | 🐳 容器环境:Kubernetes
                    </div>

                    <div class="features">
                        <div class="feature-item">🔒 安全加固</div>
                        <div class="feature-item">⚡ 高性能</div>
                        <div class="feature-item">📦 轻量级</div>
                        <div class="feature-item">🔧 可扩展</div>
                    </div>

                    <div class="info-grid">
                        <div class="info-item"><strong>应用名称:</strong> nginx-app</div>
                        <div class="info-item"><strong>镜像版本:</strong> alpine</div>
                        <div class="info-item"><strong>运行环境:</strong> Docker + K8s</div>
                        <div class="info-item"><strong>部署时间:</strong> <span id="deploy-time"></span></div>
                    </div>

                    <div style="margin: 25px 0;">
                        <button onclick="showMessage()" style="
                            background: #667eea;
                            color: white;
                            border: none;
                            padding: 12px 30px;
                            border-radius: 25px;
                            cursor: pointer;
                            font-size: 16px;
                            transition: all 0.3s;
                        " onmouseover="this.style.background='#5a6fd8'" onmouseout="this.style.background='#667eea'">
                           点击测试交互功能
                        </button>
                    </div>

                    <div class="footer">
                        <p>Harbor仓库: harbor.tianxiang.love:30443 | 技术支持: DevOps团队</p>
                        <p>© 2025 Kubernetes Demo Application - All rights reserved</p>
                    </div>
                </div>

                <script>
                    // 显示部署时间
                    document.getElementById('deploy-time').textContent = new Date().toLocaleString();

                    function showMessage() {
                        alert('🎉 你好!这是 nginx-app-v1 版本的交互测试!\n\n当前Pod: ' + window.location.hostname);
                    }

                    // 添加点击动画效果
                    document.addEventListener('click', function(e) {
                        if (e.target.tagName === 'BUTTON') {
                            e.target.style.transform = 'scale(0.95)';
                            setTimeout(() => {
                                e.target.style.transform = 'scale(1)';
                            }, 150);
                        }
                    });
                </script>
            </body>
            </html>
            EOF
            nginx -g "daemon off;"
        resources:
          requests:
            memory: "64Mi"
            cpu: "50m"
          limits:
            memory: "128Mi"
            cpu: "100m"
        livenessProbe:
          httpGet:
            path: /
            port: 80
          initialDelaySeconds: 5
          periodSeconds: 10
        readinessProbe:
          httpGet:
            path: /
            port: 80
          initialDelaySeconds: 5
          periodSeconds: 10
apiVersion: v1
kind: Service
metadata:
name: nginx-app
namespace: first-project
labels:
app: nginx-app
spec:
selector:
app: nginx-app
ports:
- protocol: TCP
port: 80
targetPort: 80
type: NodePorttianxiang@k8s-master1:~/k8s-app/nginx-app$ kubectl apply -f .
deployment.apps/nginx-app-v1 created
service/nginx-app created可以看到这种方式部署的应用是没有开启服务网格的,没有 sidecar 容器接管流量

下面将它转化成servicemesh服务网格形式
2. 将工作负载关联到应用
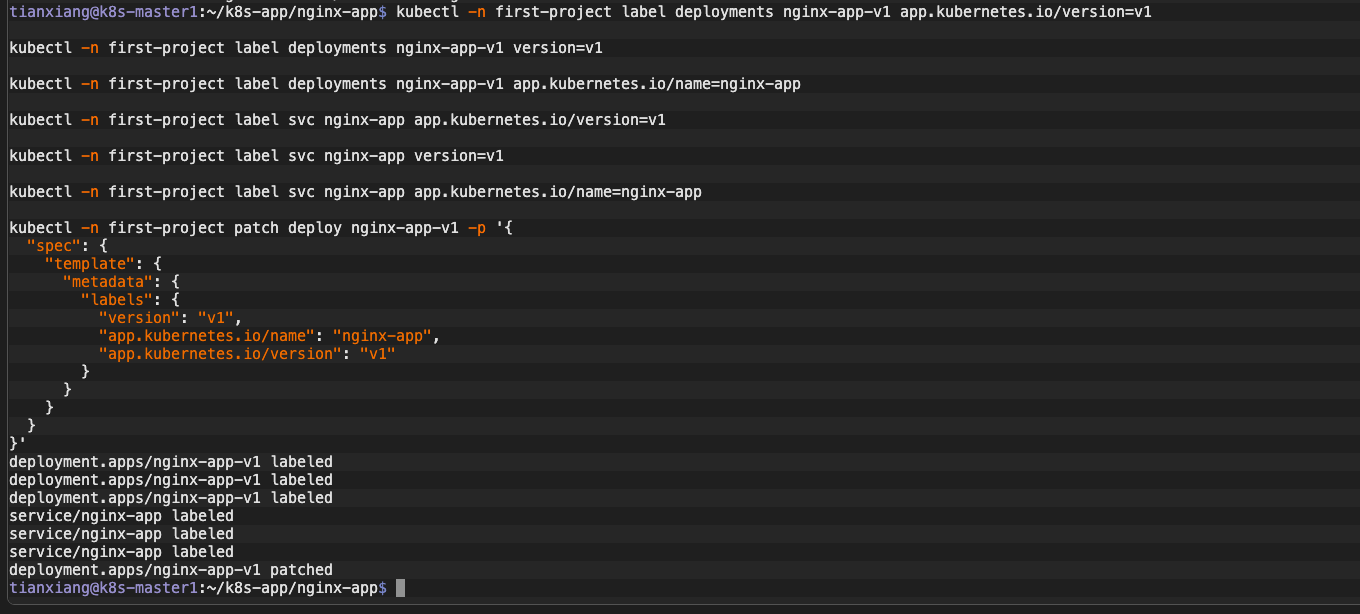
2.1 打标签
给相关应用打上 label,声明服务归属于该应用
kubectl -n first-project label deployments nginx-app-v1 app.kubernetes.io/version=v1

kubectl -n first-project label deployments nginx-app-v1 version=v1

kubectl -n first-project label deployments nginx-app-v1 app.kubernetes.io/name=nginx-app

kubectl -n first-project label svc nginx-app app.kubernetes.io/version=v1

kubectl -n first-project label svc nginx-app version=v1

kubectl -n first-project label svc nginx-app app.kubernetes.io/name=nginx-app

kubectl -n first-project patch deploy nginx-app-v1 -p '{
  "spec": {
    "template": {
      "metadata": {
        "labels": {
          "version": "v1",
          "app.kubernetes.io/name": "nginx-app",
          "app.kubernetes.io/version": "v1"
        }
      }
    }
  }
}'
2.2 apply 下面的 yaml
通过创建 Application 来关联工作负载,通过 selector 来选择归属关系
apiVersion: app.k8s.io/v1beta1
kind: Application
metadata:
  annotations:
    kubesphere.io/creator: admin
    kubesphere.io/description: 测试应用
    servicemesh.kubesphere.io/enabled: "true"
  labels:
    app: nginx-app
    app.kubernetes.io/name: nginx-app
    app.kubernetes.io/version: v1
  name: nginx-app  # 注意应用的name要跟label定义的一样:app.kubernetes.io/name
  namespace: first-project
spec:
  addOwnerRef: true
  componentKinds:
  - group: ""
    kind: Service
  - group: apps
    kind: Deployment
  - group: apps
    kind: StatefulSet
  - group: networking.k8s.io
    kind: Ingress
  - group: servicemesh.kubesphere.io
    kind: Strategy
  - group: servicemesh.kubesphere.io
    kind: ServicePolicy
  selector:
    matchLabels:
      # 相关资源需要打上这个label,表示归属关系
      app.kubernetes.io/name: nginx-app
      app.kubernetes.io/version: v1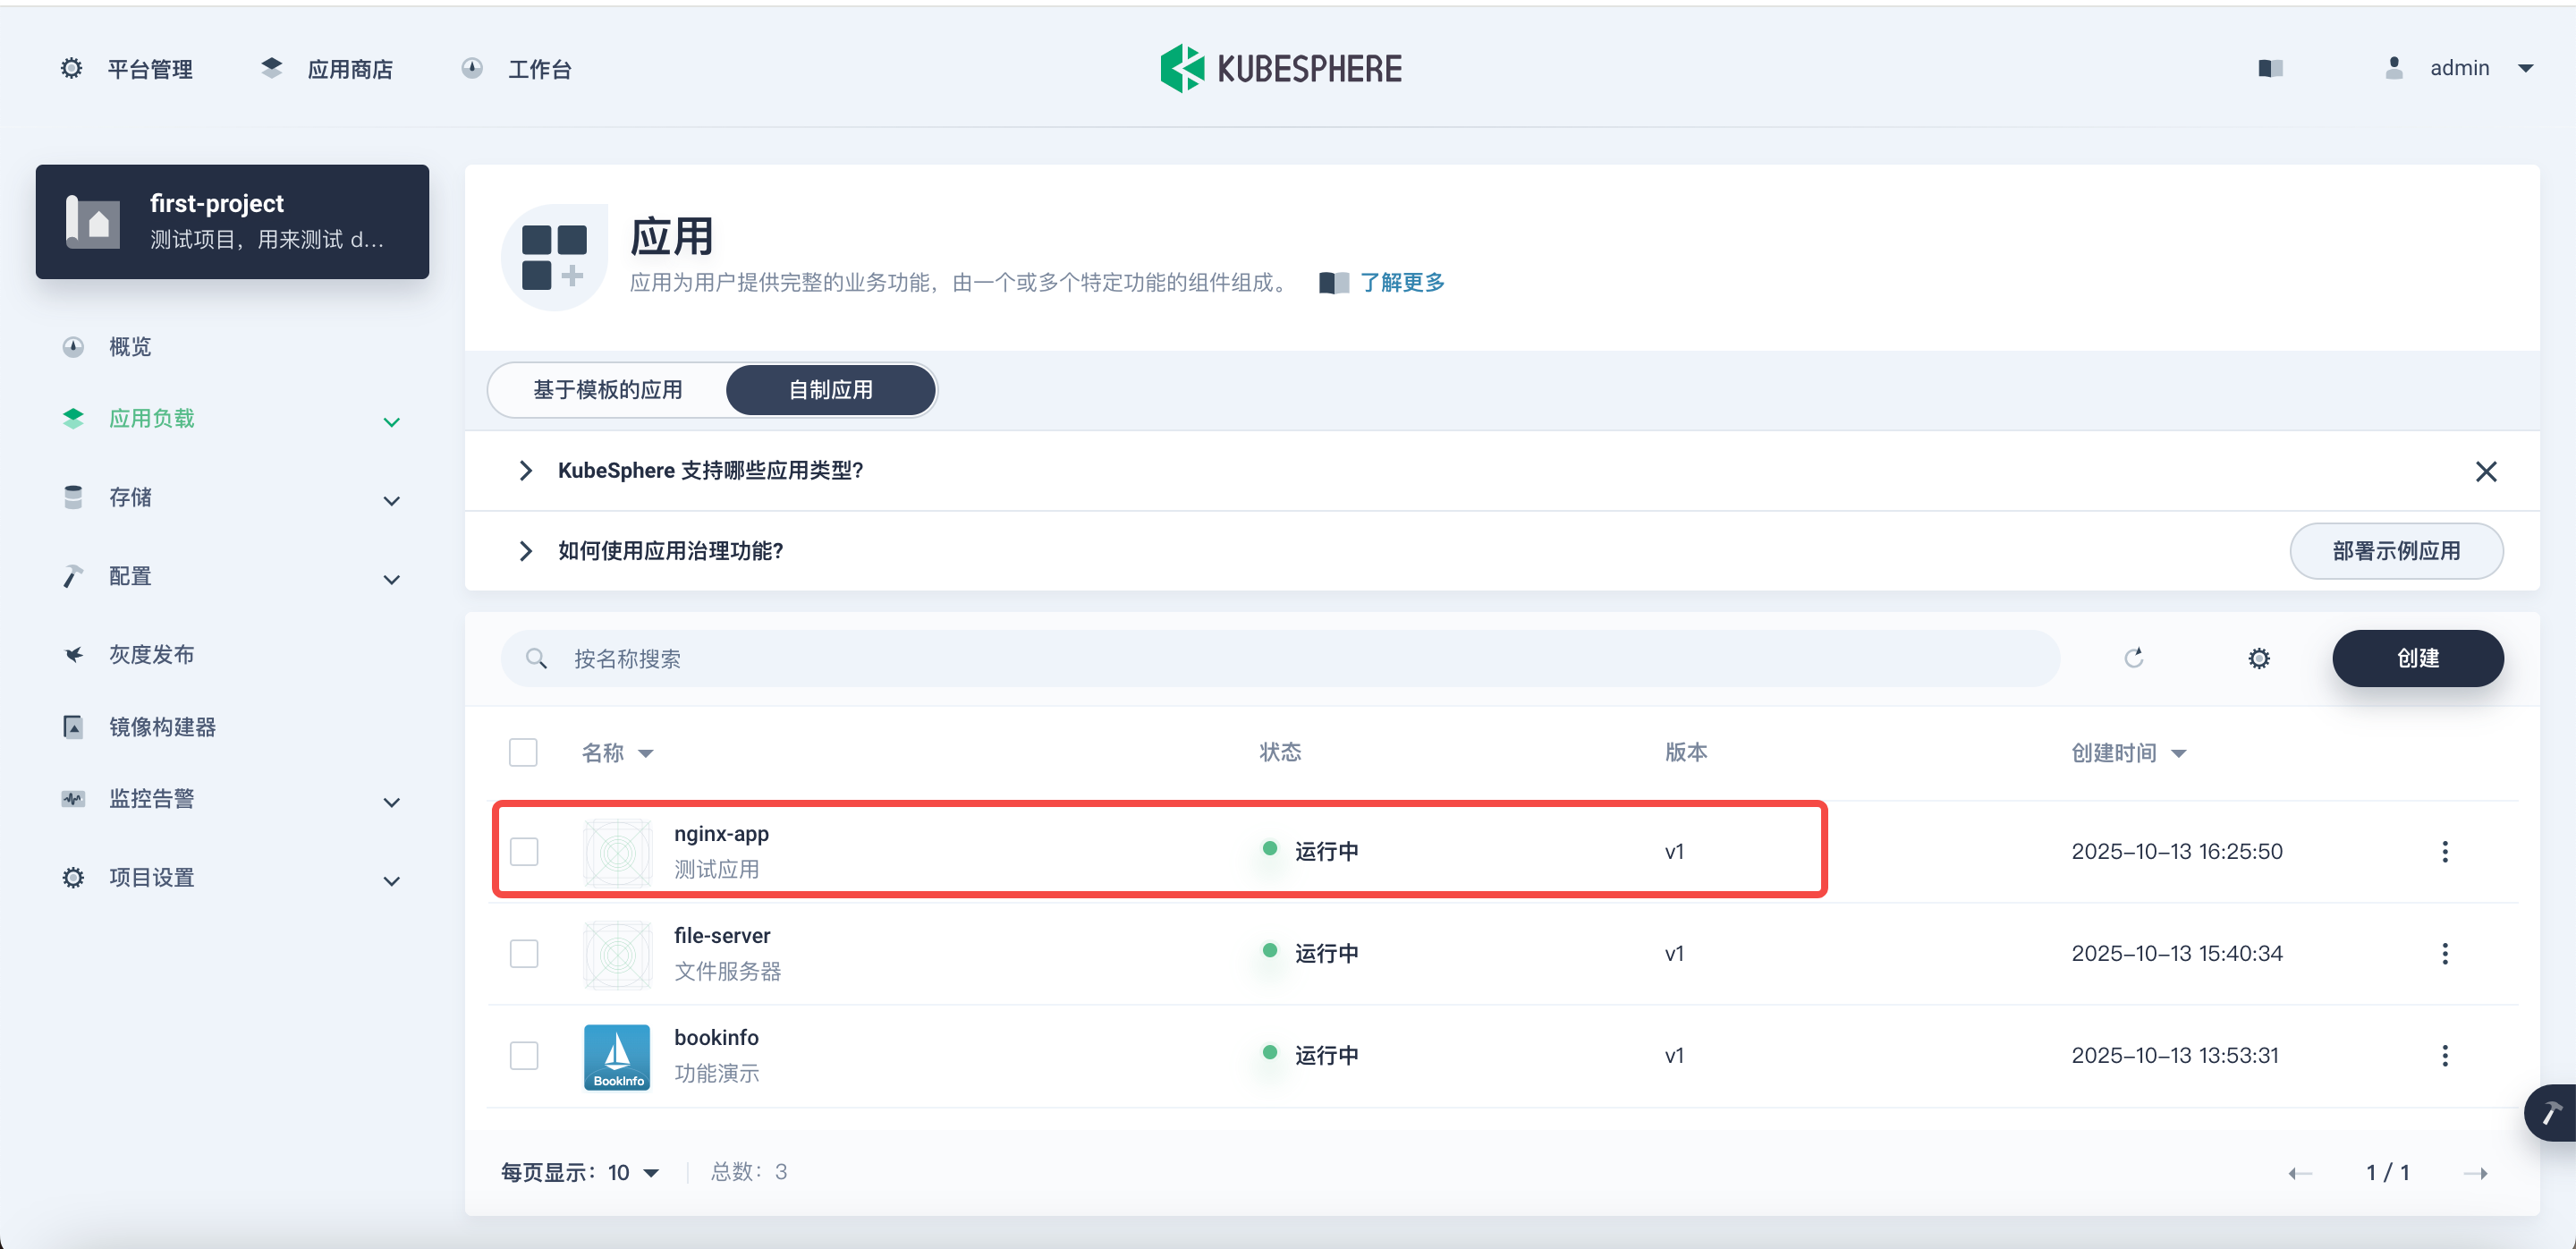
3. 开启服务网格
通过添加 annotation 来开启 servicemesh
kubectl -n first-project annotate deployments nginx-app-v1 servicemesh.kubesphere.io/enabled="true"

kubectl -n first-project annotate svc nginx-app servicemesh.kubesphere.io/enabled="true"
通过在 template 层级中的 annotations 来添加注解开启 sidecar 注入
kubectl -n first-project patch deploy nginx-app-v1 -p '{"spec":{"template":{"metadata":{"annotations":{"sidecar.istio.io/inject":"true"}}}}}'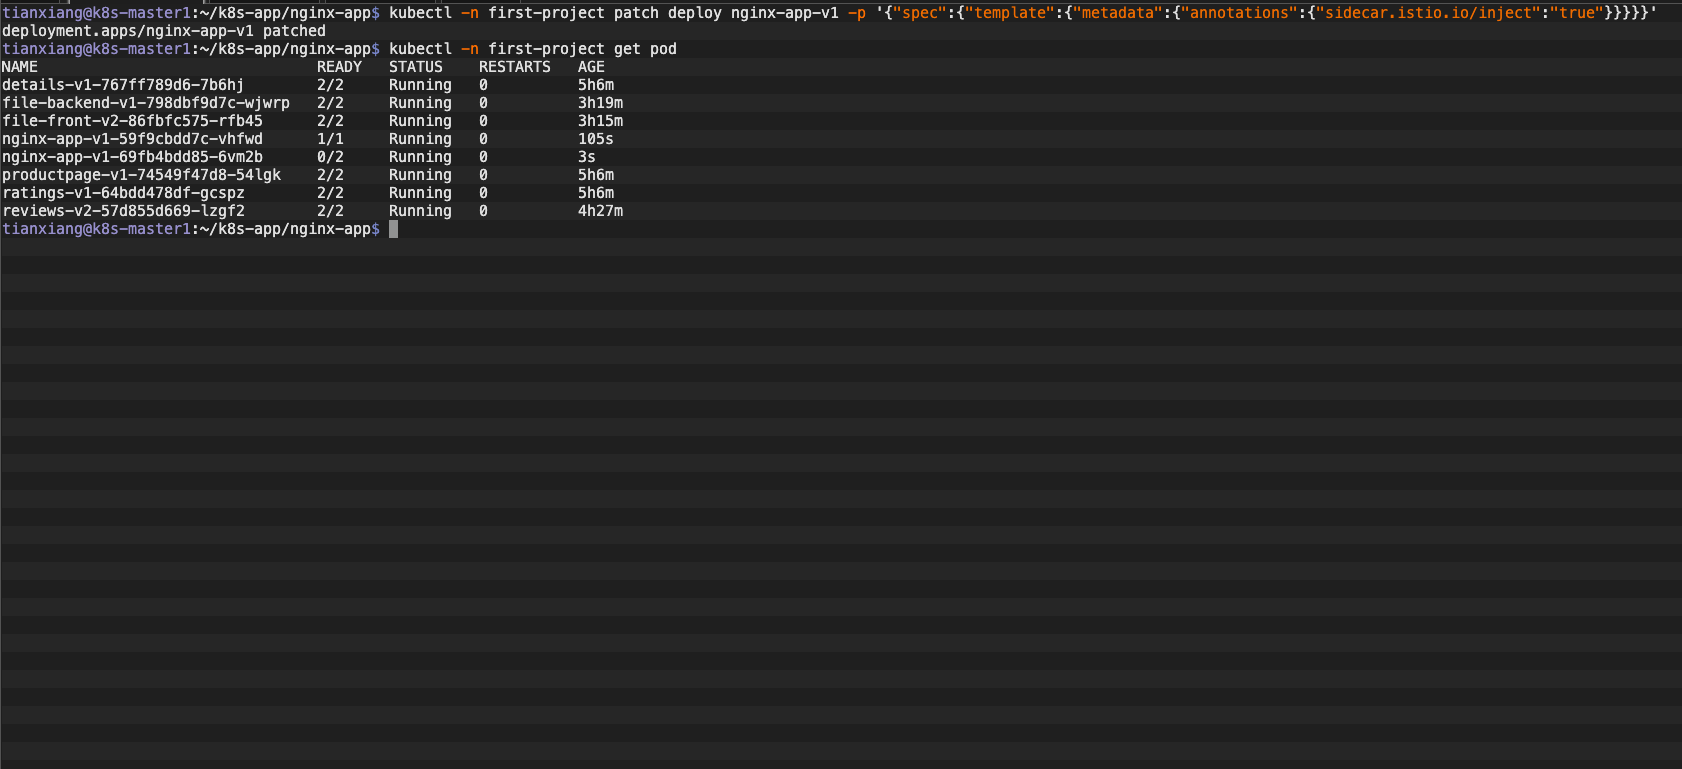
4. 创建应用路由
kind: Ingress
apiVersion: networking.k8s.io/v1
metadata:
  name: nginx-app
  namespace: first-project
  labels:
    app: nginx-app
    app.kubernetes.io/name: nginx-app
    app.kubernetes.io/version: v1
  annotations:
    kubesphere.io/creator: admin
    nginx.ingress.kubernetes.io/upstream-vhost: nginx-app.first-project.svc.cluster.local
spec:
  rules:
    - host: nginx-app.tianxiang-m6.love
      http:
        paths:
          - path: /
            pathType: ImplementationSpecific
            backend:
              service:
                name: nginx-app
                port:
                  number: 80
tianxiang@k8s-master1:~/k8s-app/nginx-app$ kubectl apply -f ingress.yaml
ingress.networking.k8s.io/nginx-app created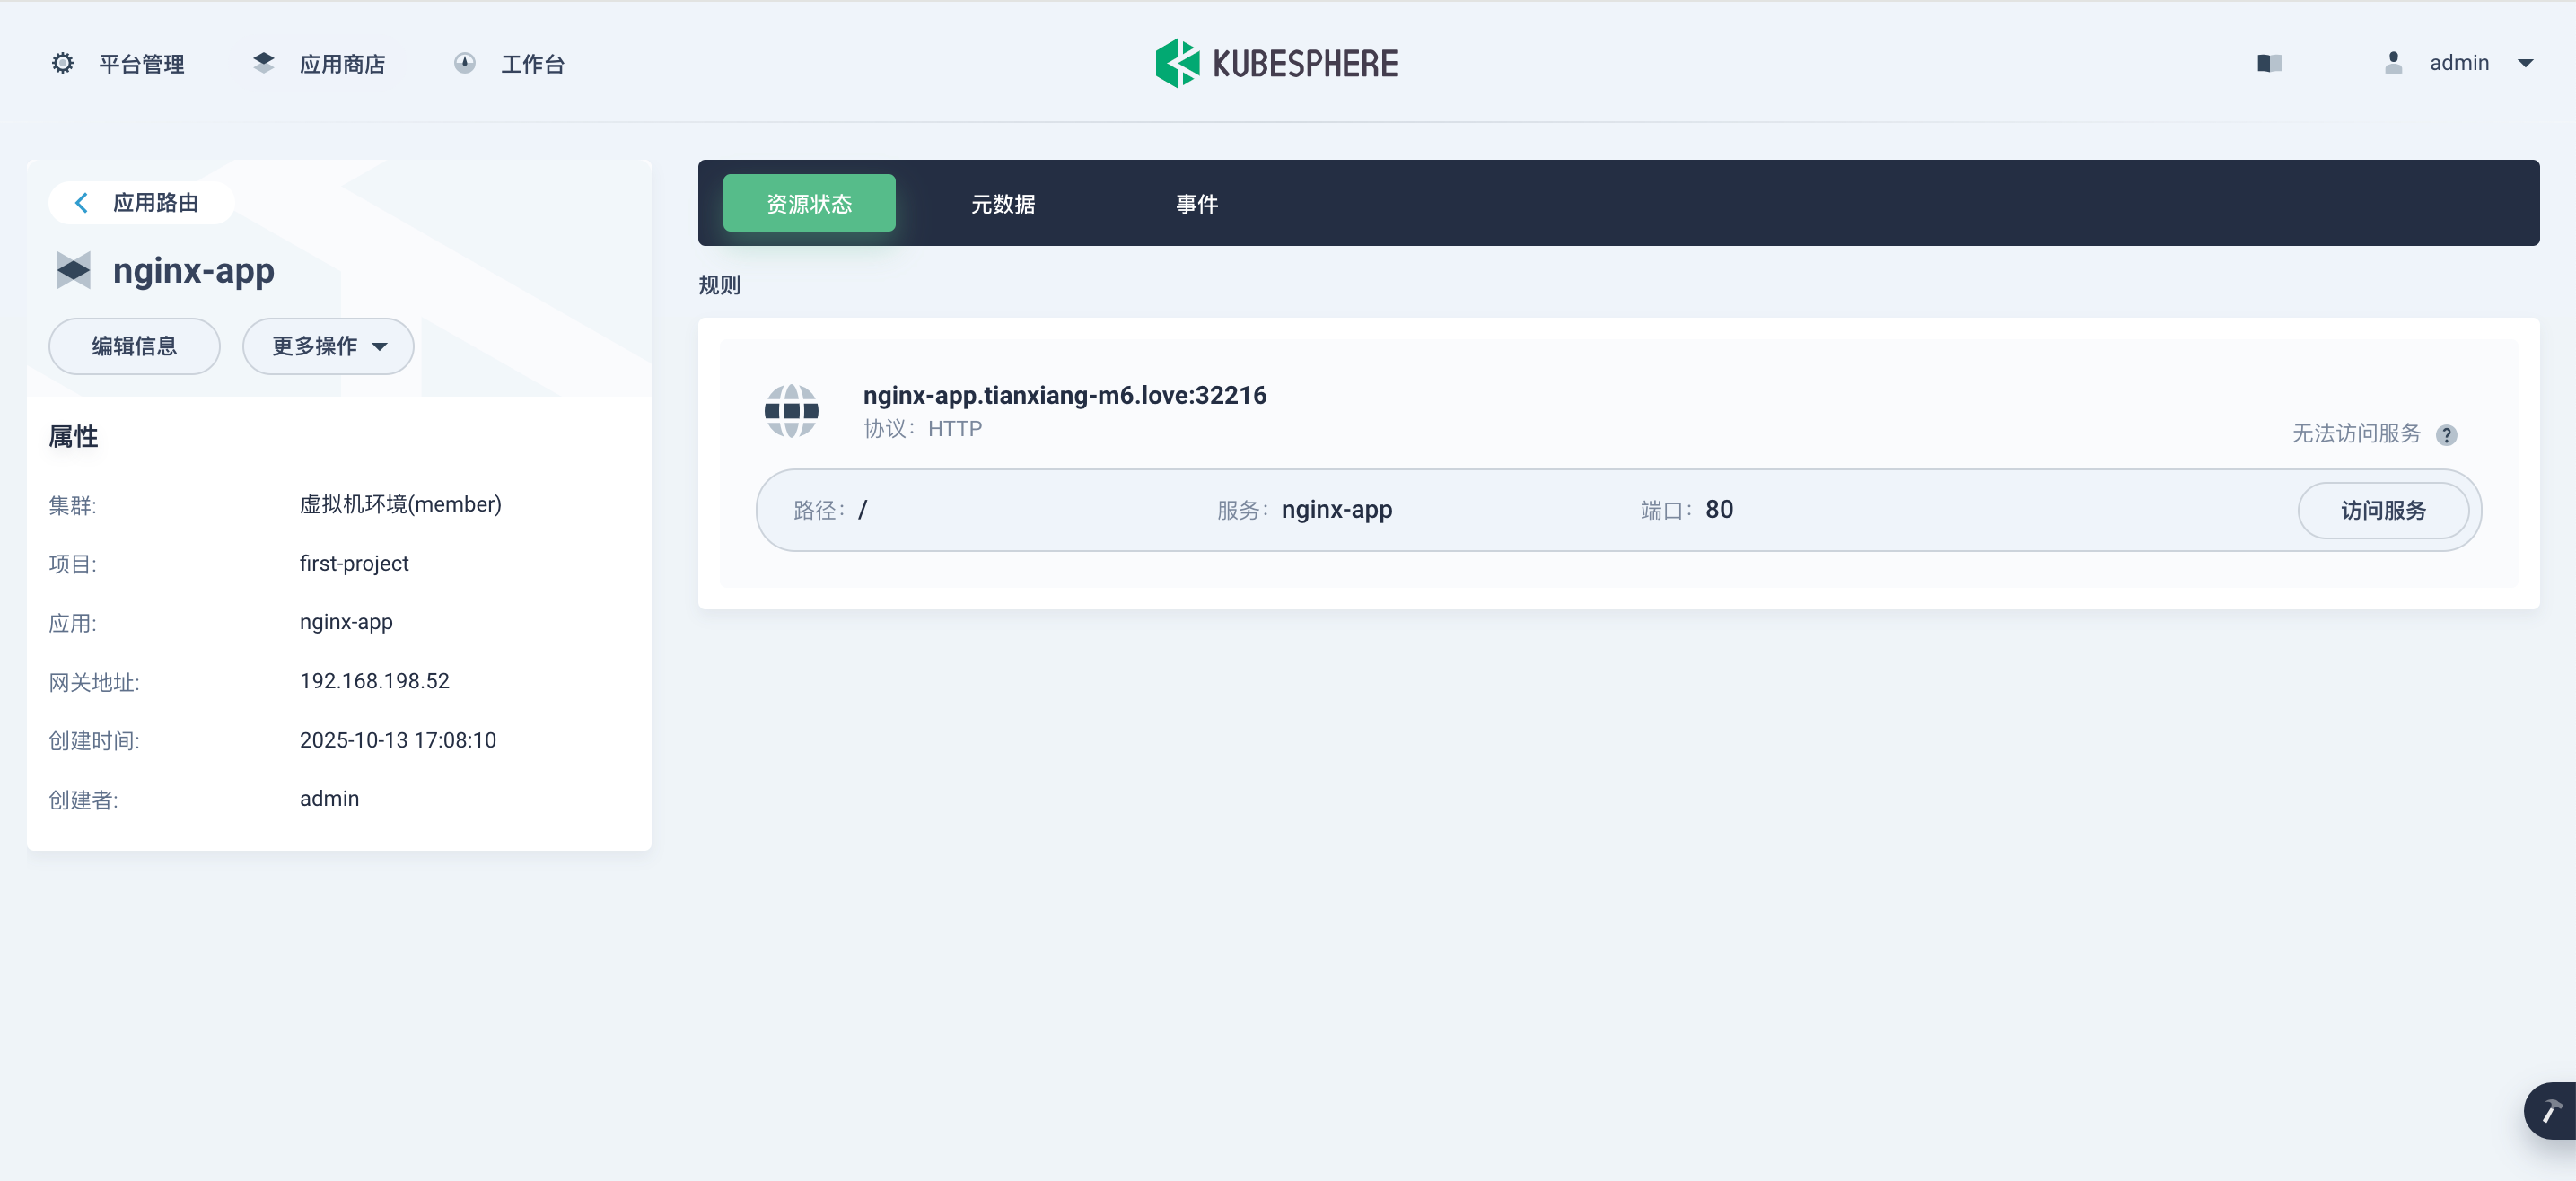
5. 创建灰度发布
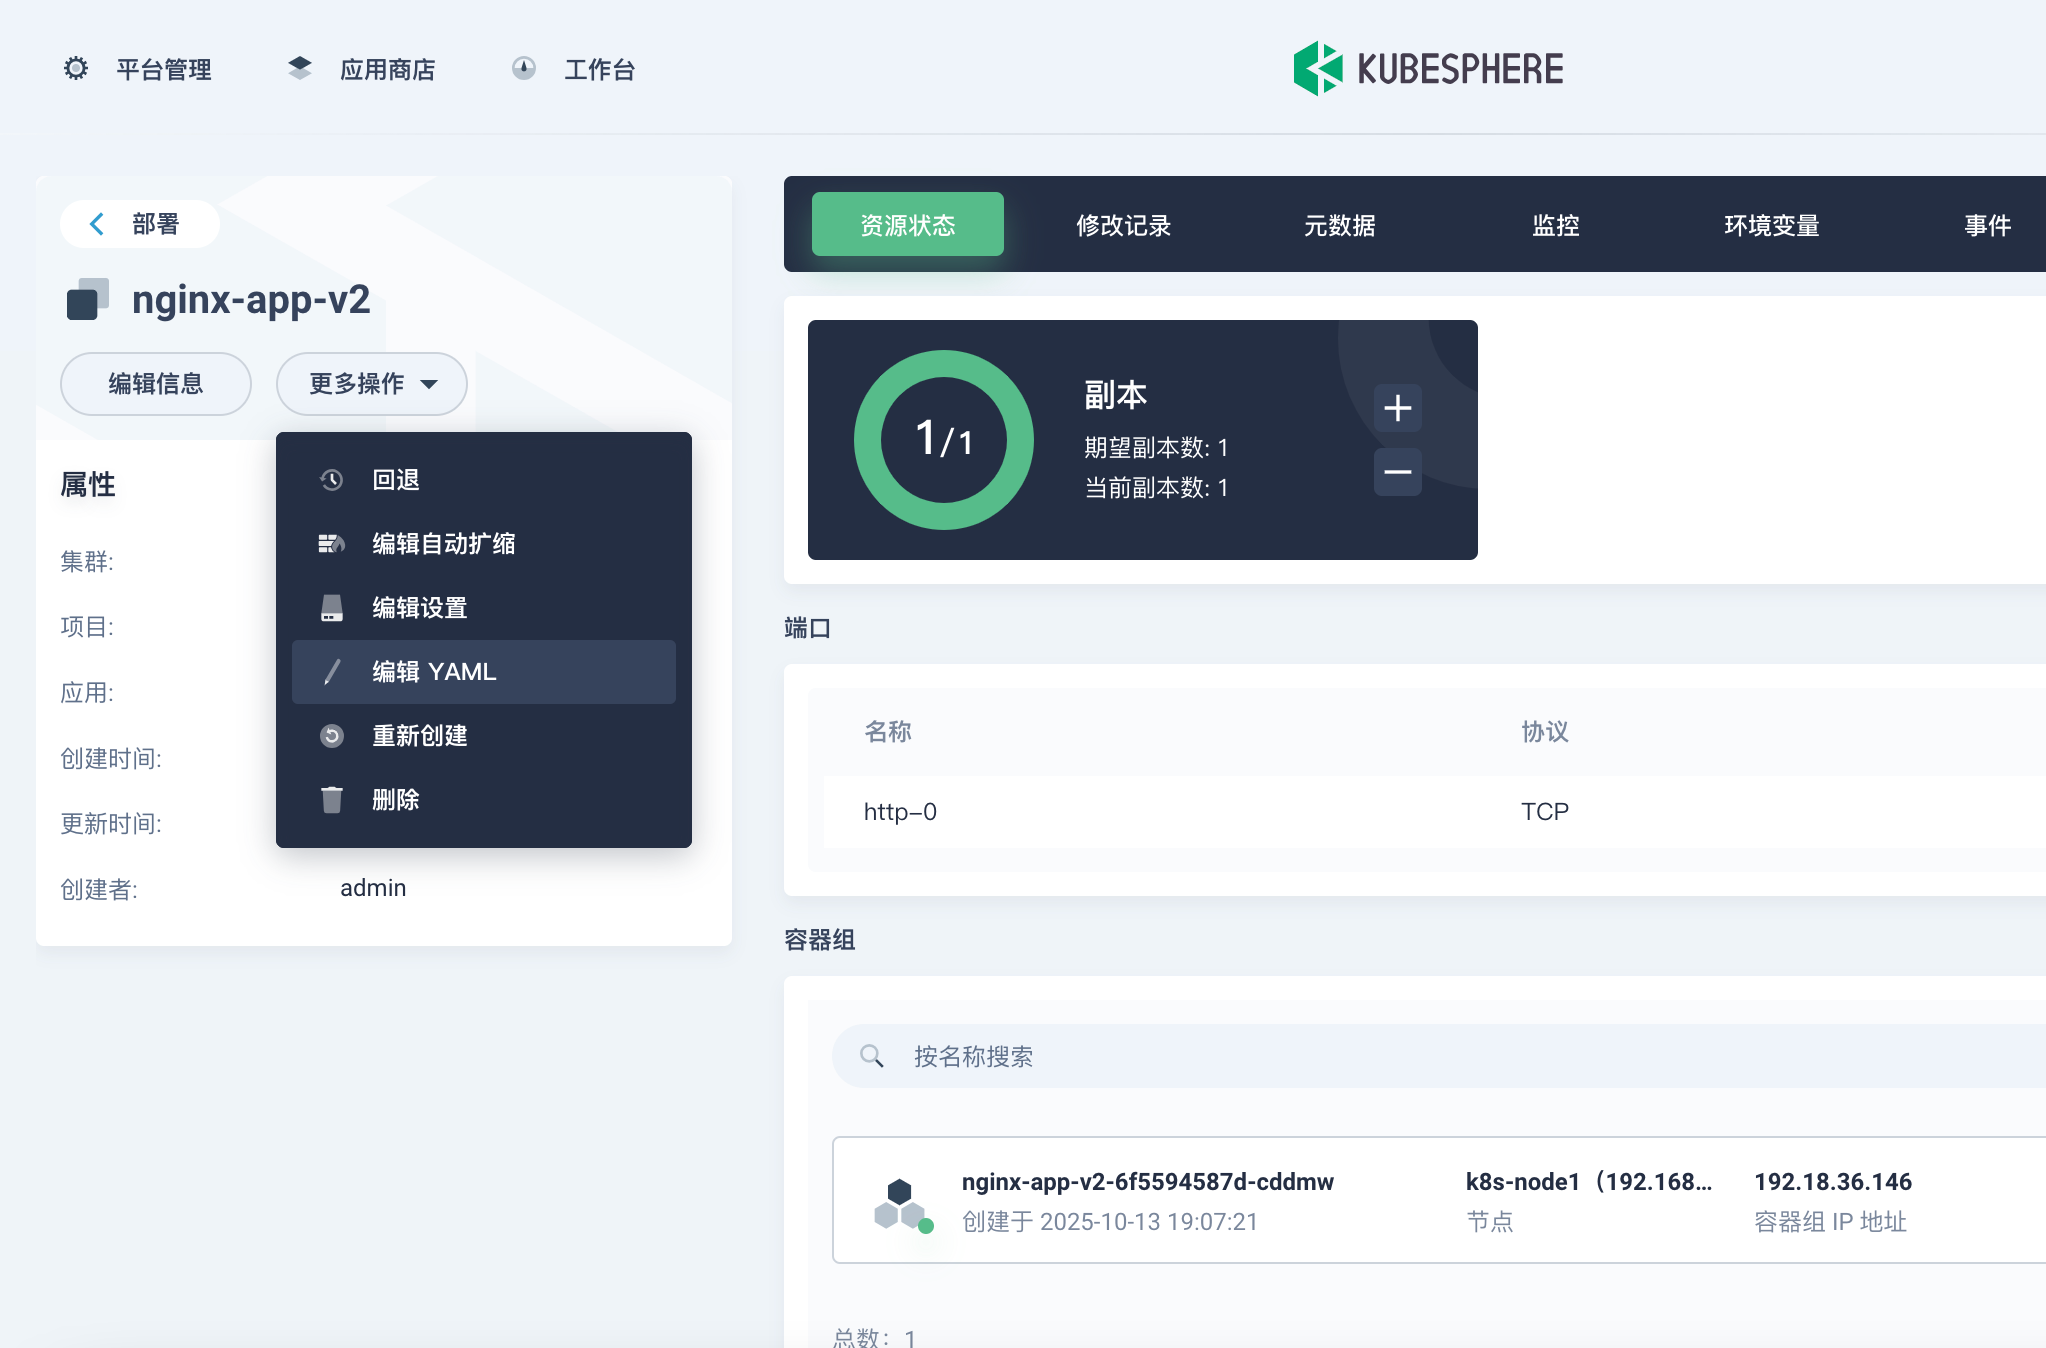
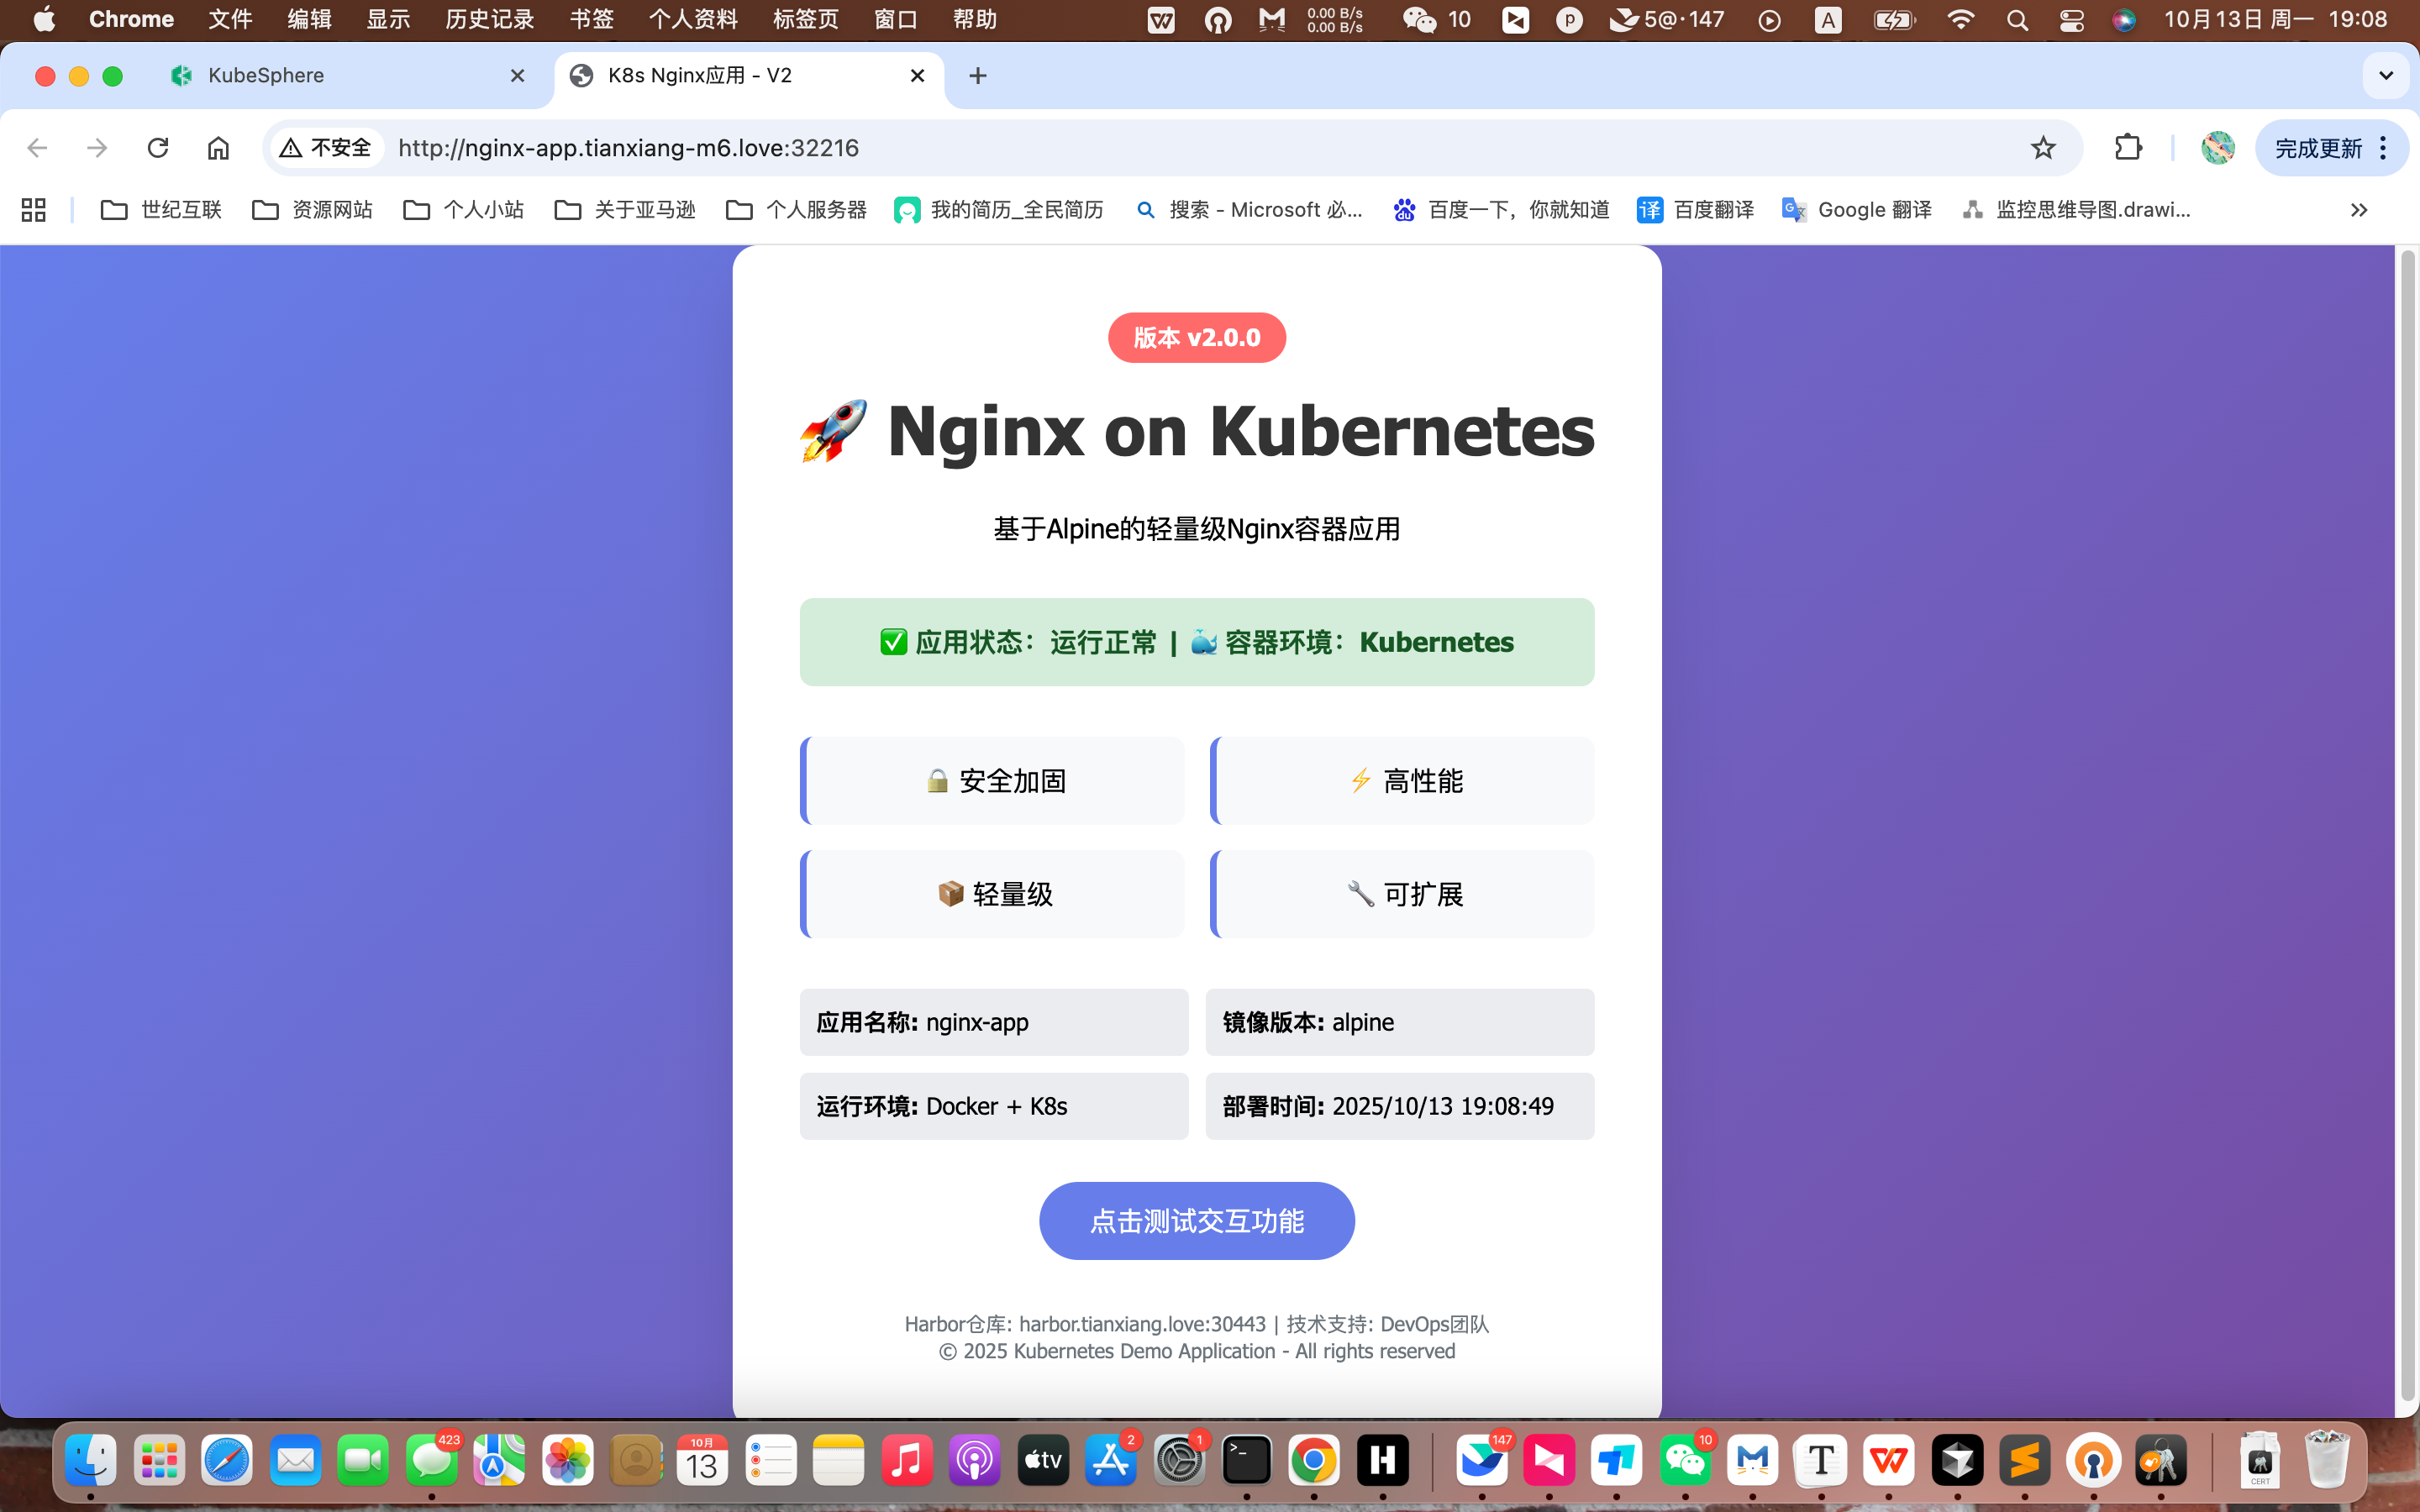
修改页面 UI 显示的内容,以此来区分不同版本
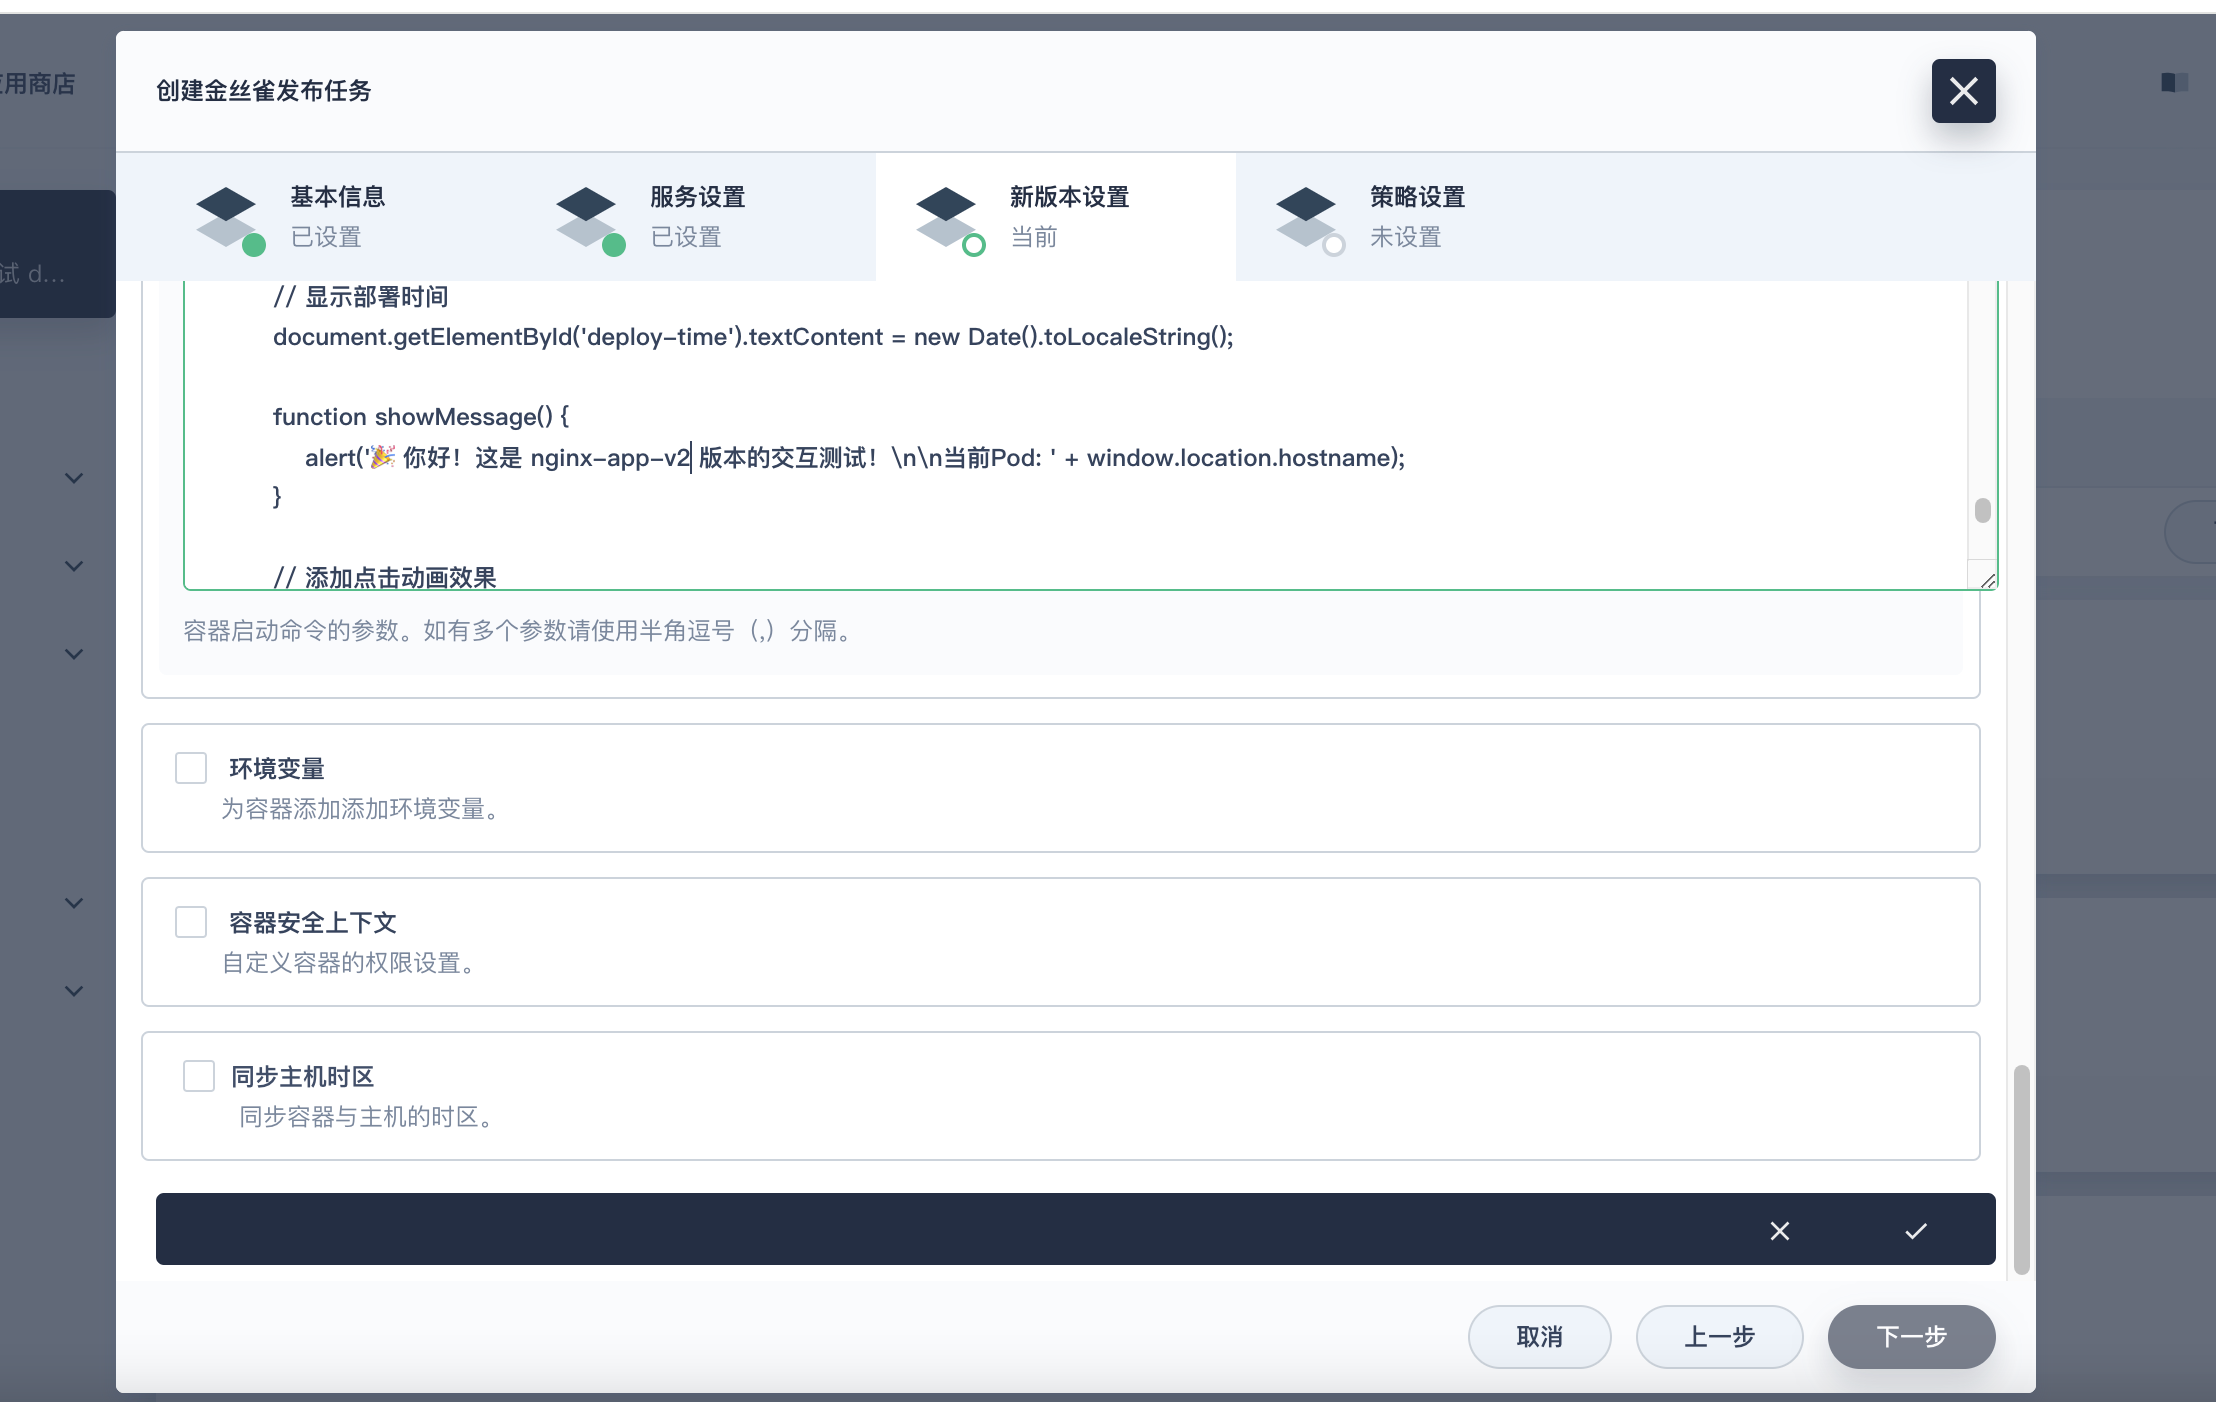
在那个位置修改完可能有问题,如果报错的话那就在 yaml 中编辑一下
            cat > /usr/share/nginx/html/index.html << 'EOF'
            <!DOCTYPE html>
            <html lang="zh-CN">
            <head>
                <meta charset="UTF-8">
                <meta name="viewport" content="width=device-width, initial-scale=1.0">
                <title>K8s Nginx应用 - V2</title>
                <style>
                    * { margin: 0; padding: 0; box-sizing: border-box; }
                    body {
                        font-family: 'Segoe UI', Tahoma, Geneva, Verdana, sans-serif;
                        background: linear-gradient(135deg, #667eea 0%, #764ba2 100%);
                        min-height: 100vh;
                        display: flex;
                        align-items: center;
                        justify-content: center;
                    }
                    .container {
                        background: white;
                        padding: 40px;
                        border-radius: 15px;
                        box-shadow: 0 20px 40px rgba(0,0,0,0.1);
                        text-align: center;
                        max-width: 600px;
                    }
                    .header {
                        margin-bottom: 30px;
                    }
                    .version-badge {
                        display: inline-block;
                        background: #ff6b6b;
                        color: white;
                        padding: 5px 15px;
                        border-radius: 20px;
                        font-size: 14px;
                        font-weight: bold;
                        margin-bottom: 15px;
                    }
                    h1 {
                        color: #333;
                        margin-bottom: 20px;
                        font-size: 2.5em;
                    }
                    .features {
                        display: grid;
                        grid-template-columns: repeat(2, 1fr);
                        gap: 15px;
                        margin: 30px 0;
                    }
                    .feature-item {
                        background: #f8f9fa;
                        padding: 15px;
                        border-radius: 8px;
                        border-left: 4px solid #667eea;
                    }
                    .status {
                        background: #d4edda;
                        color: #155724;
                        padding: 15px;
                        border-radius: 8px;
                        margin: 20px 0;
                        font-weight: bold;
                    }
                    .info-grid {
                        display: grid;
                        grid-template-columns: repeat(2, 1fr);
                        gap: 10px;
                        margin: 20px 0;
                        text-align: left;
                    }
                    .info-item {
                        background: #e9ecef;
                        padding: 10px;
                        border-radius: 5px;
                        font-size: 14px;
                    }
                    .footer {
                        margin-top: 30px;
                        color: #6c757d;
                        font-size: 12px;
                    }
                </style>
            </head>
            <body>
                <div class="container">
                    <div class="header">
                        <div class="version-badge">版本 v2.0.0</div>
                        <h1>🚀 Nginx on Kubernetes</h1>
                        <p>基于Alpine的轻量级Nginx容器应用</p>
                    </div>

                    <div class="status">
                        ✅ 应用状态:运行正常 | 🐳 容器环境:Kubernetes
                    </div>

                    <div class="features">
                        <div class="feature-item">🔒 安全加固</div>
                        <div class="feature-item">⚡ 高性能</div>
                        <div class="feature-item">📦 轻量级</div>
                        <div class="feature-item">🔧 可扩展</div>
                    </div>

                    <div class="info-grid">
                        <div class="info-item"><strong>应用名称:</strong> nginx-app</div>
                        <div class="info-item"><strong>镜像版本:</strong> alpine</div>
                        <div class="info-item"><strong>运行环境:</strong> Docker + K8s</div>
                        <div class="info-item"><strong>部署时间:</strong> <span id="deploy-time"></span></div>
                    </div>

                    <div style="margin: 25px 0;">
                        <button onclick="showMessage()" style="
                            background: #667eea;
                            color: white;
                            border: none;
                            padding: 12px 30px;
                            border-radius: 25px;
                            cursor: pointer;
                            font-size: 16px;
                            transition: all 0.3s;
                        " onmouseover="this.style.background='#5a6fd8'" onmouseout="this.style.background='#667eea'">
                           点击测试交互功能
                        </button>
                    </div>

                    <div class="footer">
                        <p>Harbor仓库: harbor.tianxiang.love:30443 | 技术支持: DevOps团队</p>
                        <p>© 2025 Kubernetes Demo Application - All rights reserved</p>
                    </div>
                </div>

                <script>
                    // 显示部署时间
                    document.getElementById('deploy-time').textContent = new Date().toLocaleString();

                    function showMessage() {
                        alert('🎉 你好!这是 nginx-app-v2 版本的交互测试!\n\n当前Pod: ' + window.location.hostname);
                    }

                    // 添加点击动画效果
                    document.addEventListener('click', function(e) {
                        if (e.target.tagName === 'BUTTON') {
                            e.target.style.transform = 'scale(0.95)';
                            setTimeout(() => {
                                e.target.style.transform = 'scale(1)';
                            }, 150);
                        }
                    });
                </script>
            </body>
            </html>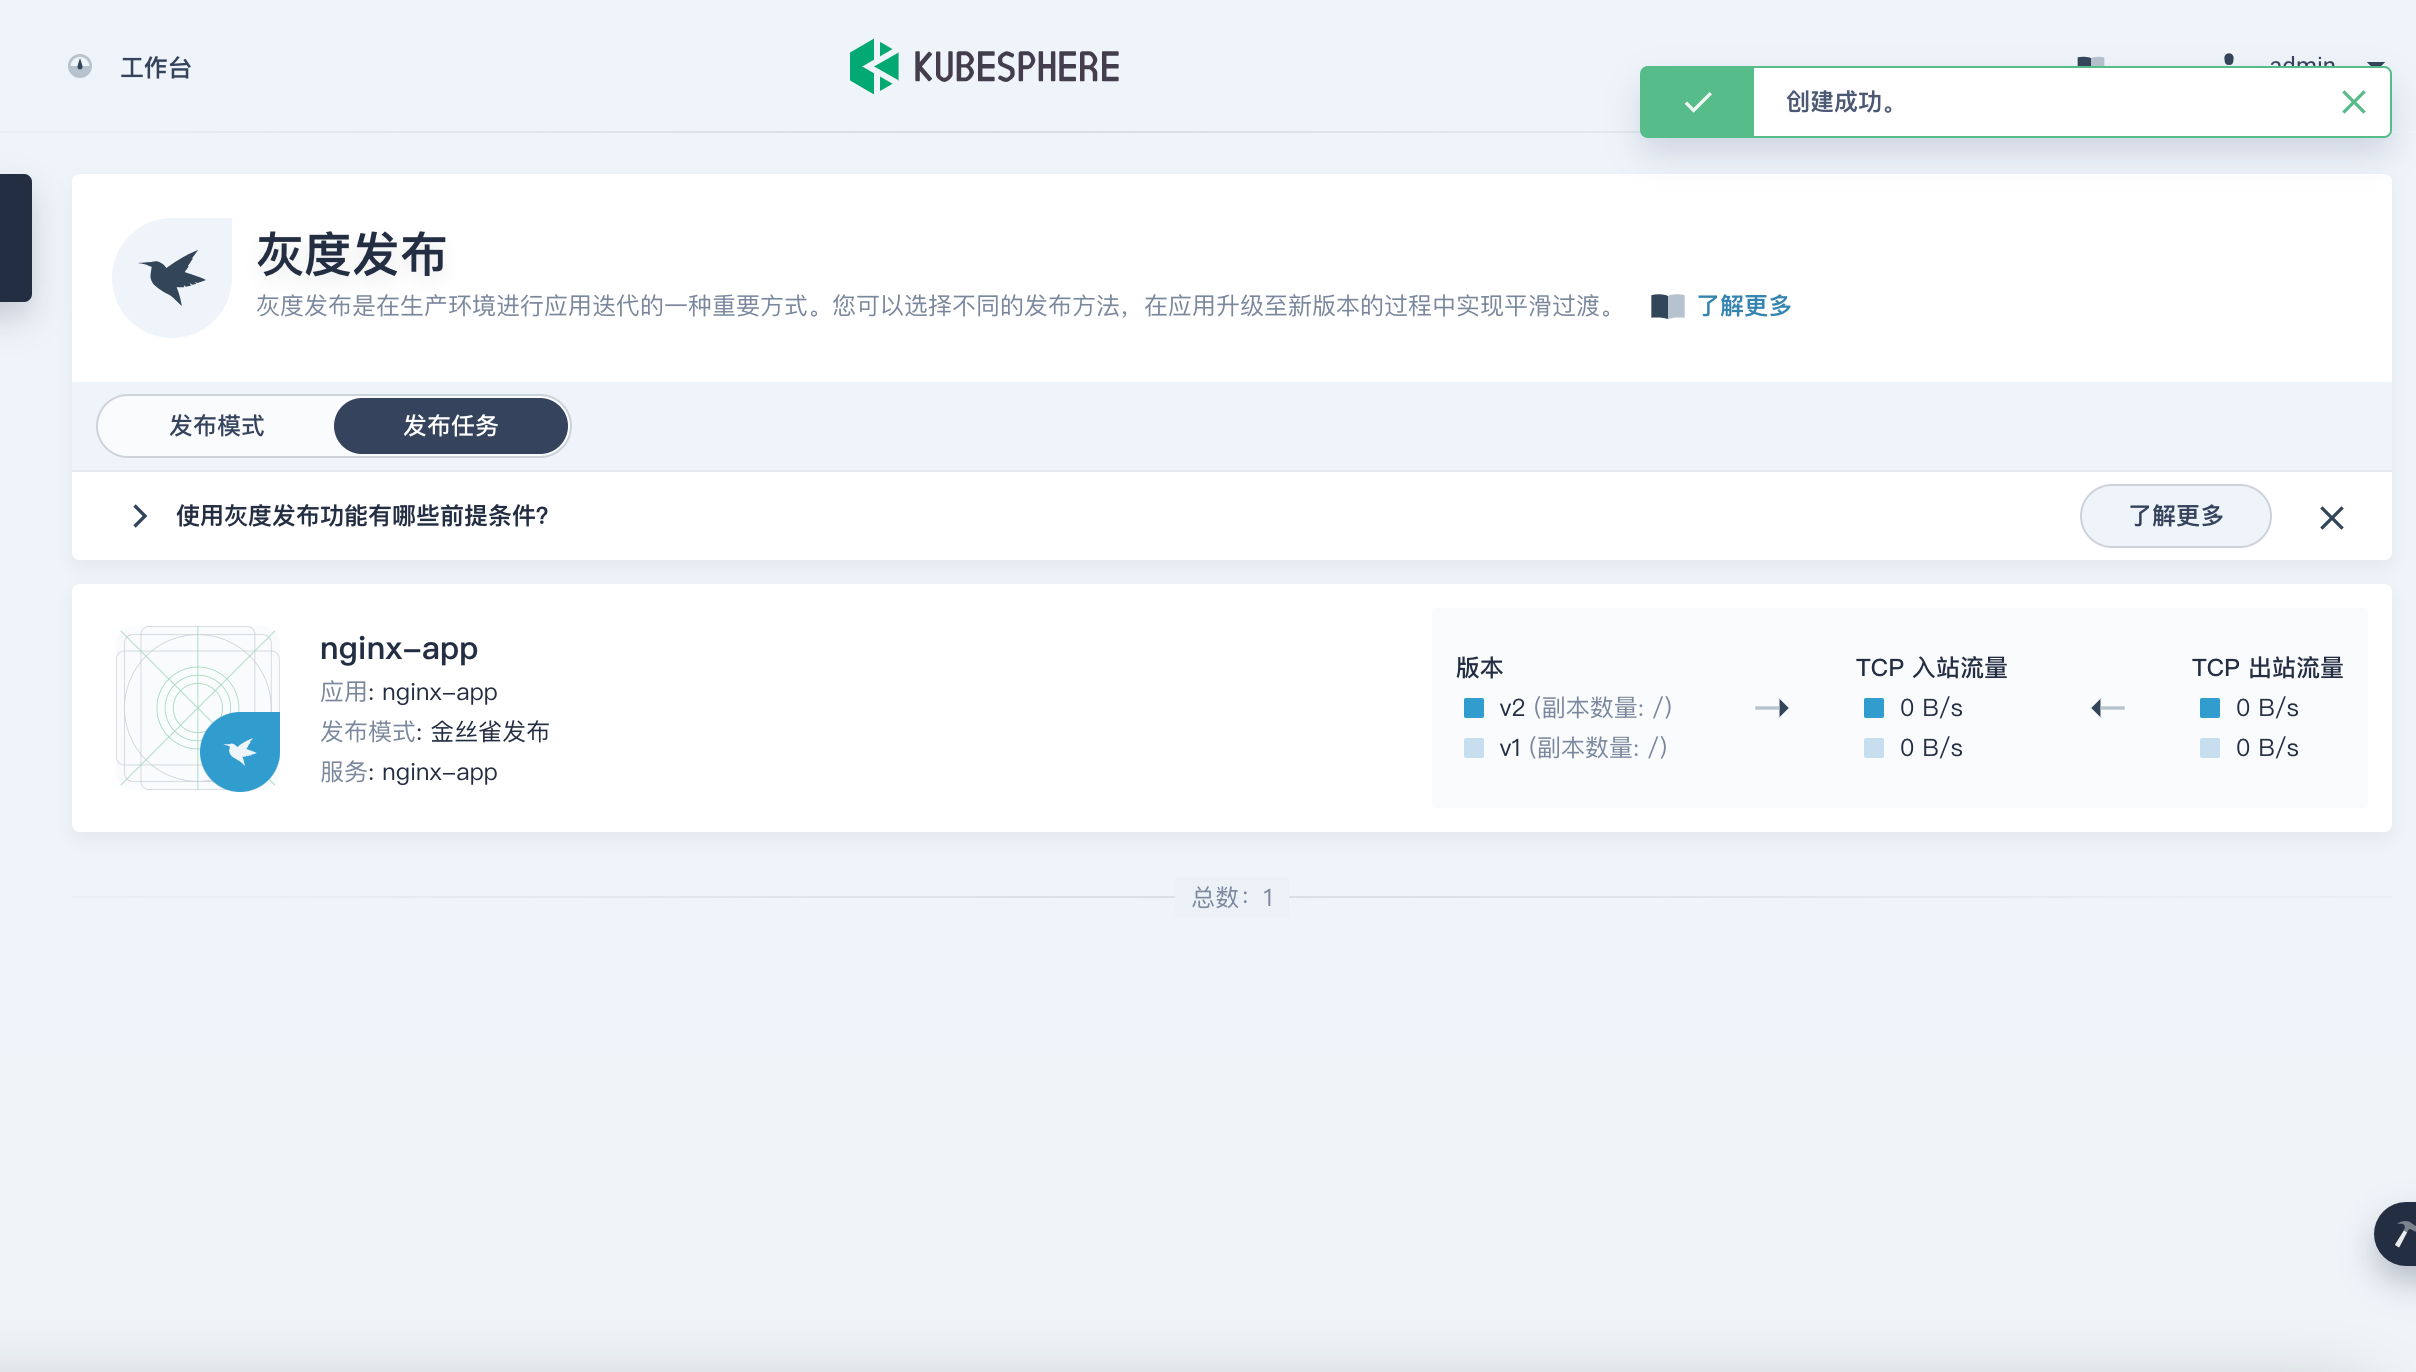
6. 验证没问题