部署使用 JumpServer 堡垒机
一、简介
JumpServer 是一款全球首款完全开源的堡垒机,采用 Python/Django 开发,遵循 4A(认证 Authentication、授权 Authorization、账号 Account、审计 Audit)规范,主要用于企业运维安全审计和资产管理137。
JumpServer 的核心功能
身份认证(Authentication)
支持多种认证方式:LDAP/AD、RADIUS、OpenID(单点登录)、MFA(多因素认证)27。
管理员可监控用户登录行为,确保安全性2。
账号管理(Account)
集中管理用户账号、密钥,支持自动推送密码、批量改密37。
可托管资产密码,并设置密码过期策略3。
授权控制(Authorization)
支持多维授权(用户、用户组、资产、应用等)3。
可限制访问时间、命令执行(黑白名单)、文件传输权限37。
安全审计(Audit)
会话录像:记录 Linux/Windows 操作,支持回放审计37。
命令审计:记录用户执行的命令,防止误操作或恶意行为7。
文件传输审计:监控文件上传/下载,防止数据泄露3。
二、Docker-compose 方式部署
1. 部署清单
[root@k8s-app-1 jumpserver-docker-compose]# ls
docker-compose.yml  jumpserver  mysql  redis
[root@k8s-app-1 jumpserver-docker-compose]# cat docker-compose.yml
services:
  mysql:
    image: mysql:5.7
    container_name: jumpserver-mysql
    command:
      --character-set-server=utf8mb4
      --collation-server=utf8mb4_general_ci
    restart: always
    environment:
      MYSQL_ROOT_PASSWORD: rootPass123!
      MYSQL_DATABASE: jumpserver
      MYSQL_USER: jumpserver
      MYSQL_PASSWORD: StrongPass123!
    volumes:
      - ./mysql/data:/var/lib/mysql
    ports:
      - "3306:3306"

  redis:
    image: redis:6.2
    container_name: jumpserver-redis
    restart: always
    command: redis-server --requirepass jumpserver
    volumes:
      - ./redis/data:/data
    ports:
      - "6379:6379"

  jumpserver:
    image: jumpserver/jms_all:latest
    container_name: jumpserver
    restart: always
    depends_on:
      - mysql
      - redis
    ports:
      - "8888:80"        # Web 页面
      - "2222:2222"    # SSH 接入
    volumes:
      - ./jumpserver/data:/opt/jumpserver/data
    environment:
      DB_ENGINE: mysql  # 显式声明数据库引擎类型,默认不指定使用内置的 PostgreSQL
      DB_HOST: mysql
      DB_PORT: 3306
      DB_USER: jumpserver
      DB_PASSWORD: StrongPass123!
      DB_NAME: jumpserver

      REDIS_HOST: redis
      REDIS_PORT: 6379
      REDIS_PASSWORD: jumpserver

      SECRET_KEY: wJ7hK8C6gpaixlleHXzpUsLnlf41PzW4xfxFRvxeRiUyRAfg1
      BOOTSTRAP_TOKEN: lYHUCHMkLj83OMNF

# 初始管理员账号及密码
# 账号:admin
# 密码:ChangeMe
2. 启动
[root@k8s-app-1 jumpserver-docker-compose]# docker-compose up -d三、页面操作
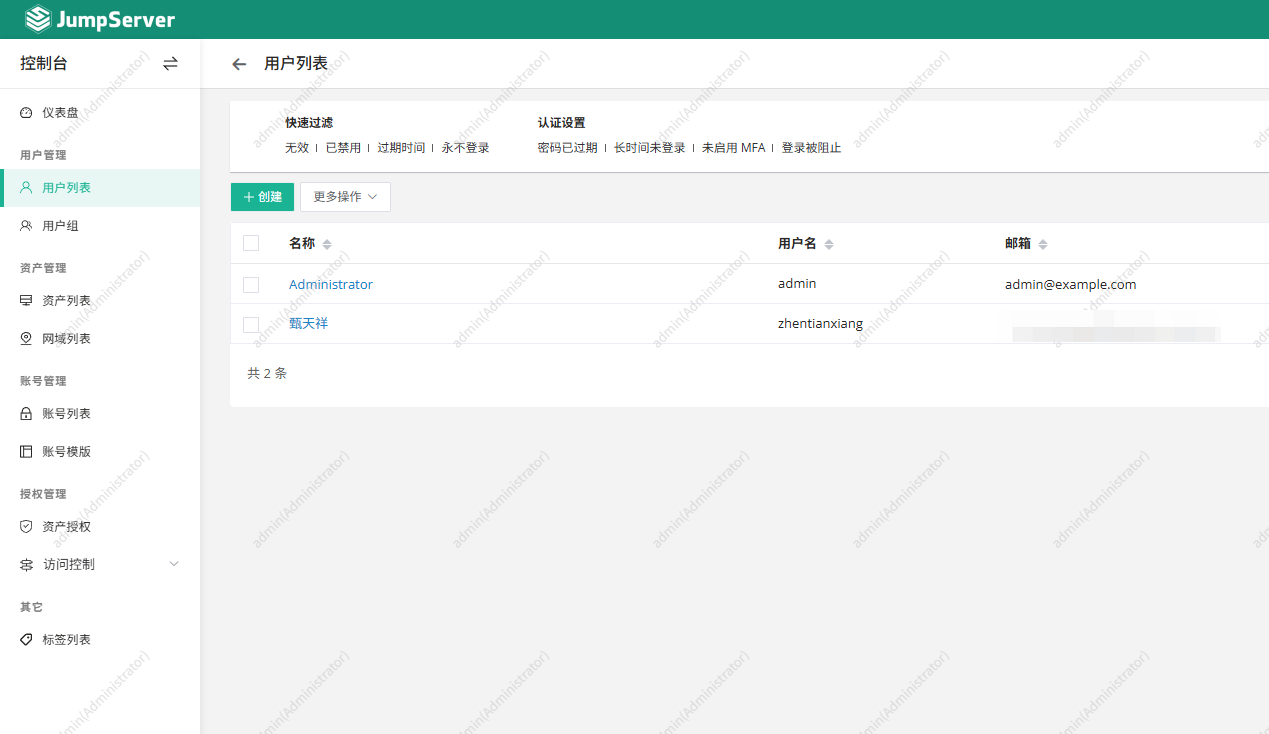
1. 创建用户
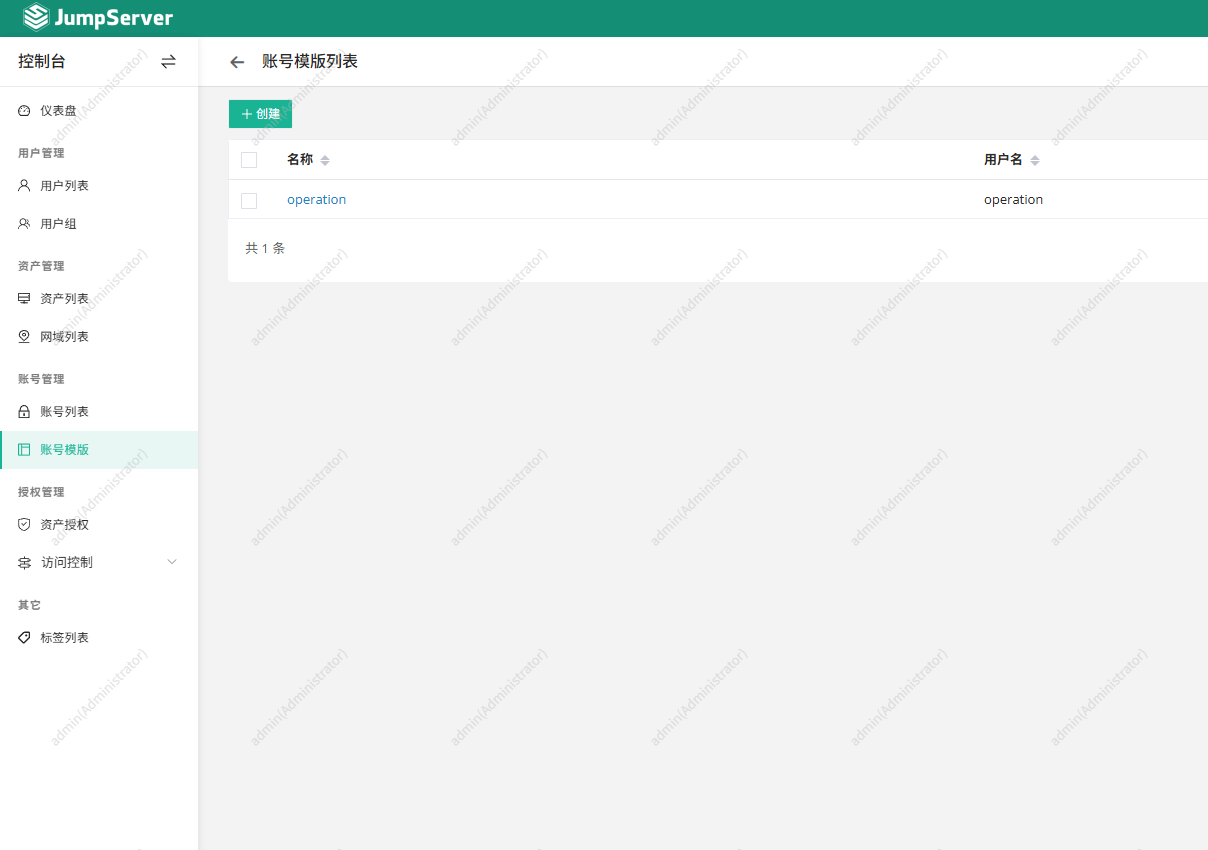
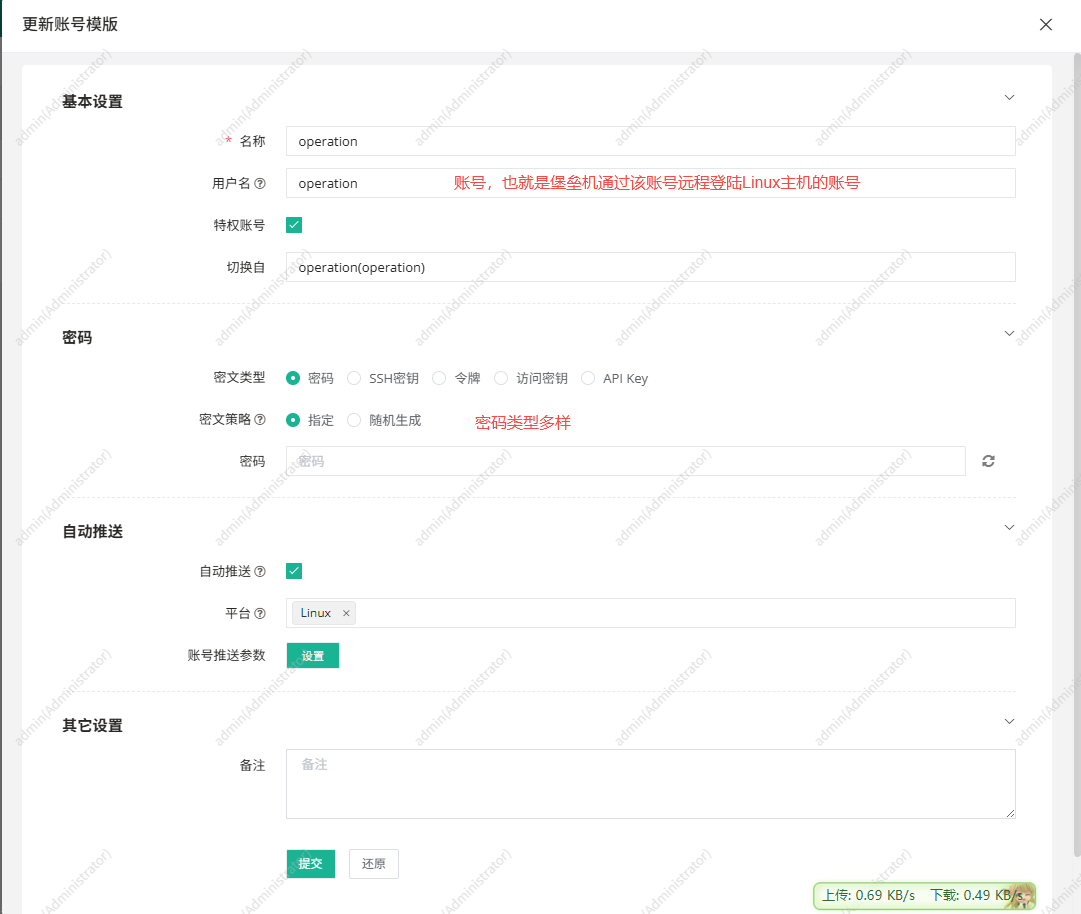
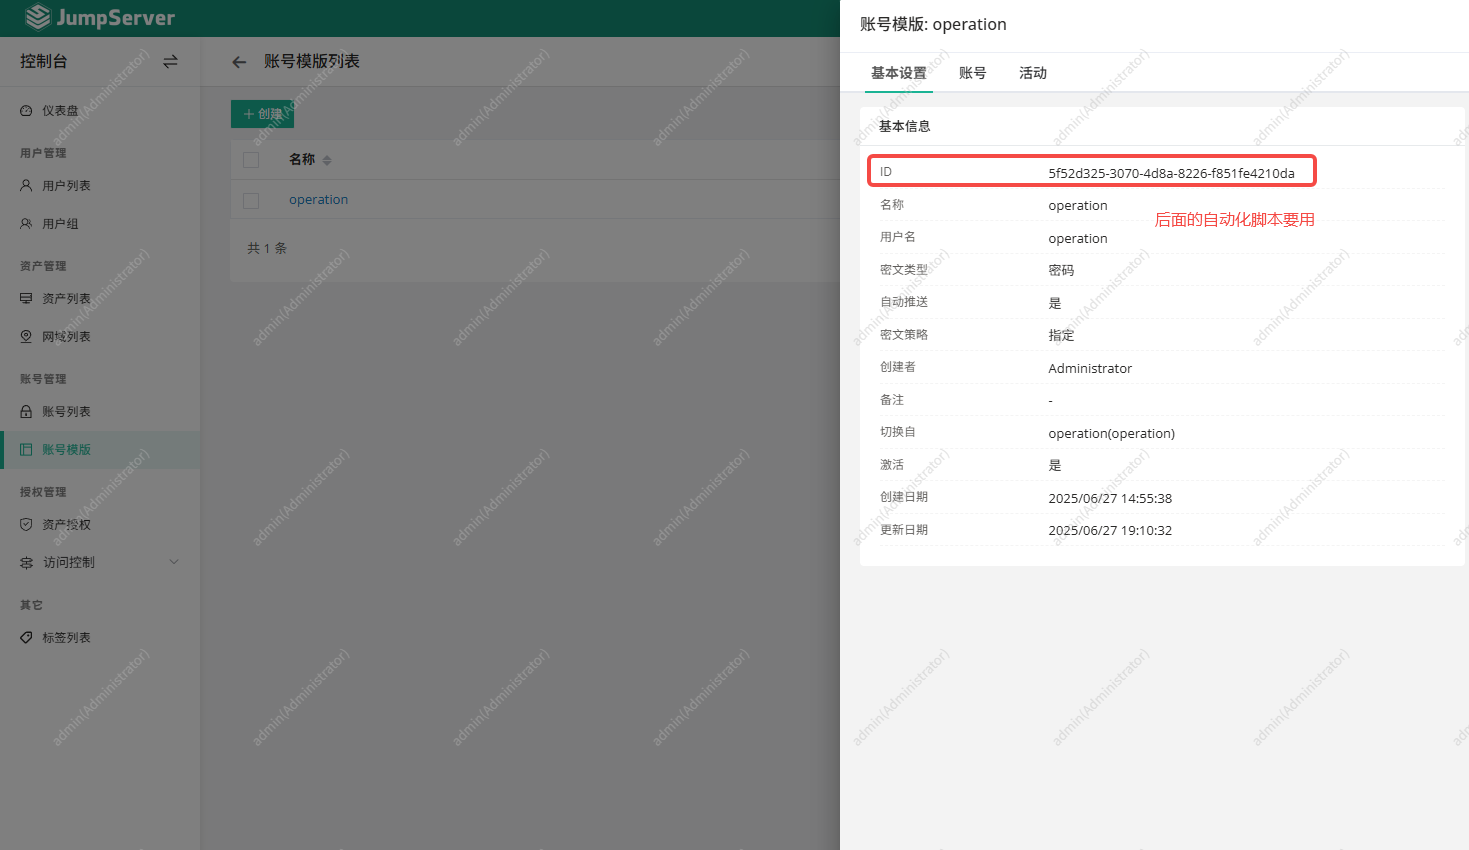
2. 创建账号模板并获取模板ID
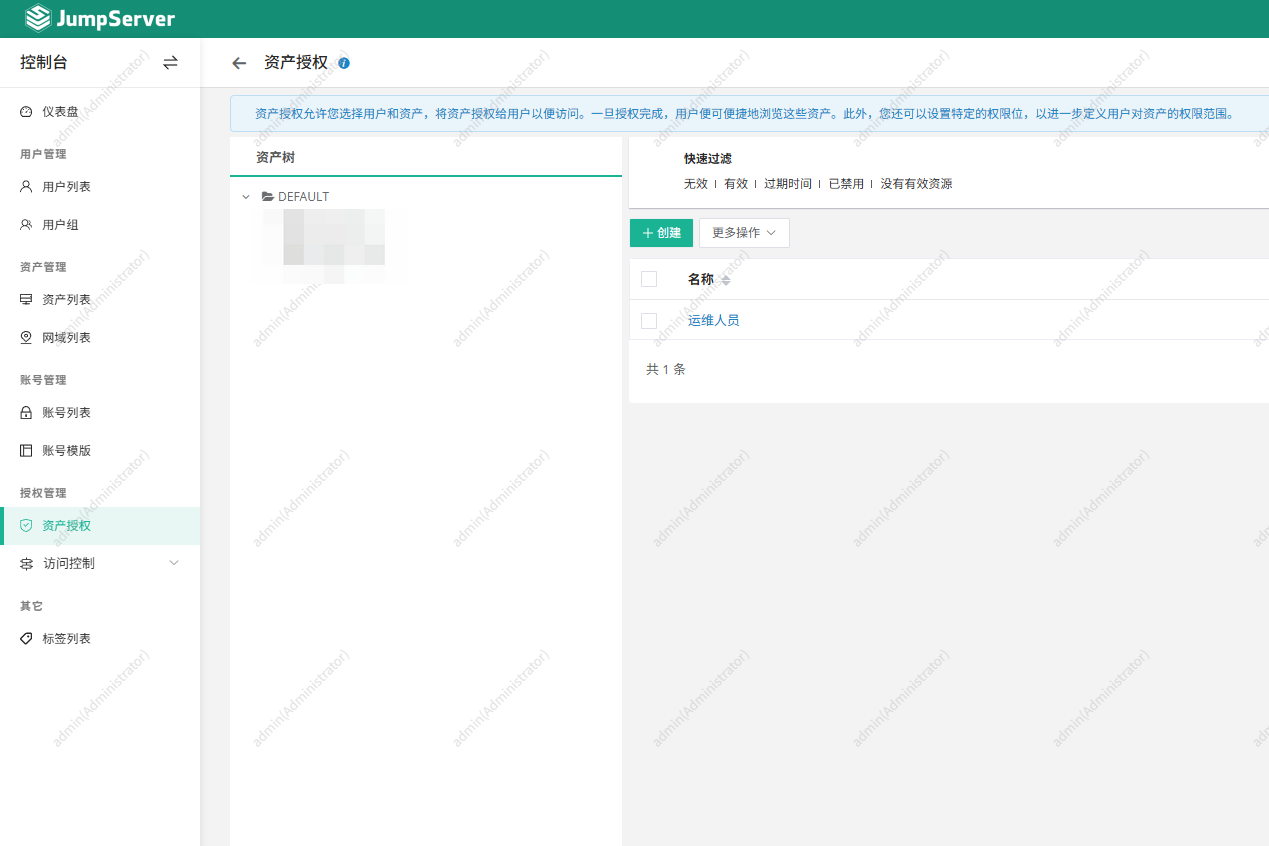
3. 创建资产授权

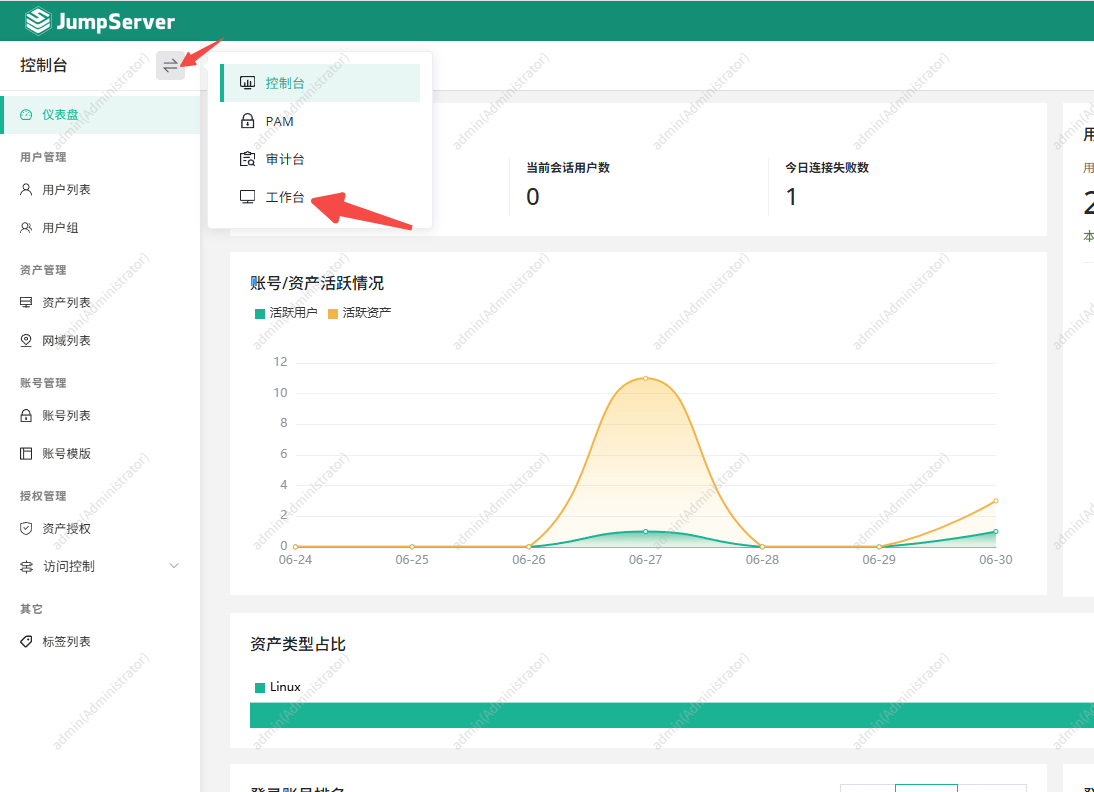
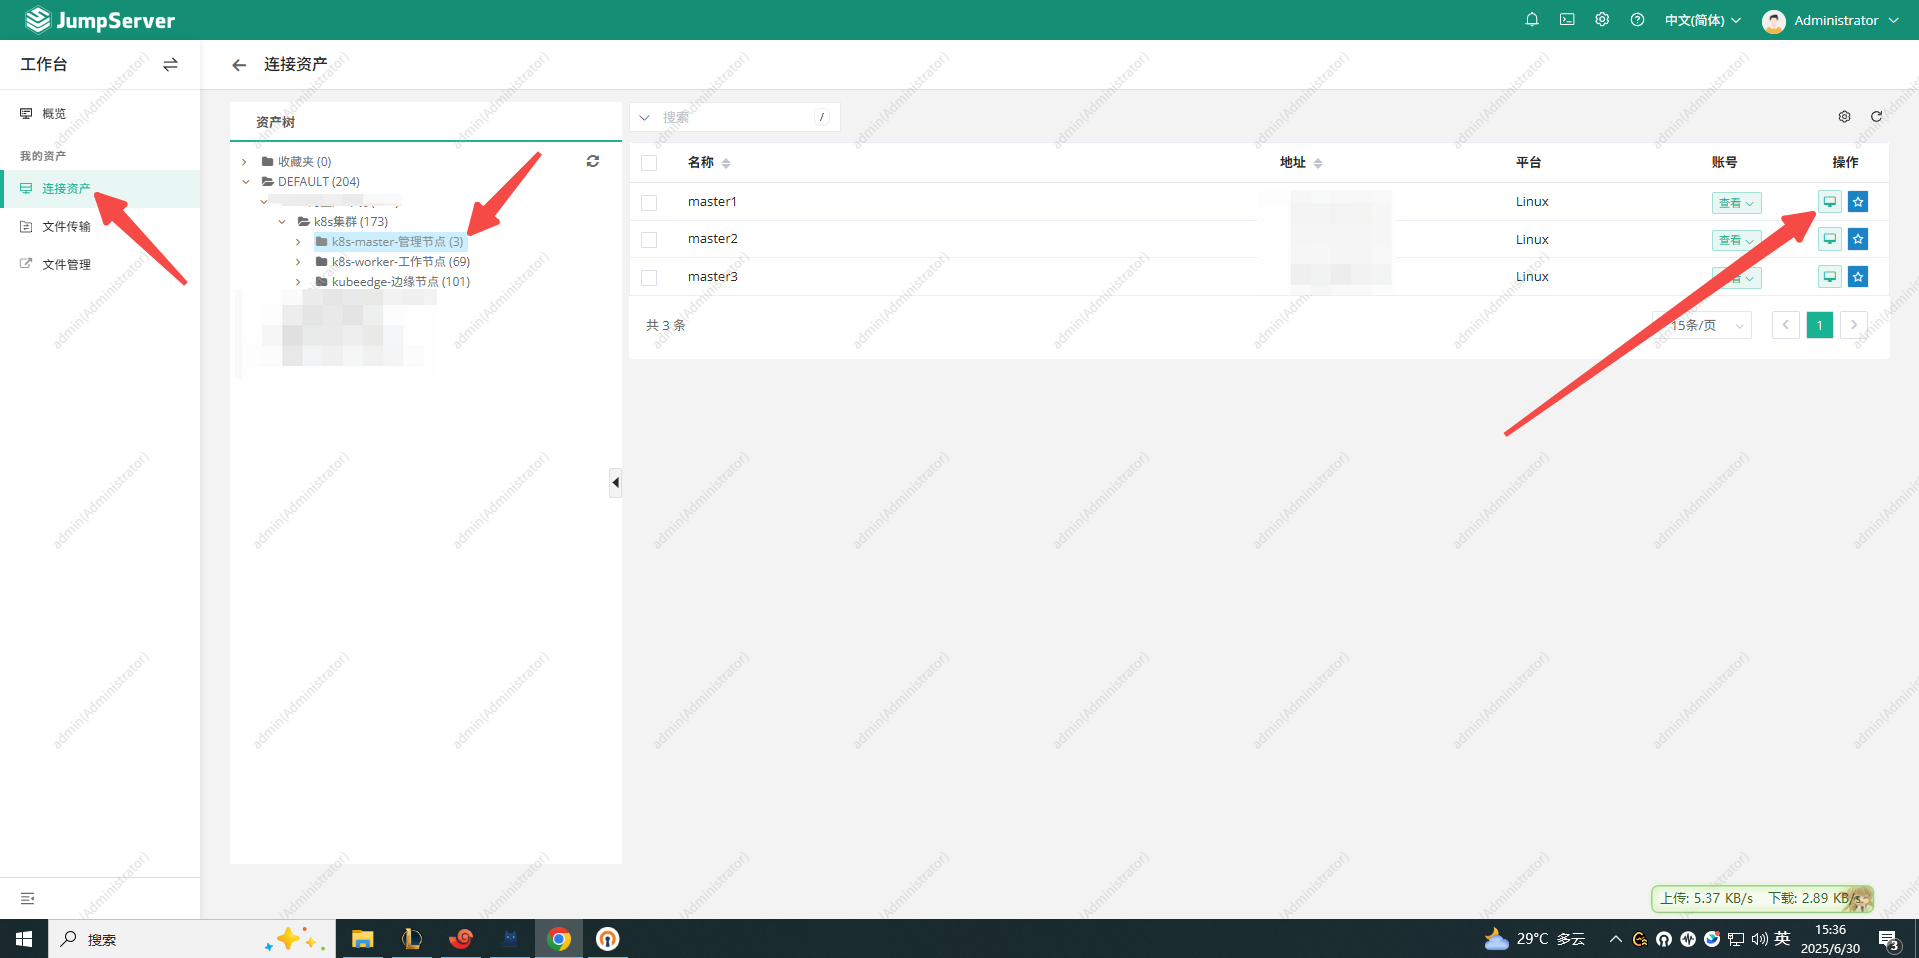
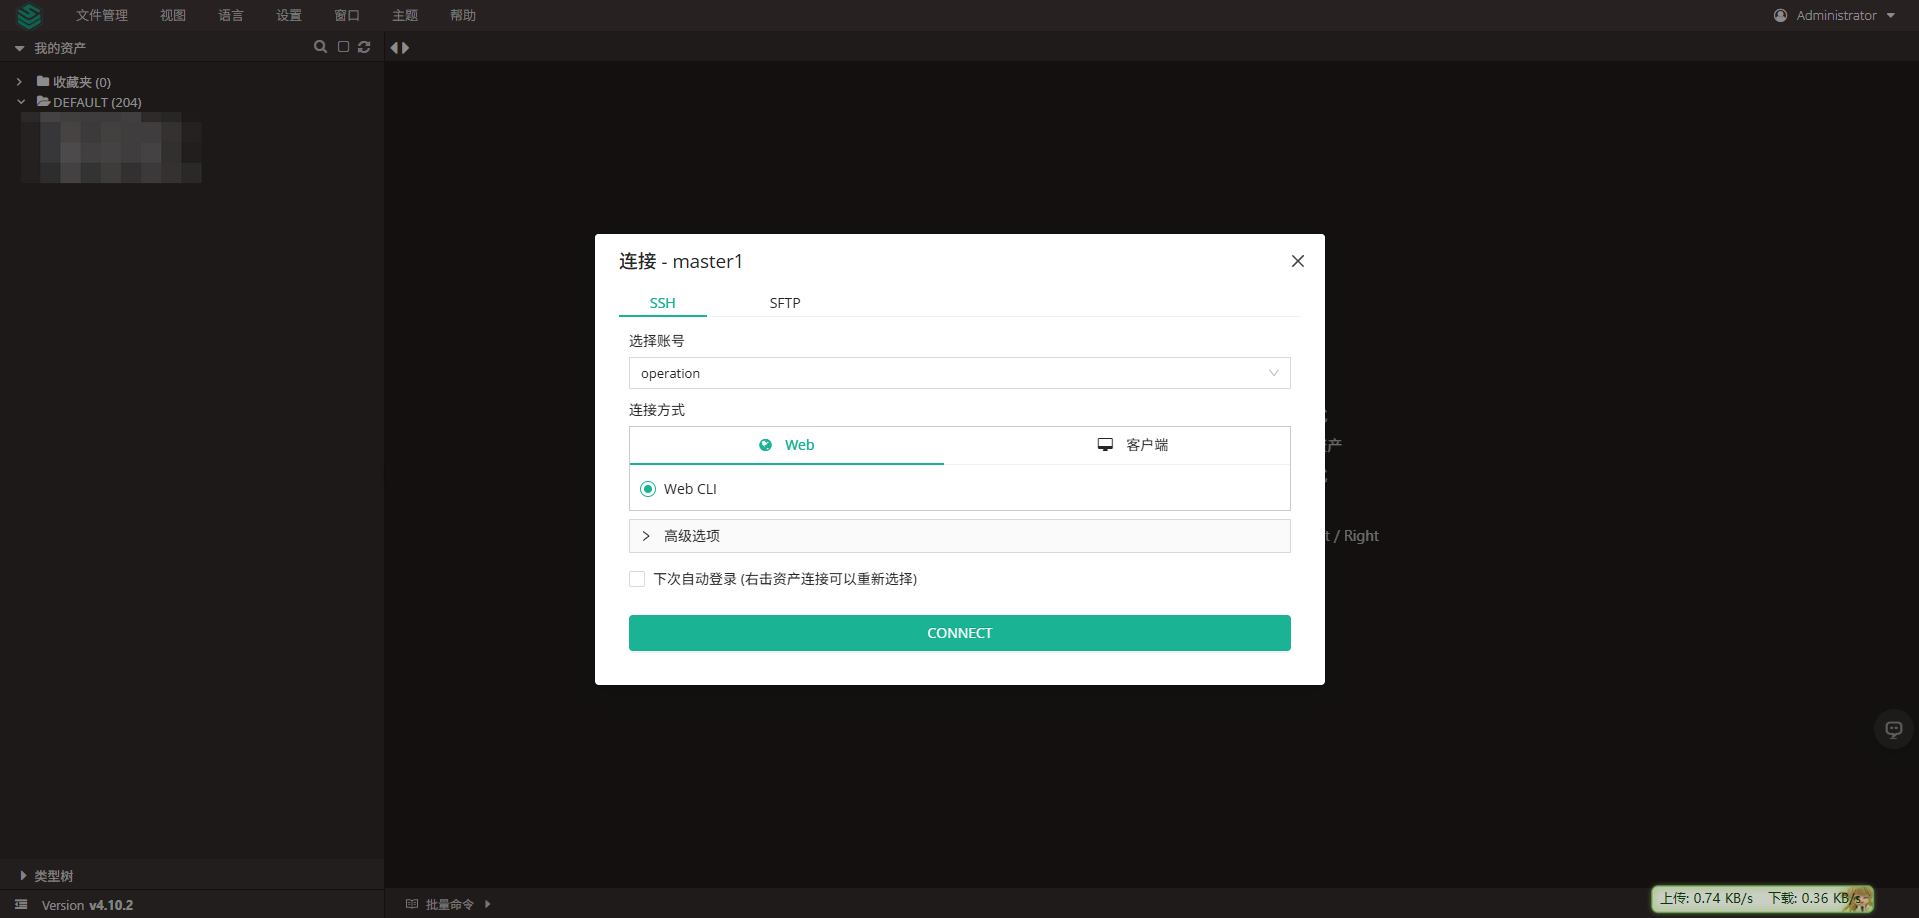
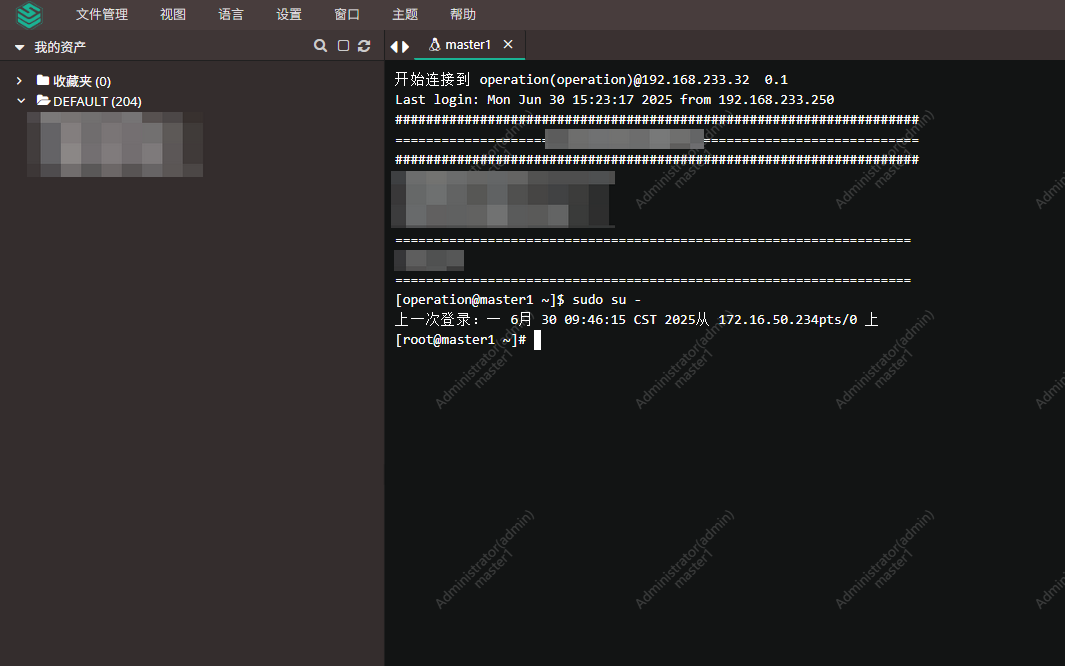
4. 测试登陆
四、ansible-playbook 自动添加堡垒机登陆用户
前提 ansible 执行机器需要能够免密登录其他机器
1. hosts.ini 文件
使用此脚本可以快速根据 ip 清单生成 hosts.ini 文件
[root@k8s-master1 ansible]# cat ip-list.txt
192.168.248.40
192.168.248.41
192.168.248.42
192.168.248.43
192.168.248.53
192.168.248.54
192.168.248.55
192.168.248.56
192.168.248.57
192.168.248.58
192.168.248.59
192.168.248.60
192.168.248.44
192.168.248.45
192.168.248.46
192.168.248.47
192.168.248.48
192.168.248.49
192.168.248.50
192.168.248.52

[root@k8s-master1 ansible]# cat revise-ansible-hosts.sh
#!/bin/bash
count=1
echo "[physical_nodes]" > hosts.ini
while read ip; do
  echo "node${count} ansible_host=${ip} ansible_user=root ip=${ip}" >> hosts.ini
  ((count++))
done < ip-list.txt

[root@k8s-master1 ansible]# bash revise-ansible-hosts.sh
[root@k8s-master1 ansible]# cat hosts.ini
[physical_nodes]
node1 ansible_host=192.168.248.40 ansible_user=root ip=192.168.248.40
node2 ansible_host=192.168.248.41 ansible_user=root ip=192.168.248.41
node3 ansible_host=192.168.248.42 ansible_user=root ip=192.168.248.42
node4 ansible_host=192.168.248.43 ansible_user=root ip=192.168.248.43
node5 ansible_host=192.168.248.53 ansible_user=root ip=192.168.248.53
node6 ansible_host=192.168.248.54 ansible_user=root ip=192.168.248.54
node7 ansible_host=192.168.248.55 ansible_user=root ip=192.168.248.55
node8 ansible_host=192.168.248.56 ansible_user=root ip=192.168.248.56
node9 ansible_host=192.168.248.57 ansible_user=root ip=192.168.248.57
node10 ansible_host=192.168.248.58 ansible_user=root ip=192.168.248.58
node11 ansible_host=192.168.248.59 ansible_user=root ip=192.168.248.59
node12 ansible_host=192.168.248.60 ansible_user=root ip=192.168.248.60
node13 ansible_host=192.168.248.44 ansible_user=root ip=192.168.248.44
node14 ansible_host=192.168.248.45 ansible_user=root ip=192.168.248.45
node15 ansible_host=192.168.248.46 ansible_user=root ip=192.168.248.46
node16 ansible_host=192.168.248.47 ansible_user=root ip=192.168.248.47
node17 ansible_host=192.168.248.48 ansible_user=root ip=192.168.248.48
node18 ansible_host=192.168.248.49 ansible_user=root ip=192.168.248.49
node19 ansible_host=192.168.248.50 ansible_user=root ip=192.168.248.50
node20 ansible_host=192.168.248.52 ansible_user=root ip=192.168.248.522. 创建 playbook
[root@k8s-master1 ansible]# cat create_operation_user_centos.yml
- name: 自动创建 operation 用户并配置 sudo(CentOS / Ubuntu 兼容)
  hosts: physical_nodes
  become: true

  vars:
    operation_user: operation
    operation_password_plain: "123123"
    operation_password_hash: "{{ operation_password_plain | password_hash('sha512', 'A1b2c3d4e5f6') }}"  # 添加salt值增加安全性

  tasks:
    - name: 创建用户 {{ operation_user }}(根据系统加入对应组)
      user:
        name: "{{ operation_user }}"
        password: "{{ operation_password_hash }}"
        shell: /bin/bash
        groups: "{{ 'wheel' if ansible_facts['os_family'] == 'RedHat' else 'sudo' }}"
        append: yes
        state: present
        create_home: yes
        update_password: always  # 确保密码总是更新

    - name: 确保 /etc/sudoers.d 目录存在
      file:
        path: /etc/sudoers.d
        state: directory
        mode: '0750'

    - name: 设置 sudo 权限(兼容所有系统)
      lineinfile:
        path: /etc/sudoers.d/{{ operation_user }}
        create: yes
        mode: '0440'
        line: "{{ operation_user }} ALL=(ALL) NOPASSWD:ALL"
        validate: 'visudo -cf %s'
      when: ansible_facts['os_family'] in ['RedHat', 'Debian']  # 合并条件
3. 执行批量创建统一用户
[root@k8s-master1 ansible]# ansible-playbook -i hosts.ini create_operation_user_centos.yml
PLAY RECAP ********************************************************************************************************************************************************************************
node1                      : ok=4    changed=2    unreachable=0    failed=0    skipped=0    rescued=0    ignored=0
node10                     : ok=4    changed=2    unreachable=0    failed=0    skipped=0    rescued=0    ignored=0
node11                     : ok=4    changed=2    unreachable=0    failed=0    skipped=0    rescued=0    ignored=0
node12                     : ok=4    changed=2    unreachable=0    failed=0    skipped=0    rescued=0    ignored=0
node13                     : ok=4    changed=2    unreachable=0    failed=0    skipped=0    rescued=0    ignored=0
node14                     : ok=4    changed=2    unreachable=0    failed=0    skipped=0    rescued=0    ignored=0
node15                     : ok=4    changed=2    unreachable=0    failed=0    skipped=0    rescued=0    ignored=0
node16                     : ok=4    changed=2    unreachable=0    failed=0    skipped=0    rescued=0    ignored=0
node17                     : ok=4    changed=2    unreachable=0    failed=0    skipped=0    rescued=0    ignored=0
node18                     : ok=4    changed=2    unreachable=0    failed=0    skipped=0    rescued=0    ignored=0
node19                     : ok=4    changed=2    unreachable=0    failed=0    skipped=0    rescued=0    ignored=0
node2                      : ok=4    changed=2    unreachable=0    failed=0    skipped=0    rescued=0    ignored=0
node20                     : ok=4    changed=2    unreachable=0    failed=0    skipped=0    rescued=0    ignored=0
node3                      : ok=4    changed=2    unreachable=0    failed=0    skipped=0    rescued=0    ignored=0
node4                      : ok=4    changed=2    unreachable=0    failed=0    skipped=0    rescued=0    ignored=0
node5                      : ok=4    changed=2    unreachable=0    failed=0    skipped=0    rescued=0    ignored=0
node6                      : ok=4    changed=2    unreachable=0    failed=0    skipped=0    rescued=0    ignored=0
node7                      : ok=4    changed=2    unreachable=0    failed=0    skipped=0    rescued=0    ignored=0
node8                      : ok=4    changed=2    unreachable=0    failed=0    skipped=0    rescued=0    ignored=0
node9                      : ok=4    changed=2    unreachable=0    failed=0    skipped=0    rescued=0    ignored=0
五、脚本自动化批量添加主机
首先要确保每一台机器的用户名和密码一致,这一点已经在上一个步骤使用 ansible 自动创建
1. 获取登陆 Token
[root@k8s-app-1 jumpserver-add-host]# curl -s -X POST http://192.168.233.250:8888/api/v1/authentication/auth/ \
>   -H 'Content-Type: application/json' \
>   -d '{"username": "admin", "password": "Tian18332825309."}' | jq -r '.token'
fRiK9A8gDqQYe8dHkDadeq9cGocmCBI846zs
2. 获取用户模版ID
获取 operation 用户
[root@k8s-app-1 jumpserver-add-host]# curl -s -H "Authorization: Bearer fRiK9A8gDqQYe8dHkDadeq9cGocmCBI846zs" \
> http://192.168.233.250:8888/api/v1/accounts/account-templates/ | \
> jq -r '.[] | select(.name=="operation") | .id'
5f52d325-3070-4d8a-8226-f851fe4210da
3. python 自动化脚本
[root@k8s-app-1 jumpserver-add-host]# cat batch_add_assets.py
#!/usr/bin/env python3
import sys
import requests
import paramiko
import json
from typing import Optional

# JumpServer 配置
JUMPSERVER_URL = "http://192.168.233.250:8888"
JUMPSERVER_TOKEN = "fRiK9A8gDqQYe8dHkDadeq9cGocmCBI846zs"
ACCOUNT_TEMPLATE_ID = "5f52d325-3070-4d8a-8226-f851fe4210da"
IP_LIST_FILE = "k8s-cloud-ip.txt"
HEADERS = {
    "Authorization": f"Bearer {JUMPSERVER_TOKEN}",
    "Content-Type": "application/json"
}

def get_or_create_group(full_group_path: str) -> str:
    """获取分组ID"""
    url = f"{JUMPSERVER_URL}/api/v1/assets/nodes/"
    resp = requests.get(url, headers=HEADERS)
    if resp.status_code != 200:
        print(f"❌ 获取节点列表失败: {resp.status_code} {resp.text}")
        sys.exit(1)

    for node in resp.json():
        if node.get("full_value") == full_group_path:
            print(f"✅ 找到分组: {full_group_path} (ID: {node['id']})")
            return node["id"]

    print(f"❌ 分组不存在: {full_group_path}")
    sys.exit(1)

def get_hostname(ip: str, port: int, password: str) -> str:
    """通过SSH获取主机名"""
    ssh = paramiko.SSHClient()
    ssh.set_missing_host_key_policy(paramiko.AutoAddPolicy())
    try:
        ssh.connect(ip, port=port, username="root", password=password, timeout=8)
        #stdin, stdout, stderr = ssh.exec_command("hostnamectl | head -n1 | awk '{print $NF}'")
        stdin, stdout, stderr = ssh.exec_command("hostname")
        hostname = stdout.read().decode().strip()
        return hostname if hostname else ip
    except Exception as e:
        print(f"⚠️ 获取主机名失败: {e}")
        return ip
    finally:
        ssh.close()

def check_asset_exists(hostname: str, ip: str) -> Optional[str]:
    """检查资产是否已存在,返回存在的资产ID"""
    url = f"{JUMPSERVER_URL}/api/v1/assets/hosts/"
    params = {"search": f"{hostname} {ip}"}

    try:
        resp = requests.get(url, headers=HEADERS, params=params, timeout=10)
        if resp.status_code == 200:
            for asset in resp.json():
                if asset["name"] == hostname or asset["address"] == ip:
                    return asset["id"]
    except Exception as e:
        print(f"⚠️ 检查资产存在时出错: {e}")
    return None

def create_or_update_asset(ip: str, port: int, password: str, group_id: str):
    """创建/更新资产"""
    hostname = get_hostname(ip, port, password)
    print(f"处理主机: {ip}:{port} (主机名: {hostname})")

    # 检查资产是否已存在
    asset_id = check_asset_exists(hostname, ip)
    if asset_id:
        print(f"✅ 资产已存在,跳过添加: {hostname} (ID: {asset_id})")
        return

    asset_data = {
        "name": hostname,
        "address": ip,
        "platform": 1,  # 1=Linux
        "protocols": [
            {"name": "ssh", "port": port},
            {"name": "sftp", "port": port}  # SFTP通常使用和SSH相同的端口
        ],
        "is_active": True,
        "nodes": [group_id],
        "accounts": [{
            "template": ACCOUNT_TEMPLATE_ID,
            "username": "root",
            "secret": password
        }]
    }

    url = f"{JUMPSERVER_URL}/api/v1/assets/hosts/"
    resp = requests.post(url, json=asset_data, headers=HEADERS)

    if resp.status_code == 201:
        print(f"✅ 成功创建资产: {hostname}")
    elif resp.status_code == 400 and "already exists" in resp.text:
        print(f"⚠️ 资产已存在: {hostname}")
    else:
        print(f"❌ 创建失败: {resp.status_code} {resp.text}")
        print("请求数据:", json.dumps(asset_data, indent=2))

def main():
    if len(sys.argv) != 2:
        print(f"用法: {sys.argv[0]} '/完整/分组/路径'")
        sys.exit(1)

    group_path = sys.argv[1]
    group_id = get_or_create_group(group_path)

    with open(IP_LIST_FILE) as f:
        for line in f:
            line = line.strip()
            if not line or line.startswith("#"):
                continue

            try:
                ip, port, password = line.split()
                create_or_update_asset(ip, int(port), password, group_id)
            except ValueError:
                print(f"跳过无效行: {line}")

if __name__ == "__main__":
    main()
4. 执行脚本
# 此文件是脚本用来自动化登陆并且获取 hostname,并不是堡垒机用来登陆服务器的用户密码
[root@k8s-app-1 jumpserver-add-host]# cat k8s-cloud-ip.txt |head -n 5
192.168.233.49 22 password
192.168.233.249 22 password
192.168.233.250 22 password
192.168.233.117 22 password
192.168.233.118 22 password

[root@k8s-app-1 jumpserver-add-host]# pip3 install requests

# 如果执行脚本报错提示:
ImportError: urllib3 v2 only supports OpenSSL 1.1.1+, currently the 'ssl' module is compiled with 'OpenSSL 1.0.2k-fips  26 Jan 2017'. See: https://github.com/urllib3/urllib3/issues/2168

[root@k8s-app-1 jumpserver-add-host]# pip3 uninstall urllib3
[root@k8s-app-1 jumpserver-add-host]# pip3 install "urllib3<2.0"

[root@k8s-app-1 jumpserver-add-host]# python3 batch_add_assets.py "/DEFAULT/三河生产环境/k8s集群/k8s-worker-工作节点"
✅ 找到分组: /DEFAULT/三河生产环境/k8s集群/k8s-worker-工作节点 (ID: d64ec26d-e4df-4045-ad2a-1764ea182ab8)
处理主机: 192.168.233.49:22 (主机名: ai-node)
✅ 成功创建资产: ai-node
处理主机: 192.168.233.249:22 (主机名: k8s-app-0)
✅ 成功创建资产: k8s-app-0
处理主机: 192.168.233.250:22 (主机名: k8s-app-1)
✅ 成功创建资产: k8s-app-1
处理主机: 192.168.233.117:22 (主机名: kafka-1)
✅ 成功创建资产: kafka-1
处理主机: 192.168.233.118:22 (主机名: kafka-2)
✅ 成功创建资产: kafka-2
处理主机: 192.168.233.119:22 (主机名: kafka-3)
✅ 成功创建资产: kafka-3
处理主机: 192.168.233.124:22 (主机名: kafka-4)
✅ 成功创建资产: kafka-4
处理主机: 192.168.233.133:22 (主机名: kafka-5)
✅ 成功创建资产: kafka-5
处理主机: 192.168.233.134:22 (主机名: kafka-6)
✅ 成功创建资产: kafka-6
处理主机: 192.168.233.32:22 (主机名: master1)
✅ 资产已存在,跳过添加: master1 (ID: 3438e1c5-1601-40fe-8e0b-ae2ff2702b01)
处理主机: 192.168.233.33:22 (主机名: master2)
✅ 资产已存在,跳过添加: master2 (ID: bdaa8caa-260b-42d2-86a7-6a13924d9f7a)
处理主机: 192.168.233.34:22 (主机名: master3)
✅ 资产已存在,跳过添加: master3 (ID: 10ea48c5-0da7-4cdb-9f52-5e4598fa0453)
License:
CC BY 4.0